

spot_traders1
886 Posts

spot_traders1
Report
Block User
16 Following
9 Followers
317 Liked
Posts
All
Quotes
Videos
·
--
Bullish
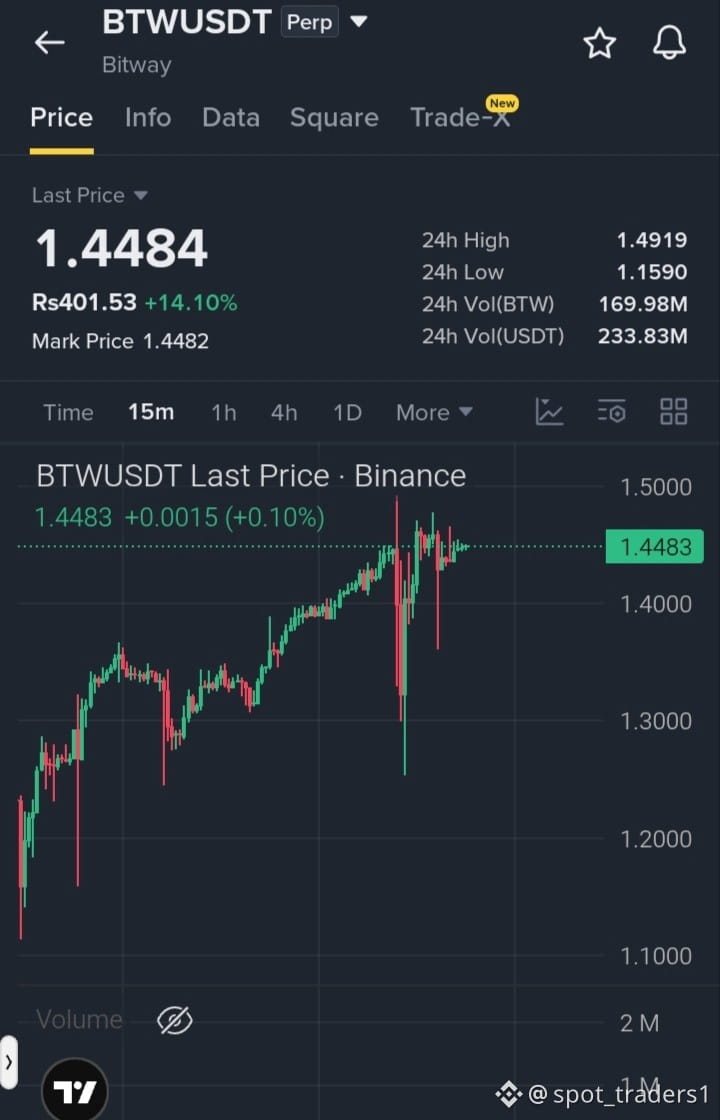
$BTW long setup is progressing well in profit and is close to hitting all planned TPs. I’m continuing to hold the long position while keeping an eye on the remaining targets.
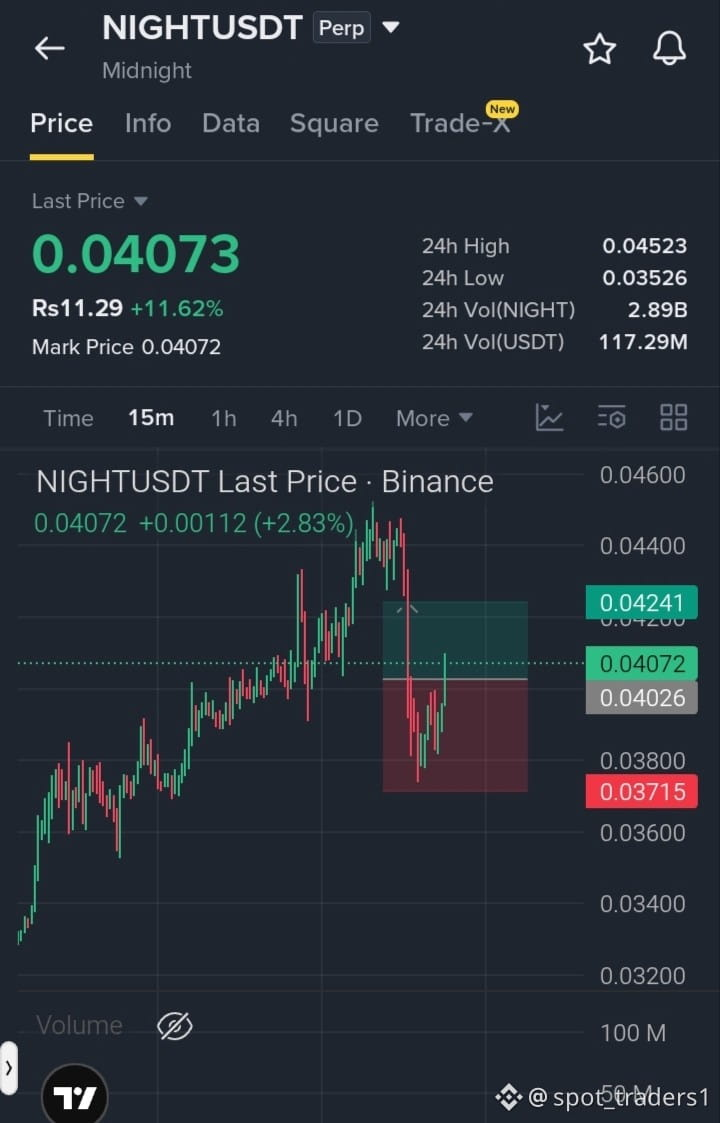
Meanwhile, the $NIGHT short setup continues to follow the expected bearish structure. I’m still holding the short and securing partial gains as the move develops.
Manage risk carefully, protect profits whenever possible, and stay disciplined with your trading plan instead of chasing price.
DYOR (Do Your Own Research
{future}(NIGHTUSDT)
{future}(BTWUSDT)
$BTW long setup is progressing well in profit and is close to hitting all planned TPs. I’m continuing to hold the long position while keeping an eye on the remaining targets.
Meanwhile, the $NIGHT short setup continues to follow the expected bearish structure. I’m still holding the short and securing partial gains as the move develops.
Manage risk carefully, protect profits whenever possible, and stay disciplined with your trading plan instead of chasing price.
DYOR (Do Your Own Research
Meanwhile, the $NIGHT short setup continues to follow the expected bearish structure. I’m still holding the short and securing partial gains as the move develops.
Manage risk carefully, protect profits whenever possible, and stay disciplined with your trading plan instead of chasing price.
DYOR (Do Your Own Research
spot_traders1
·
--
Bullish$BTW is showing solid momentum as buyers continue to step in around the current structure. Rising volume and supportive moving averages are strengthening the trend, while a further push toward resistance could develop if momentum remains intact.
LONG $BTW
Entry: 1.35 – 1.40
SL: 1.30
TP1: 1.45
TP2: 1.50
Watch the reaction around the entry zone and manage risk carefully. If buyers remain in control, price could attempt a breakout from the current structure.
DYOR (Do Your Own Research
LONG $BTW
Entry: 1.35 – 1.40
SL: 1.30
TP1: 1.45
TP2: 1.50
Watch the reaction around the entry zone and manage risk carefully. If buyers remain in control, price could attempt a breakout from the current structure.
DYOR (Do Your Own Research
23
·
--
Bearish
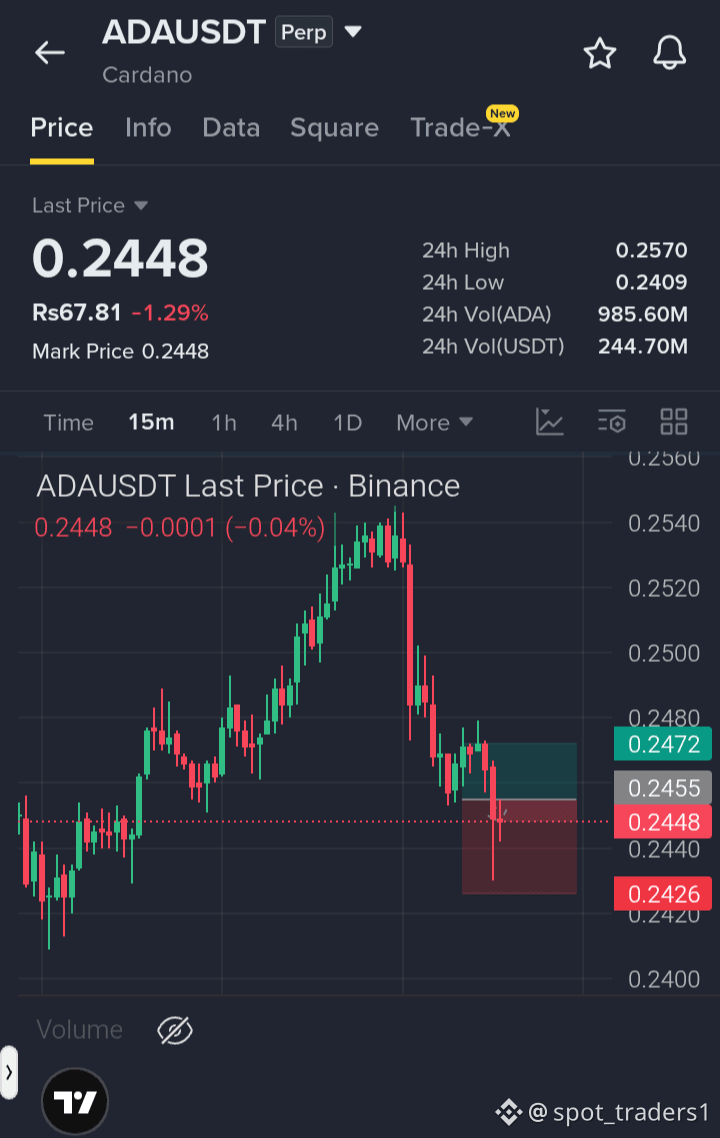
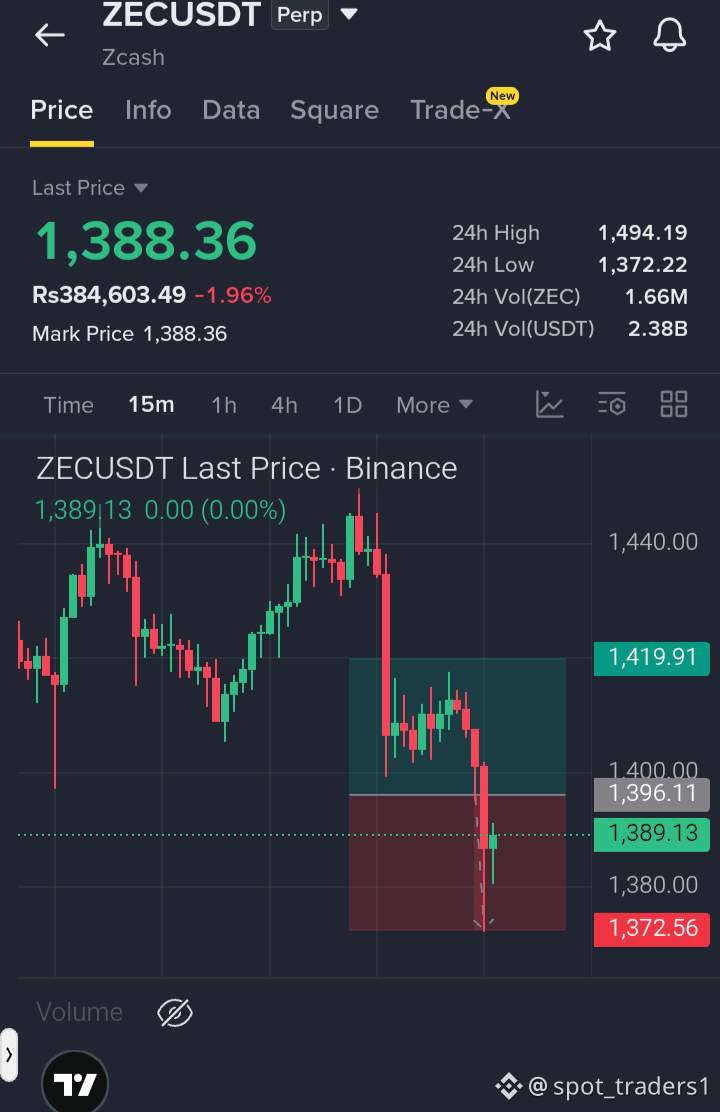
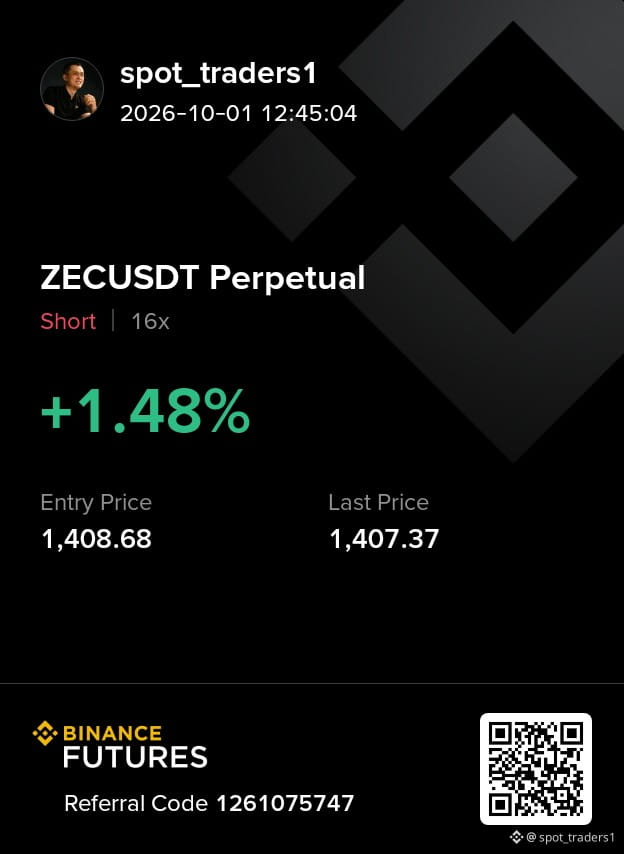
$ZEC and $ADA short setups have successfully hit TP1 as planned.
If you’re holding these trades, consider taking around 30% partial profit and moving your SL to the entry level to protect your position. The bearish setups remain valid as long as price stays below the respective invalidation levels.
Continue watching the upcoming targets and manage your positions carefully with proper risk control.
Also, keep $ACE on your watchlist for a potential setup.
DYOR (Do Your Own Research
{future}(ADAUSDT)
{future}(ACEUSDT)
{future}(ZECUSDT)
$ZEC and $ADA short setups have successfully hit TP1 as planned.
If you’re holding these trades, consider taking around 30% partial profit and moving your SL to the entry level to protect your position. The bearish setups remain valid as long as price stays below the respective invalidation levels.
Continue watching the upcoming targets and manage your positions carefully with proper risk control.
Also, keep $ACE on your watchlist for a potential setup.
DYOR (Do Your Own Research
If you’re holding these trades, consider taking around 30% partial profit and moving your SL to the entry level to protect your position. The bearish setups remain valid as long as price stays below the respective invalidation levels.
Continue watching the upcoming targets and manage your positions carefully with proper risk control.
Also, keep $ACE on your watchlist for a potential setup.
DYOR (Do Your Own Research
spot_traders1
·
--
Bearish$ADA short setup — the recent bounce is losing strength, while sellers are becoming more active around the current zone. If bearish pressure continues, price could potentially move lower from here.
Entry: 0.250–0.269
SL: 0.277
TP1: 0.244
TP2: 0.237
TP3: 0.227
Manage risk carefully and avoid chasing the move if price moves too far away from the entry zone.
DYOR (Do Your Own Research
Entry: 0.250–0.269
SL: 0.277
TP1: 0.244
TP2: 0.237
TP3: 0.227
Manage risk carefully and avoid chasing the move if price moves too far away from the entry zone.
DYOR (Do Your Own Research
16
·
--
Bullish
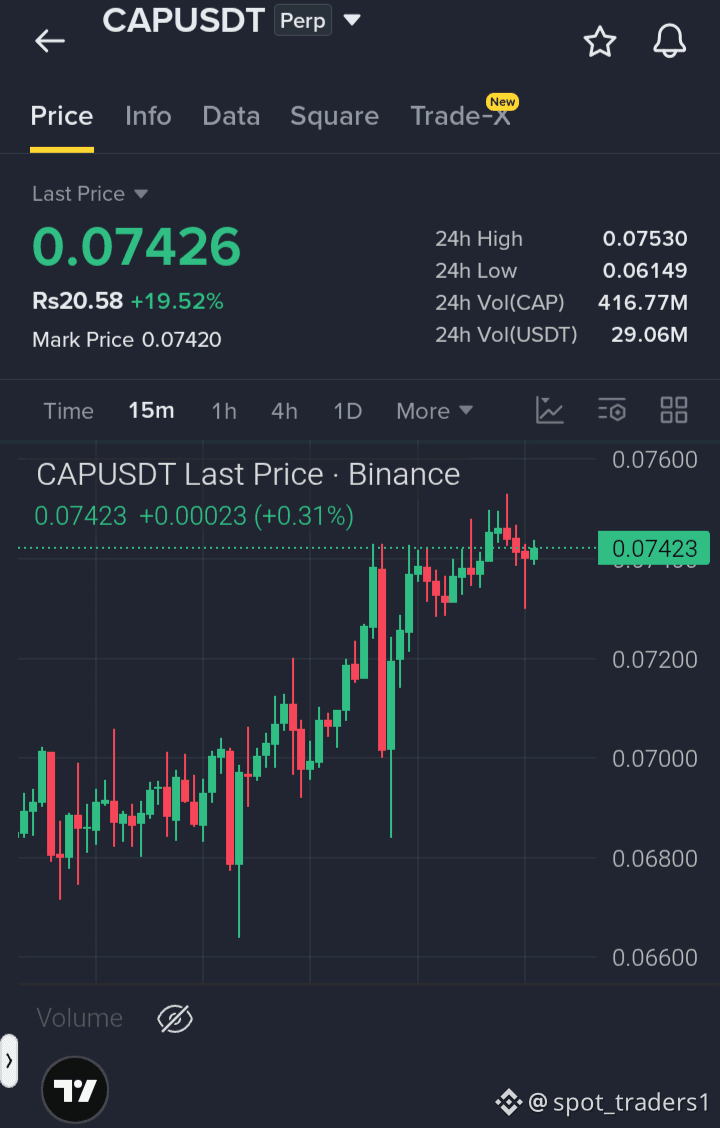
$CAP is nearing a key dynamic support zone, and the upcoming price reaction could show whether buyers are ready to defend the trendline.
LONG $CAP
If price retraces into the support zone and buyers step in, this setup is worth watching:
Entry: 0.0700 – 0.0750
SL: 0.0670
TP1: 0.0780
TP2: 0.0810
TP3: 0.0840
The main trigger is how price responds around the support zone. A strong bounce could open the path toward the targets, while a clear break below the stop-loss level would invalidate the setup.
Manage risk carefully and DYOR (Do Your Own Research
{future}(CAPUSDT)
$CAP is nearing a key dynamic support zone, and the upcoming price reaction could show whether buyers are ready to defend the trendline.
LONG $CAP
If price retraces into the support zone and buyers step in, this setup is worth watching:
Entry: 0.0700 – 0.0750
SL: 0.0670
TP1: 0.0780
TP2: 0.0810
TP3: 0.0840
The main trigger is how price responds around the support zone. A strong bounce could open the path toward the targets, while a clear break below the stop-loss level would invalidate the setup.
Manage risk carefully and DYOR (Do Your Own Research
LONG $CAP
If price retraces into the support zone and buyers step in, this setup is worth watching:
Entry: 0.0700 – 0.0750
SL: 0.0670
TP1: 0.0780
TP2: 0.0810
TP3: 0.0840
The main trigger is how price responds around the support zone. A strong bounce could open the path toward the targets, while a clear break below the stop-loss level would invalidate the setup.
Manage risk carefully and DYOR (Do Your Own Research
2
·
--
Bullish
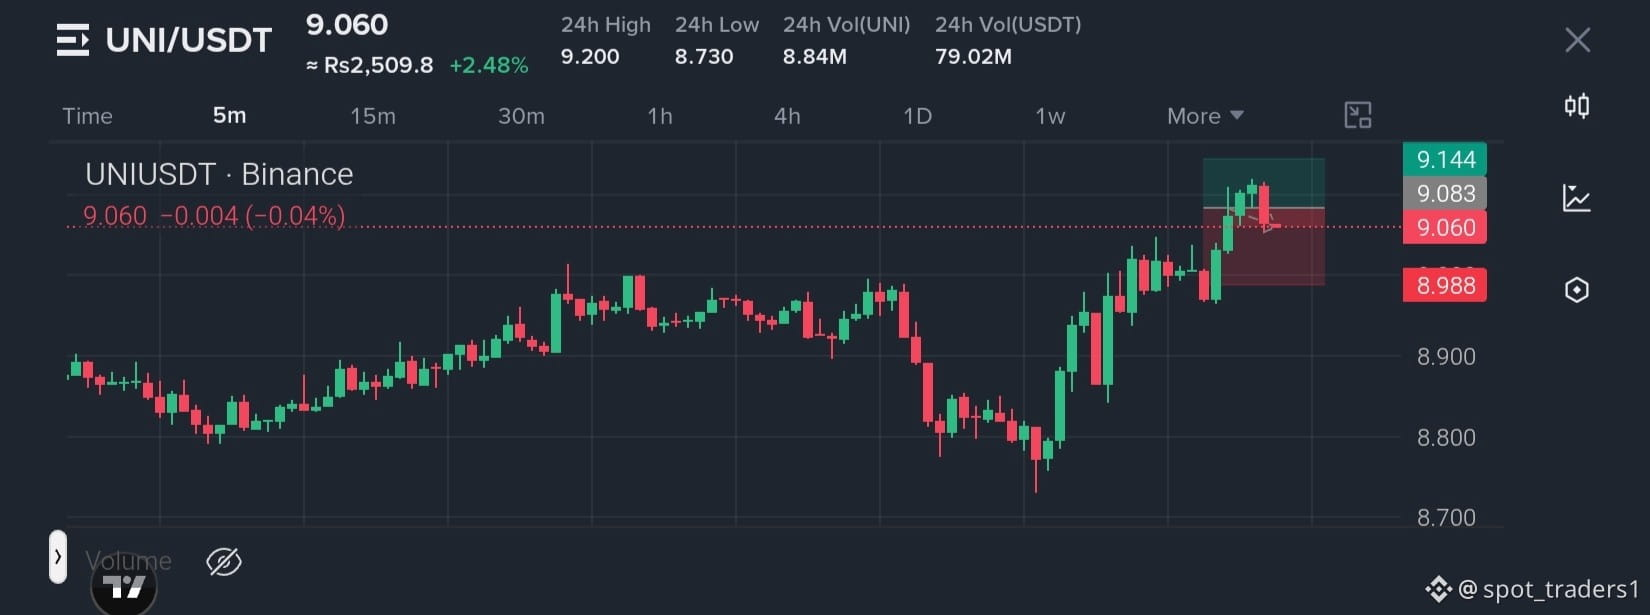
$UNI is showing bullish strength and looks ready for another push higher. Momentum is building in favor of buyers. Long setup.
Entry: $9 - $9.2
TP: $9.6 - $10 - $11 - $12 - $14
SL: $8.2
{future}(UNIUSDT)
$UNI is showing bullish strength and looks ready for another push higher. Momentum is building in favor of buyers. Long setup.
Entry: $9 - $9.2
TP: $9.6 - $10 - $11 - $12 - $14
SL: $8.2
Entry: $9 - $9.2
TP: $9.6 - $10 - $11 - $12 - $14
SL: $8.2
10
Ripple Unlocks 1B $XRP Worth $1.49B
Ripple has unlocked 1 billion XRP from escrow today, valued at approximately $1.49 billion.
The release was completed through four separate transactions:
• 400M XRP
• 300M XRP
• 200M XRP
• 100M XRP
All four transfers were completed within minutes of each other. The unlock is part of Ripple’s scheduled escrow releases, with the funds generally allocated toward ecosystem growth, liquidity, and operational needs.
#RippleXRP #cryptofirst21
$MOVR $CT
Ripple Unlocks 1B $XRP Worth $1.49B
Ripple has unlocked 1 billion XRP from escrow today, valued at approximately $1.49 billion.
The release was completed through four separate transactions:
• 400M XRP
• 300M XRP
• 200M XRP
• 100M XRP
All four transfers were completed within minutes of each other. The unlock is part of Ripple’s scheduled escrow releases, with the funds generally allocated toward ecosystem growth, liquidity, and operational needs.
#RippleXRP #cryptofirst21
$MOVR $CT
Ripple has unlocked 1 billion XRP from escrow today, valued at approximately $1.49 billion.
The release was completed through four separate transactions:
• 400M XRP
• 300M XRP
• 200M XRP
• 100M XRP
All four transfers were completed within minutes of each other. The unlock is part of Ripple’s scheduled escrow releases, with the funds generally allocated toward ecosystem growth, liquidity, and operational needs.
#RippleXRP #cryptofirst21
$MOVR $CT

5
·
--
Bearish
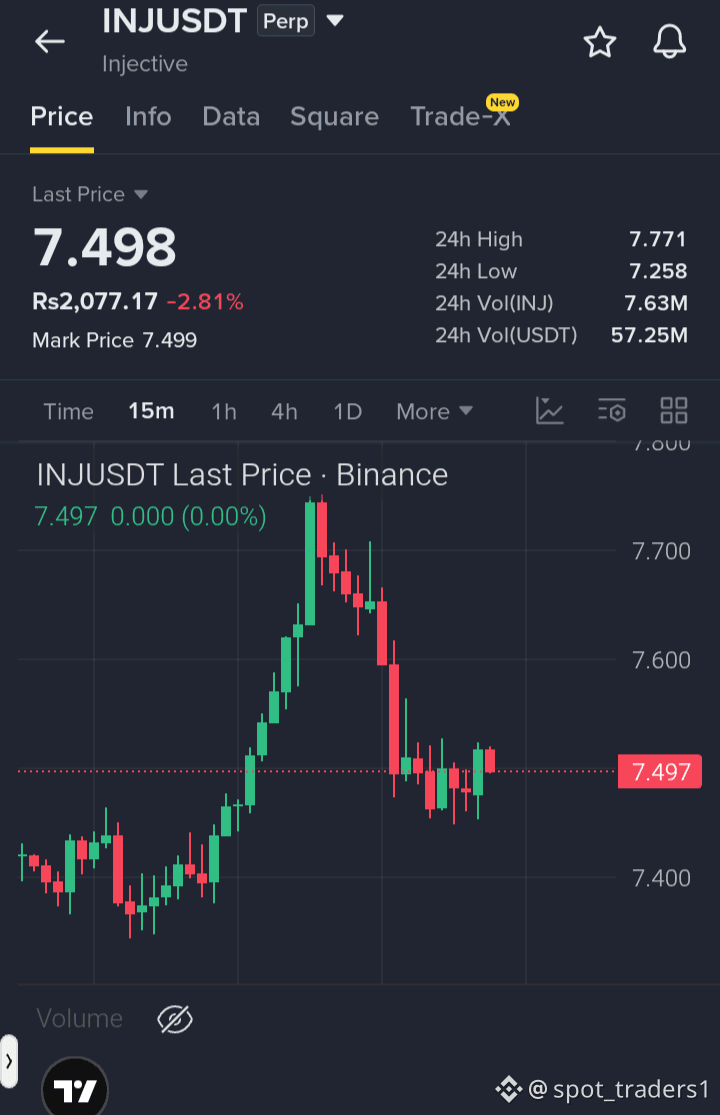
$INJ SHORT SETUP — price is struggling to reclaim higher levels as sellers continue to apply pressure on the structure. If the weakness continues, another downside move could develop from this zone.
Trading Idea: Short $INJ
Entry: 7.44 – 7.65
SL: 8.10
TP1: 7.34
TP2: 7.00
TP3: 6.75
Manage your position carefully and keep a close eye on the invalidation level.
DYOR (Do Your Own Research
{future}(INJUSDT)
$INJ SHORT SETUP — price is struggling to reclaim higher levels as sellers continue to apply pressure on the structure. If the weakness continues, another downside move could develop from this zone.
Trading Idea: Short $INJ
Entry: 7.44 – 7.65
SL: 8.10
TP1: 7.34
TP2: 7.00
TP3: 6.75
Manage your position carefully and keep a close eye on the invalidation level.
DYOR (Do Your Own Research
Trading Idea: Short $INJ
Entry: 7.44 – 7.65
SL: 8.10
TP1: 7.34
TP2: 7.00
TP3: 6.75
Manage your position carefully and keep a close eye on the invalidation level.
DYOR (Do Your Own Research
6
·
--
Bullish
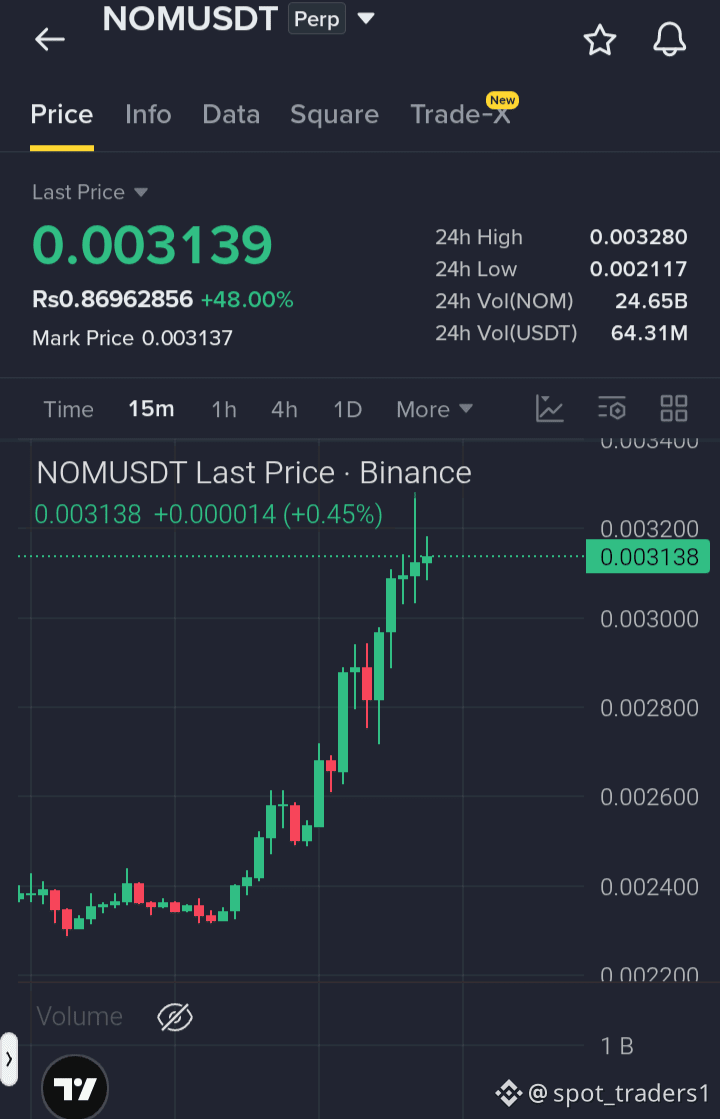
$NOM is showing a massive breakout as momentum continues to accelerate sharply.
Strong buying volume is pushing price through the key resistance zone, creating room for further upside if the breakout holds.
Momentum is building quickly, so keep an eye on the next move and manage risk carefully.
DYOR (Do Your Own Research
{future}(NOMUSDT)
$NOM is showing a massive breakout as momentum continues to accelerate sharply.
Strong buying volume is pushing price through the key resistance zone, creating room for further upside if the breakout holds.
Momentum is building quickly, so keep an eye on the next move and manage risk carefully.
DYOR (Do Your Own Research
Strong buying volume is pushing price through the key resistance zone, creating room for further upside if the breakout holds.
Momentum is building quickly, so keep an eye on the next move and manage risk carefully.
DYOR (Do Your Own Research
5
·
--
Bullish
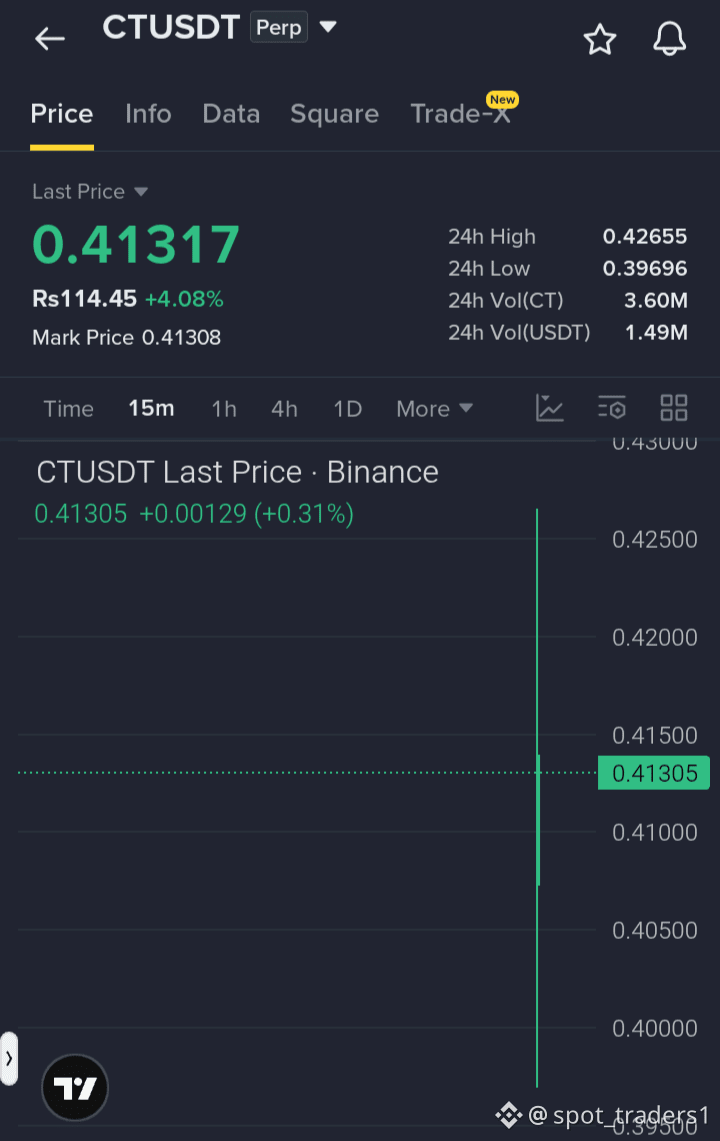
$CT is holding above the recent support area, with buyers defending the current zone. If momentum continues and price holds above support, another move toward the higher levels could develop.
LONG $CT
Entry: 0.405 – 0.420
SL: 0.375 TP1: 0.435 TP2: 0.455 TP3: 0.480
Watch the reaction around the entry zone and avoid chasing if price moves too far above the setup. Manage risk and position size carefully.
DYOR (Do Your Own Research
{future}(CTUSDT)
$CT is holding above the recent support area, with buyers defending the current zone. If momentum continues and price holds above support, another move toward the higher levels could develop.
LONG $CT
Entry: 0.405 – 0.420
SL: 0.375 TP1: 0.435 TP2: 0.455 TP3: 0.480
Watch the reaction around the entry zone and avoid chasing if price moves too far above the setup. Manage risk and position size carefully.
DYOR (Do Your Own Research
LONG $CT
Entry: 0.405 – 0.420
SL: 0.375 TP1: 0.435 TP2: 0.455 TP3: 0.480
Watch the reaction around the entry zone and avoid chasing if price moves too far above the setup. Manage risk and position size carefully.
DYOR (Do Your Own Research
200
·
--
Bullish
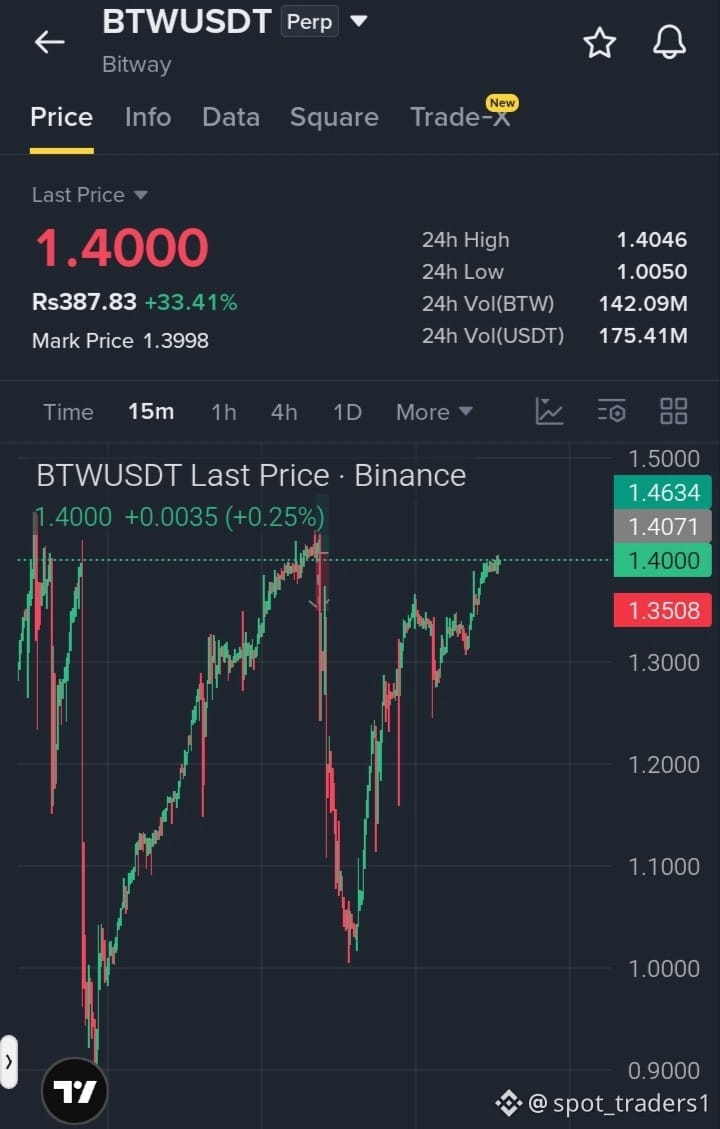
$BTW is showing solid momentum as buyers continue to step in around the current structure. Rising volume and supportive moving averages are strengthening the trend, while a further push toward resistance could develop if momentum remains intact.
LONG $BTW
Entry: 1.35 – 1.40
SL: 1.30
TP1: 1.45
TP2: 1.50
Watch the reaction around the entry zone and manage risk carefully. If buyers remain in control, price could attempt a breakout from the current structure.
DYOR (Do Your Own Research
{future}(BTWUSDT)
$BTW is showing solid momentum as buyers continue to step in around the current structure. Rising volume and supportive moving averages are strengthening the trend, while a further push toward resistance could develop if momentum remains intact.
LONG $BTW
Entry: 1.35 – 1.40
SL: 1.30
TP1: 1.45
TP2: 1.50
Watch the reaction around the entry zone and manage risk carefully. If buyers remain in control, price could attempt a breakout from the current structure.
DYOR (Do Your Own Research
LONG $BTW
Entry: 1.35 – 1.40
SL: 1.30
TP1: 1.45
TP2: 1.50
Watch the reaction around the entry zone and manage risk carefully. If buyers remain in control, price could attempt a breakout from the current structure.
DYOR (Do Your Own Research

1
5
·
--
Bearish
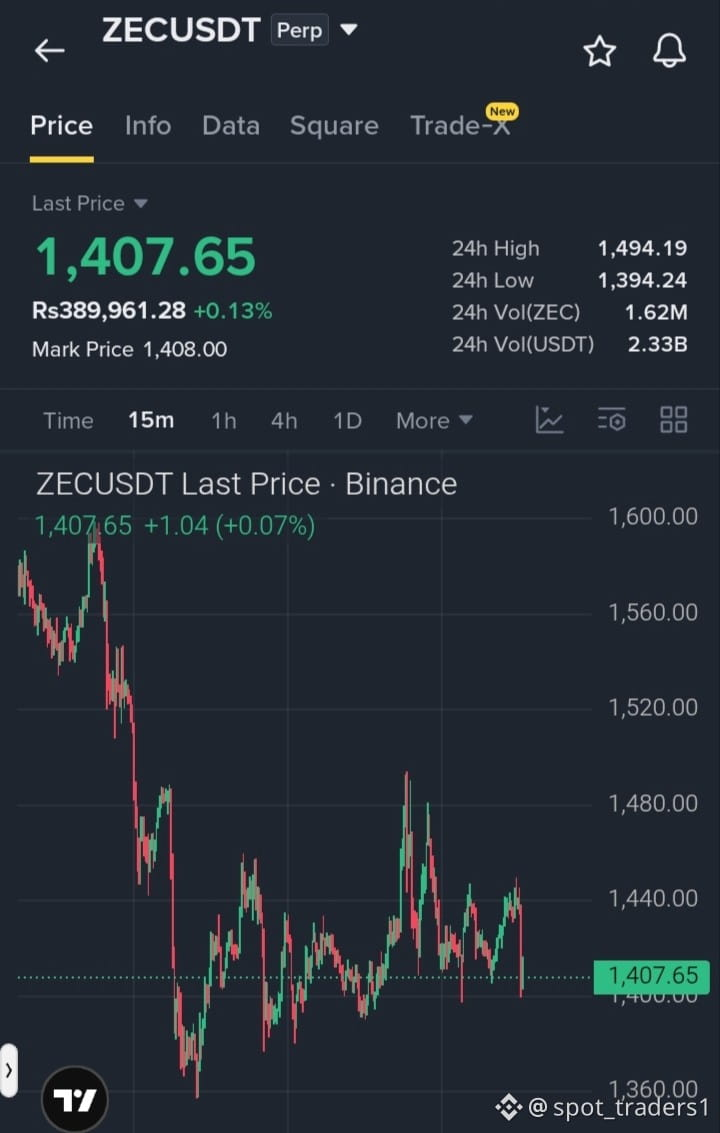
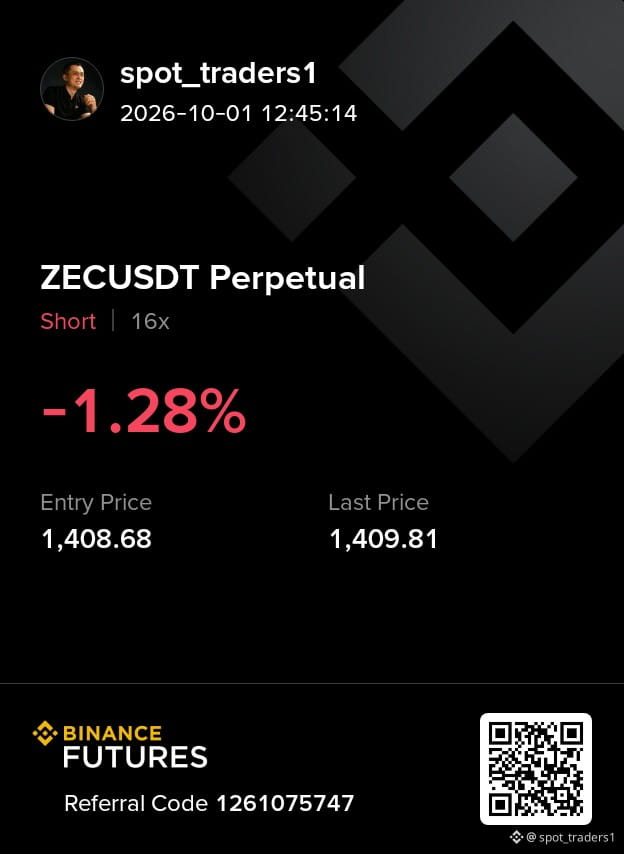
$ZEC sellers are beginning to take control again, with the current structure leaving room for another move lower if bearish momentum continues.
Trading Idea: Short $ZEC
Entry: 1400 - 1445
SL: 1530
TP1: 1375
TP2: 1325
TP3: 1290
Watch the price reaction around the entry zone and manage risk carefully. If momentum shifts, the setup could become invalid.
DYOR (Do Your Own Research
{future}(ZECUSDT)
$ZEC sellers are beginning to take control again, with the current structure leaving room for another move lower if bearish momentum continues.
Trading Idea: Short $ZEC
Entry: 1400 - 1445
SL: 1530
TP1: 1375
TP2: 1325
TP3: 1290
Watch the price reaction around the entry zone and manage risk carefully. If momentum shifts, the setup could become invalid.
DYOR (Do Your Own Research
Trading Idea: Short $ZEC
Entry: 1400 - 1445
SL: 1530
TP1: 1375
TP2: 1325
TP3: 1290
Watch the price reaction around the entry zone and manage risk carefully. If momentum shifts, the setup could become invalid.
DYOR (Do Your Own Research
6
·
--
Bullish
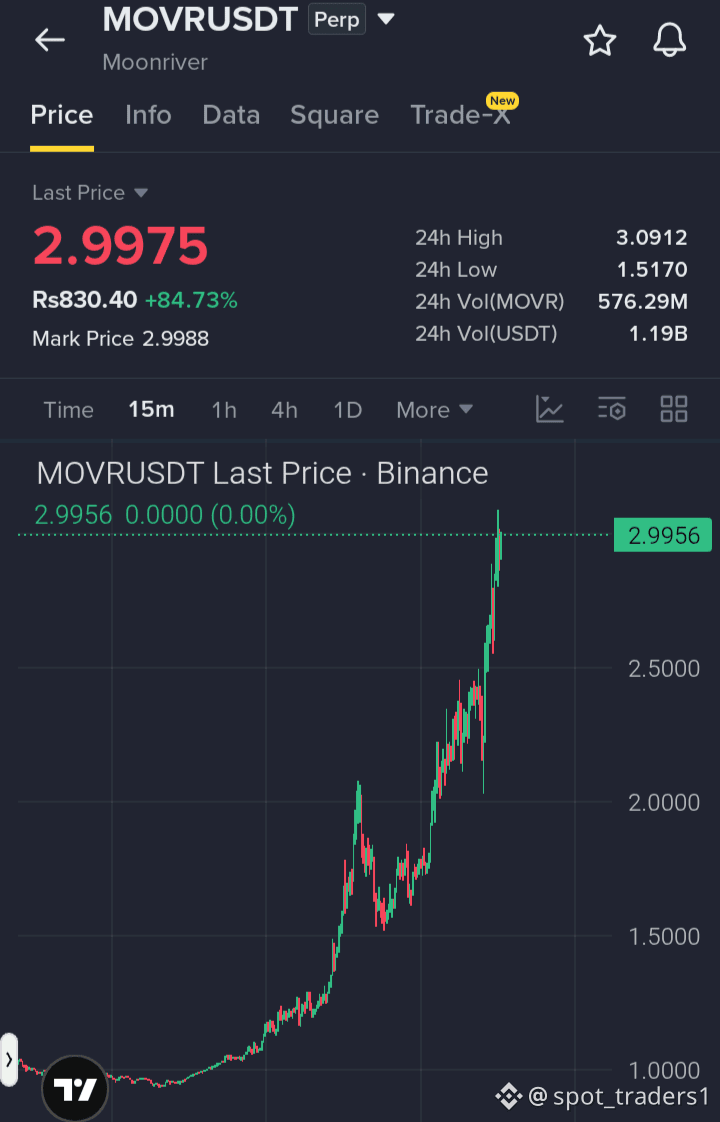
$MOVR has successfully hit the long TP as expected. Hope you didn’t miss this setup.
Momentum is still looking bullish, with the next target around 3.3 if buyers continue to maintain control.
Also keep $SIREN and $BEAT on your watchlist for potential upcoming setups.
Manage risk properly and DYOR (Do Your Own Research
{future}(MOVRUSDT)
{future}(SIRENUSDT)
{future}(BEATUSDT)
$MOVR has successfully hit the long TP as expected. Hope you didn’t miss this setup.
Momentum is still looking bullish, with the next target around 3.3 if buyers continue to maintain control.
Also keep $SIREN and $BEAT on your watchlist for potential upcoming setups.
Manage risk properly and DYOR (Do Your Own Research
Momentum is still looking bullish, with the next target around 3.3 if buyers continue to maintain control.
Also keep $SIREN and $BEAT on your watchlist for potential upcoming setups.
Manage risk properly and DYOR (Do Your Own Research
spot_traders1
·
--
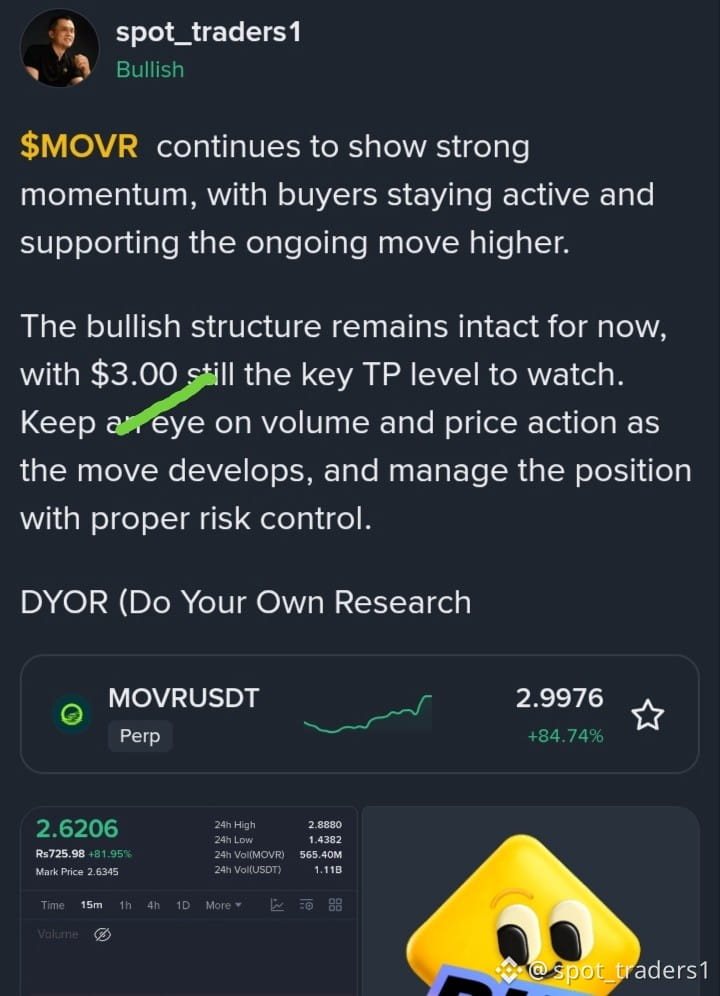
Bullish$MOVR continues to show strong momentum, with buyers staying active and supporting the ongoing move higher.
The bullish structure remains intact for now, with $3.00 still the key TP level to watch. Keep an eye on volume and price action as the move develops, and manage the position with proper risk control.
DYOR (Do Your Own Research
The bullish structure remains intact for now, with $3.00 still the key TP level to watch. Keep an eye on volume and price action as the move develops, and manage the position with proper risk control.
DYOR (Do Your Own Research
9
·
--
Bearish
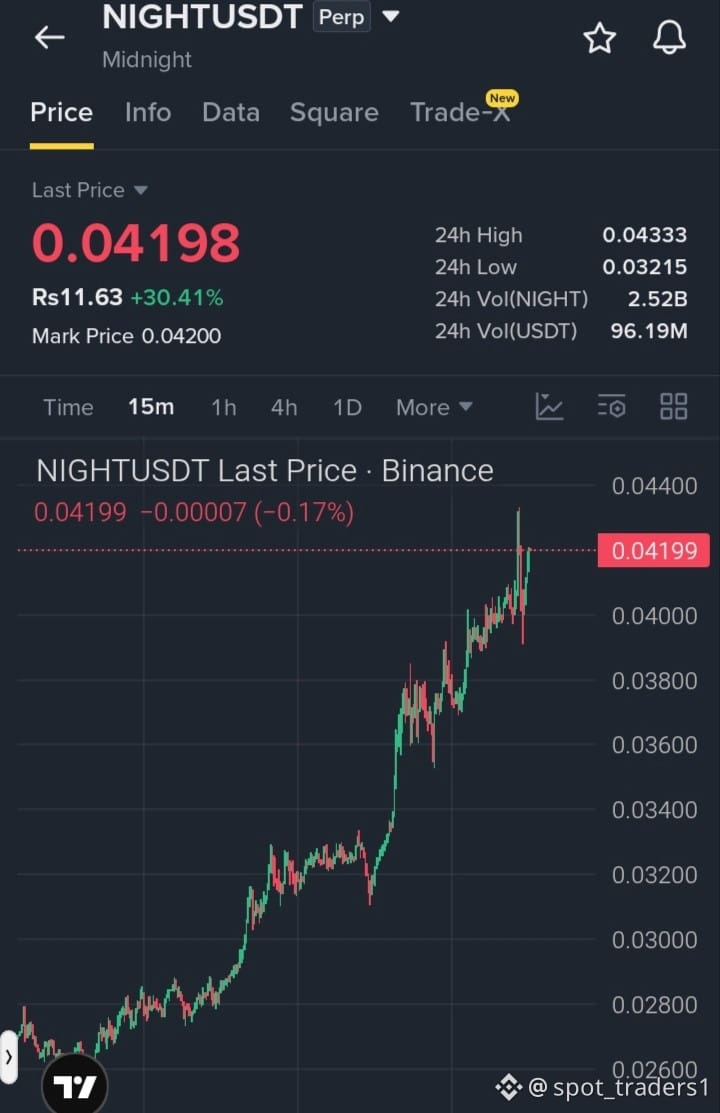
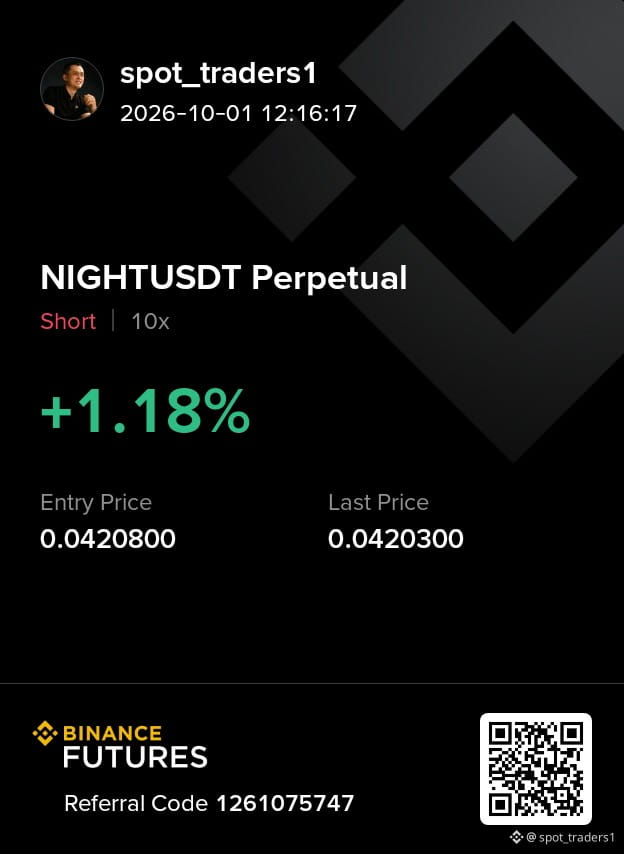
$NIGHT is showing signs of fading momentum, with buyers struggling to sustain the recent bounce. If selling pressure continues to increase, the current structure could create room for another move lower.
Trading Idea: Short $NIGHT
Entry: 0.0400 – 0.0430
SL: 0.0450
TP1: 0.0390
TP2: 0.0375
TP3: 0.0360
Manage risk carefully and monitor the reaction around the entry zone. If the structure becomes invalid, respect the stop-loss instead of forcing the setup.
DYOR (Do Your Own Research
{future}(NIGHTUSDT)
$NIGHT is showing signs of fading momentum, with buyers struggling to sustain the recent bounce. If selling pressure continues to increase, the current structure could create room for another move lower.
Trading Idea: Short $NIGHT
Entry: 0.0400 – 0.0430
SL: 0.0450
TP1: 0.0390
TP2: 0.0375
TP3: 0.0360
Manage risk carefully and monitor the reaction around the entry zone. If the structure becomes invalid, respect the stop-loss instead of forcing the setup.
DYOR (Do Your Own Research
Trading Idea: Short $NIGHT
Entry: 0.0400 – 0.0430
SL: 0.0450
TP1: 0.0390
TP2: 0.0375
TP3: 0.0360
Manage risk carefully and monitor the reaction around the entry zone. If the structure becomes invalid, respect the stop-loss instead of forcing the setup.
DYOR (Do Your Own Research
2
·
--
Bearish
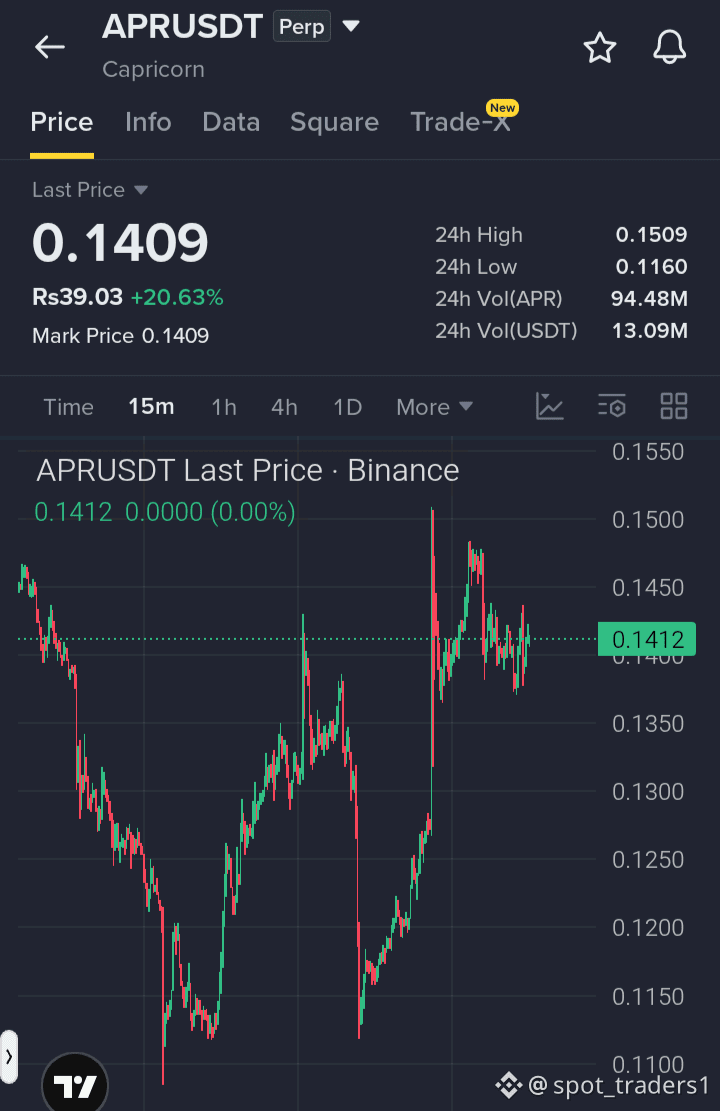
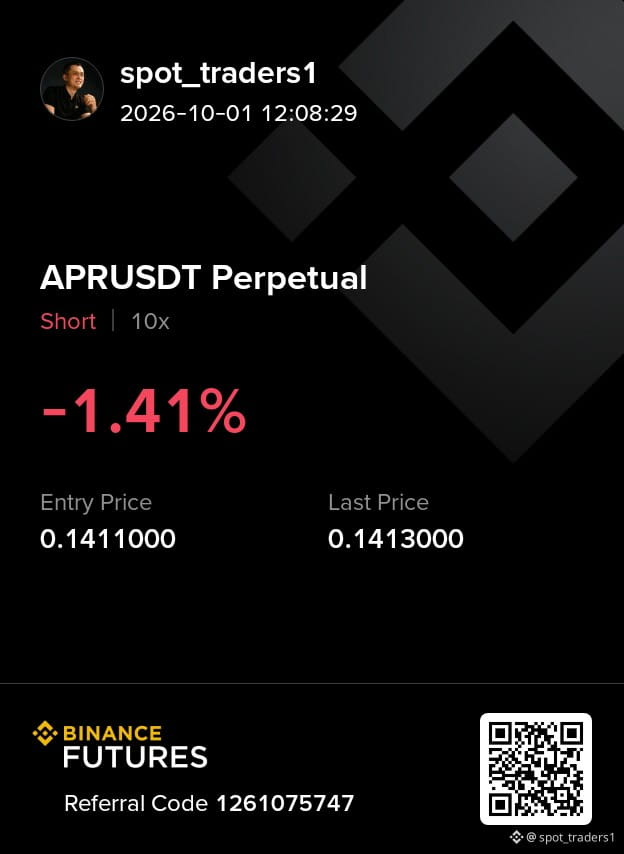
$APR SHORT — sellers are starting to take control as the recent bounce loses momentum. If the bearish structure continues to hold, price could potentially make another move toward the lower levels.
Trading Ideas — Short $APR
Entry: 0.136 – 0.145
SL: 0.154
TP1: 0.130
TP2: 0.126
TP3: 0.120
Manage risk carefully and monitor the structure around the entry zone for confirmation. If price reclaims the SL area, the setup becomes invalid.
DYOR (Do Your Own Research
{future}(APRUSDT)
$APR SHORT — sellers are starting to take control as the recent bounce loses momentum. If the bearish structure continues to hold, price could potentially make another move toward the lower levels.
Trading Ideas — Short $APR
Entry: 0.136 – 0.145
SL: 0.154
TP1: 0.130
TP2: 0.126
TP3: 0.120
Manage risk carefully and monitor the structure around the entry zone for confirmation. If price reclaims the SL area, the setup becomes invalid.
DYOR (Do Your Own Research
Trading Ideas — Short $APR
Entry: 0.136 – 0.145
SL: 0.154
TP1: 0.130
TP2: 0.126
TP3: 0.120
Manage risk carefully and monitor the structure around the entry zone for confirmation. If price reclaims the SL area, the setup becomes invalid.
DYOR (Do Your Own Research
2
·
--
Bearish
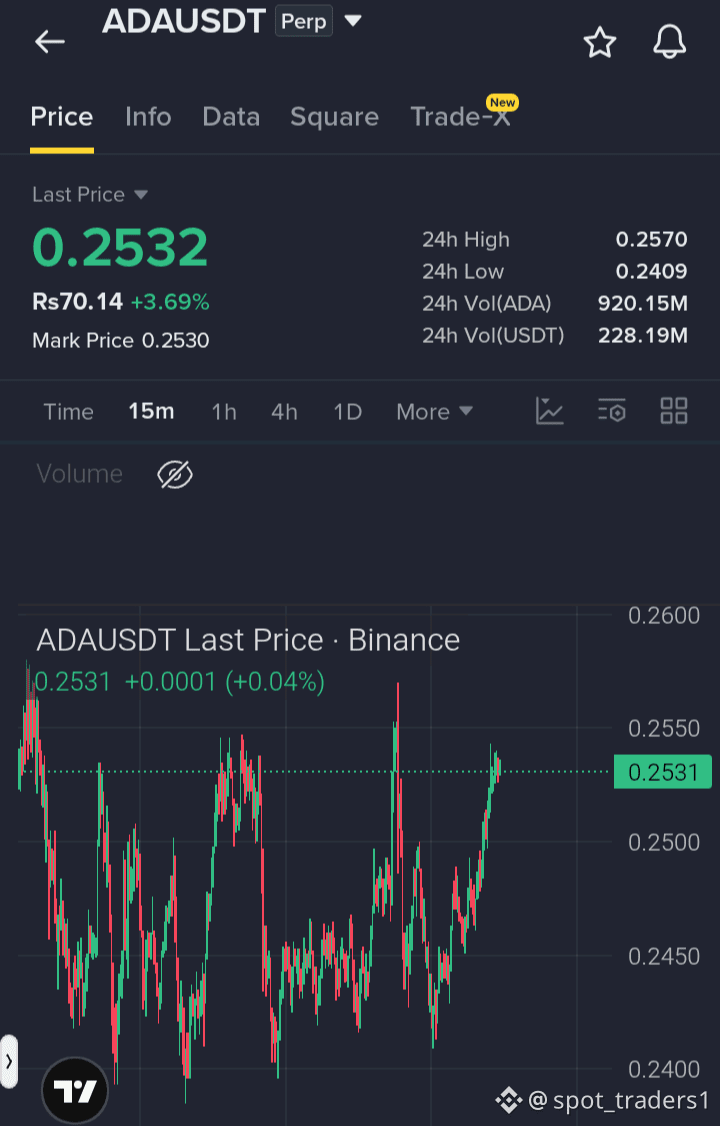
$ADA short setup — the recent bounce is losing strength, while sellers are becoming more active around the current zone. If bearish pressure continues, price could potentially move lower from here.
Entry: 0.250–0.269
SL: 0.277
TP1: 0.244
TP2: 0.237
TP3: 0.227
Manage risk carefully and avoid chasing the move if price moves too far away from the entry zone.
DYOR (Do Your Own Research
{future}(ADAUSDT)
$ADA short setup — the recent bounce is losing strength, while sellers are becoming more active around the current zone. If bearish pressure continues, price could potentially move lower from here.
Entry: 0.250–0.269
SL: 0.277
TP1: 0.244
TP2: 0.237
TP3: 0.227
Manage risk carefully and avoid chasing the move if price moves too far away from the entry zone.
DYOR (Do Your Own Research
Entry: 0.250–0.269
SL: 0.277
TP1: 0.244
TP2: 0.237
TP3: 0.227
Manage risk carefully and avoid chasing the move if price moves too far away from the entry zone.
DYOR (Do Your Own Research
1
1
·
--
Bullish
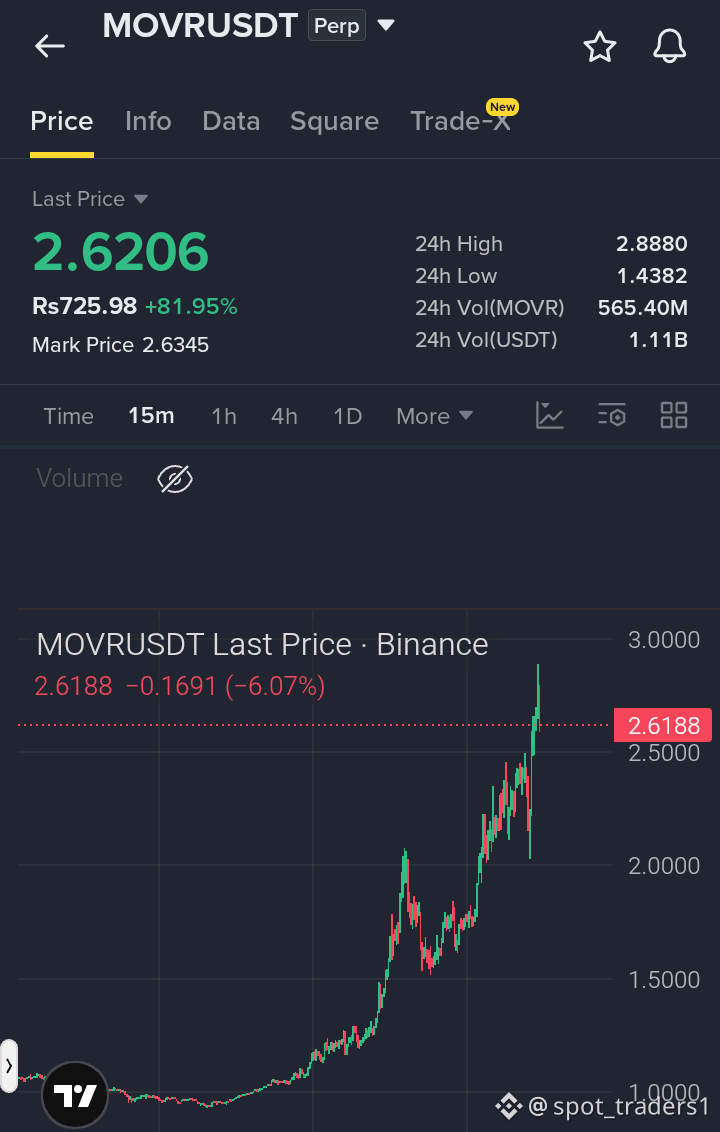
$MOVR continues to show strong momentum, with buyers staying active and supporting the ongoing move higher.
The bullish structure remains intact for now, with $3.00 still the key TP level to watch. Keep an eye on volume and price action as the move develops, and manage the position with proper risk control.
DYOR (Do Your Own Research
{future}(MOVRUSDT)
$MOVR continues to show strong momentum, with buyers staying active and supporting the ongoing move higher.
The bullish structure remains intact for now, with $3.00 still the key TP level to watch. Keep an eye on volume and price action as the move develops, and manage the position with proper risk control.
DYOR (Do Your Own Research
The bullish structure remains intact for now, with $3.00 still the key TP level to watch. Keep an eye on volume and price action as the move develops, and manage the position with proper risk control.
DYOR (Do Your Own Research

1
28
·
--
Bullish
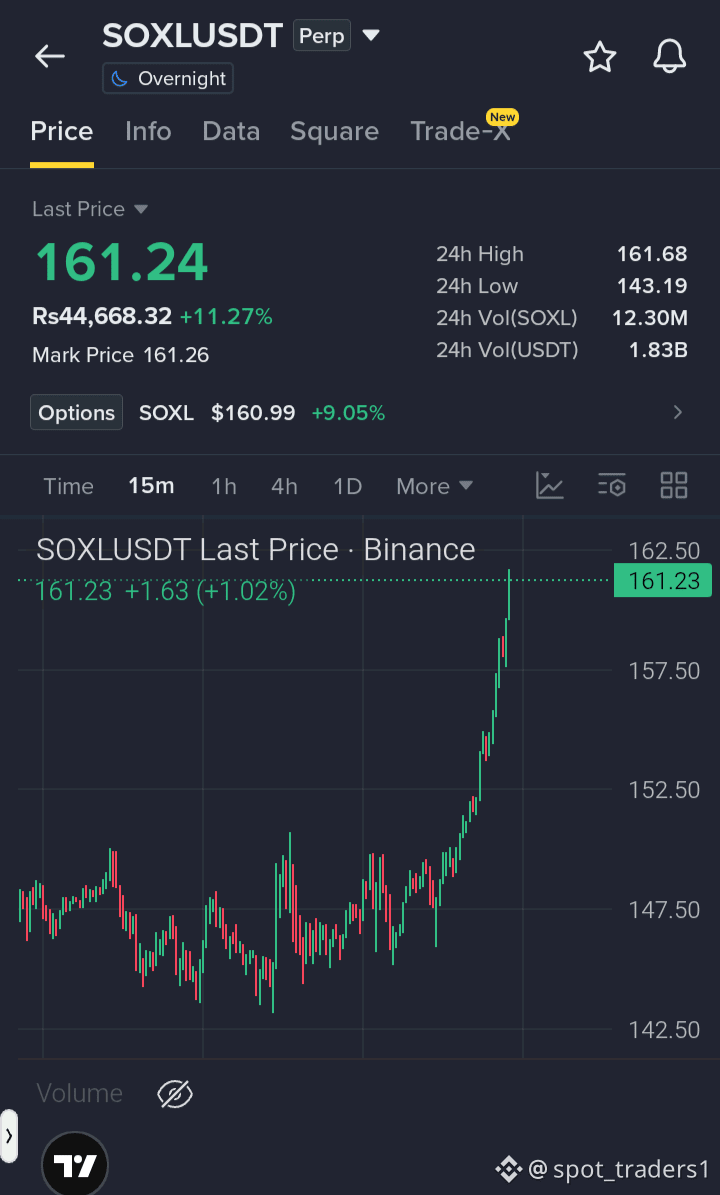
$SOXL is showing strong momentum today, with buyers stepping in firmly and the current structure supporting the potential for further upside.
Long setup:$SOXL
Entry: 153–160
SL: 150
TP1: 165
TP2: 168
TP3: 172
Manage the position carefully, consider securing profits along the way, and avoid chasing if price moves too far away from the entry zone.
DYOR (Do Your Own Research
{future}(SOXLUSDT)
$SOXL is showing strong momentum today, with buyers stepping in firmly and the current structure supporting the potential for further upside.
Long setup:$SOXL
Entry: 153–160
SL: 150
TP1: 165
TP2: 168
TP3: 172
Manage the position carefully, consider securing profits along the way, and avoid chasing if price moves too far away from the entry zone.
DYOR (Do Your Own Research
Long setup:$SOXL
Entry: 153–160
SL: 150
TP1: 165
TP2: 168
TP3: 172
Manage the position carefully, consider securing profits along the way, and avoid chasing if price moves too far away from the entry zone.
DYOR (Do Your Own Research

33
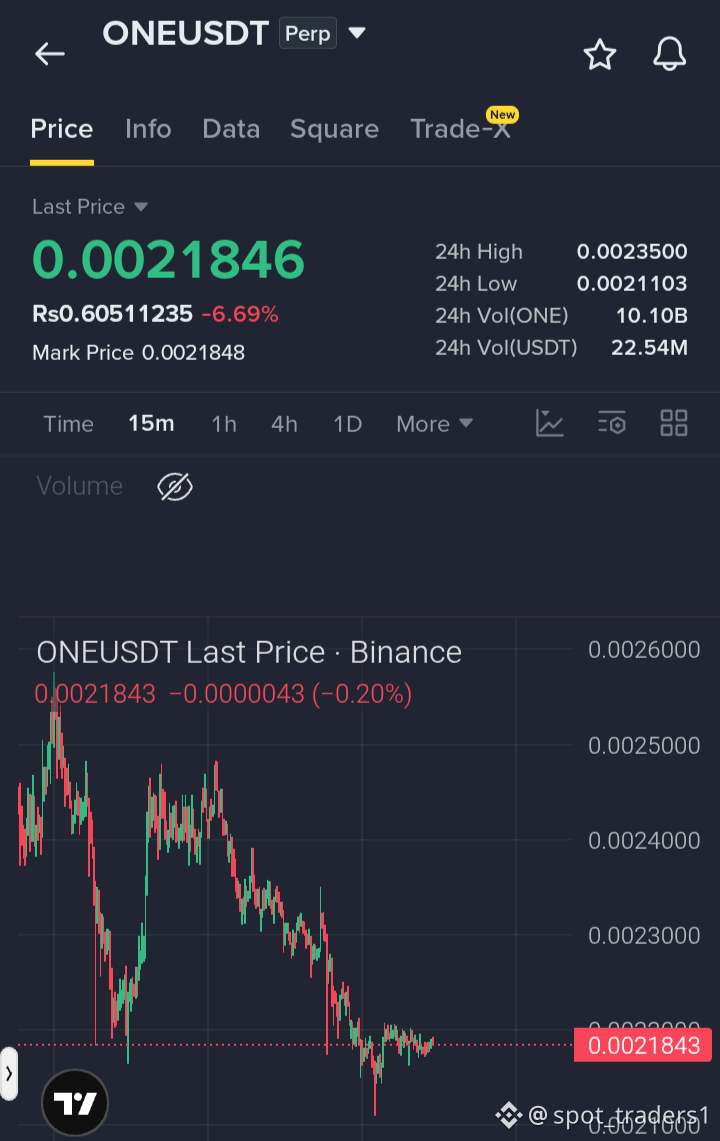
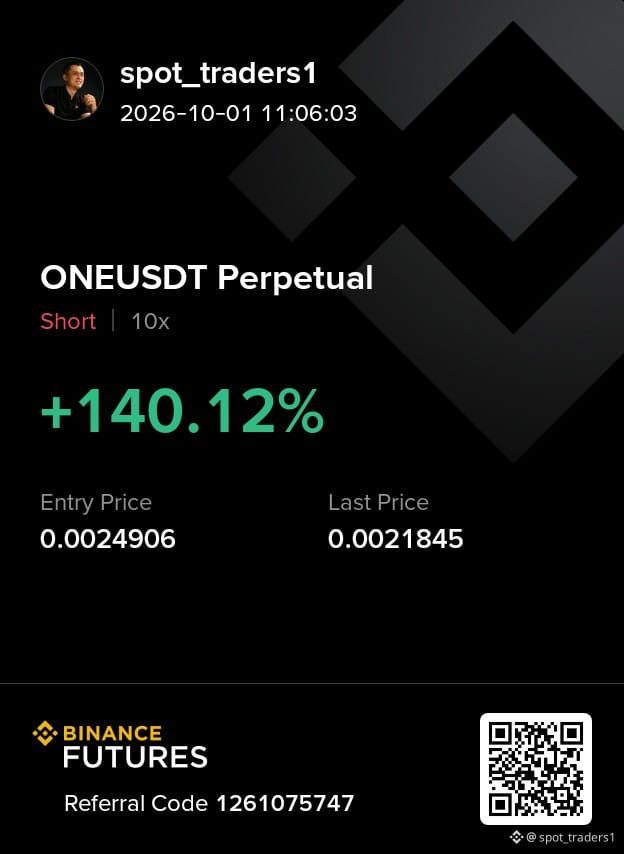
$ONE short setup has successfully hit the first TP as planned.
Consider securing partial gains here and moving your SL to breakeven to protect the position. If bearish momentum continues, keep managing the short with proper risk control.
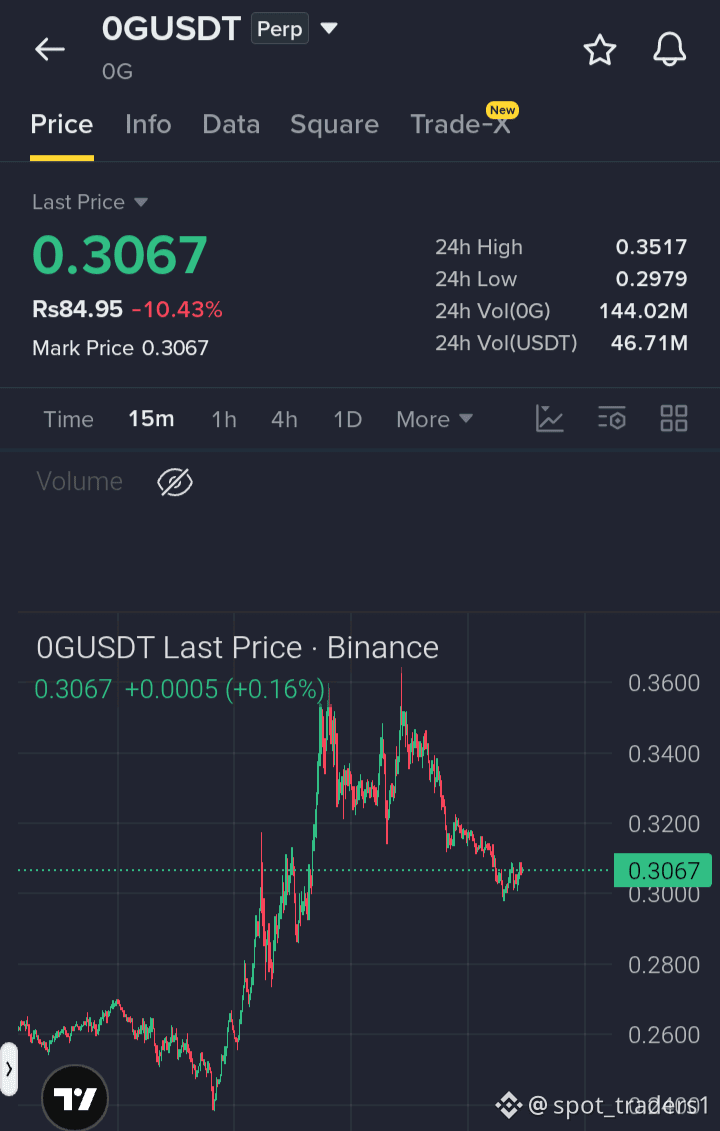
$0G short setup has also reached all TPs successfully, locking in the full move and additional gains. Hope you didn’t miss these setups.
Stay tuned for the next update, and keep $LAB on your watchlist for a potential setup.
DYOR (Do Your Own Research
{future}(ONEUSDT)
{future}(0GUSDT)
{future}(LABUSDT)
$ONE short setup has successfully hit the first TP as planned.
Consider securing partial gains here and moving your SL to breakeven to protect the position. If bearish momentum continues, keep managing the short with proper risk control.
$0G short setup has also reached all TPs successfully, locking in the full move and additional gains. Hope you didn’t miss these setups.
Stay tuned for the next update, and keep $LAB on your watchlist for a potential setup.
DYOR (Do Your Own Research
Consider securing partial gains here and moving your SL to breakeven to protect the position. If bearish momentum continues, keep managing the short with proper risk control.
$0G short setup has also reached all TPs successfully, locking in the full move and additional gains. Hope you didn’t miss these setups.
Stay tuned for the next update, and keep $LAB on your watchlist for a potential setup.
DYOR (Do Your Own Research
34
·
--
Bearish
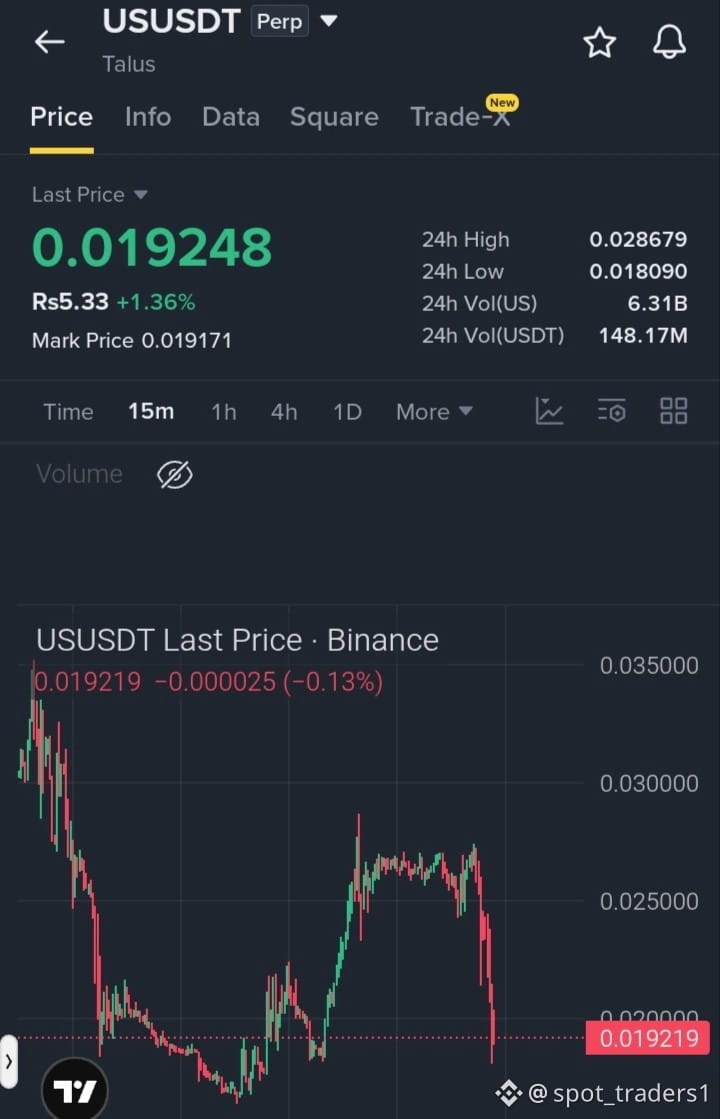
$US short setup played out exactly as planned — all TPs have been successfully hit, with additional gains captured from the move.
Hope you didn’t miss this setup. If you’re still in the position, manage risk carefully and secure profits according to your trading plan.
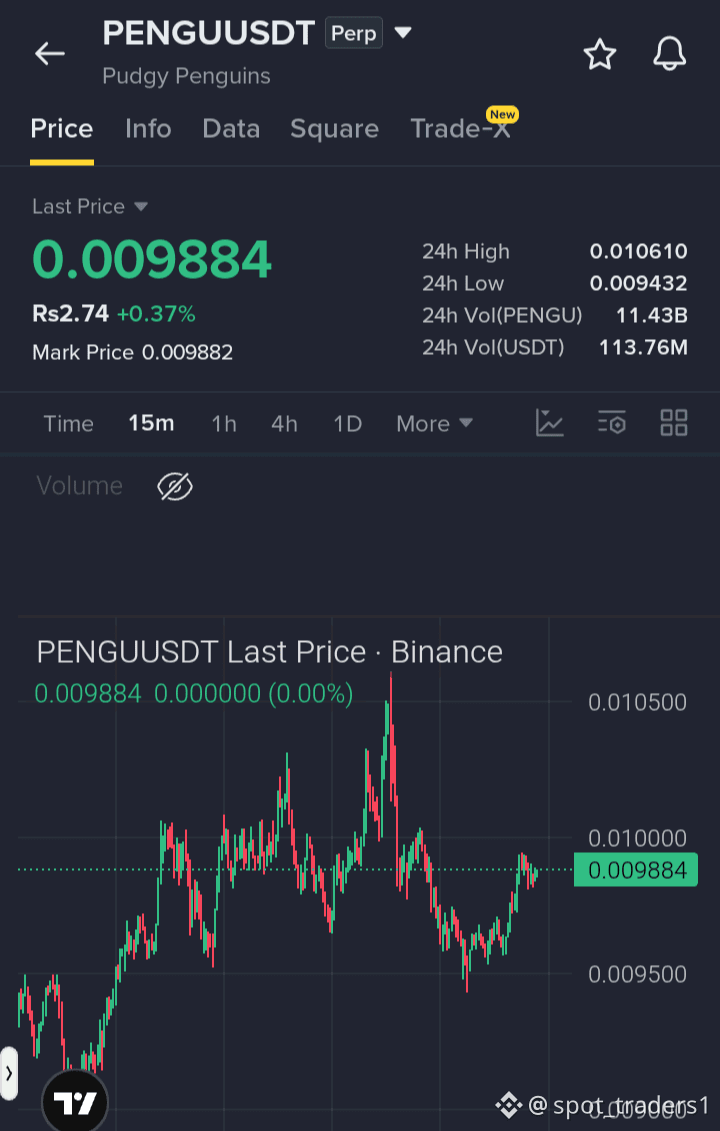
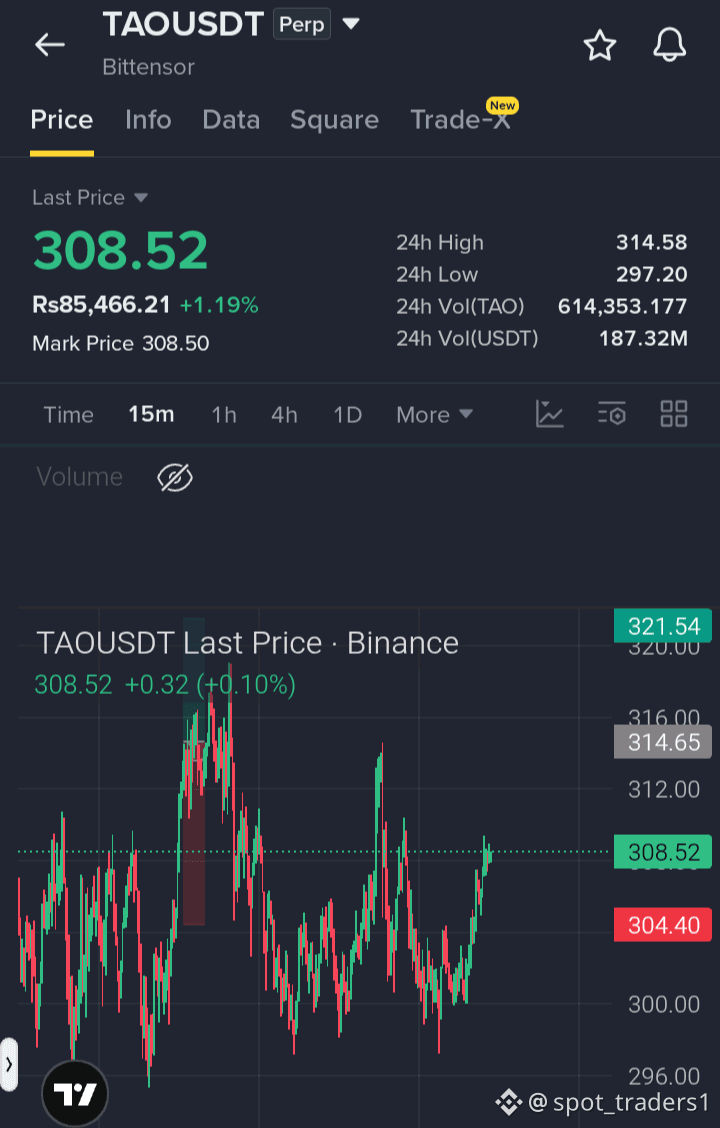
$TAO and $PENGU shorts also hit the first TP earlier this morning and have now moved back toward our entry zones. Keep monitoring the structure closely and manage the positions with proper risk control.
DYOR (Do Your Own Research
{future}(USUSDT)
{future}(PENGUUSDT)
{future}(TAOUSDT)
$US short setup played out exactly as planned — all TPs have been successfully hit, with additional gains captured from the move.
Hope you didn’t miss this setup. If you’re still in the position, manage risk carefully and secure profits according to your trading plan.
$TAO and $PENGU shorts also hit the first TP earlier this morning and have now moved back toward our entry zones. Keep monitoring the structure closely and manage the positions with proper risk control.
DYOR (Do Your Own Research
Hope you didn’t miss this setup. If you’re still in the position, manage risk carefully and secure profits according to your trading plan.
$TAO and $PENGU shorts also hit the first TP earlier this morning and have now moved back toward our entry zones. Keep monitoring the structure closely and manage the positions with proper risk control.
DYOR (Do Your Own Research
spot_traders1
·
--
Bearish$US — price is recovering after the sharp downside move, but the rebound is approaching a key resistance area where sellers may step back in.
SHORT $US
Entry Zone: 0.0248 – 0.0253
SL: 0.0262 TP1: 0.0238 TP2: 0.0228
TP3: 0.0215
The setup remains valid if sellers reject the resistance zone and downside momentum returns. Wait for confirmation before entering rather than chasing the current move, and keep risk controlled around the invalidation level.
DYOR (Do Your Own Research
SHORT $US
Entry Zone: 0.0248 – 0.0253
SL: 0.0262 TP1: 0.0238 TP2: 0.0228
TP3: 0.0215
The setup remains valid if sellers reject the resistance zone and downside momentum returns. Wait for confirmation before entering rather than chasing the current move, and keep risk controlled around the invalidation level.
DYOR (Do Your Own Research
44
·
--
Bullish
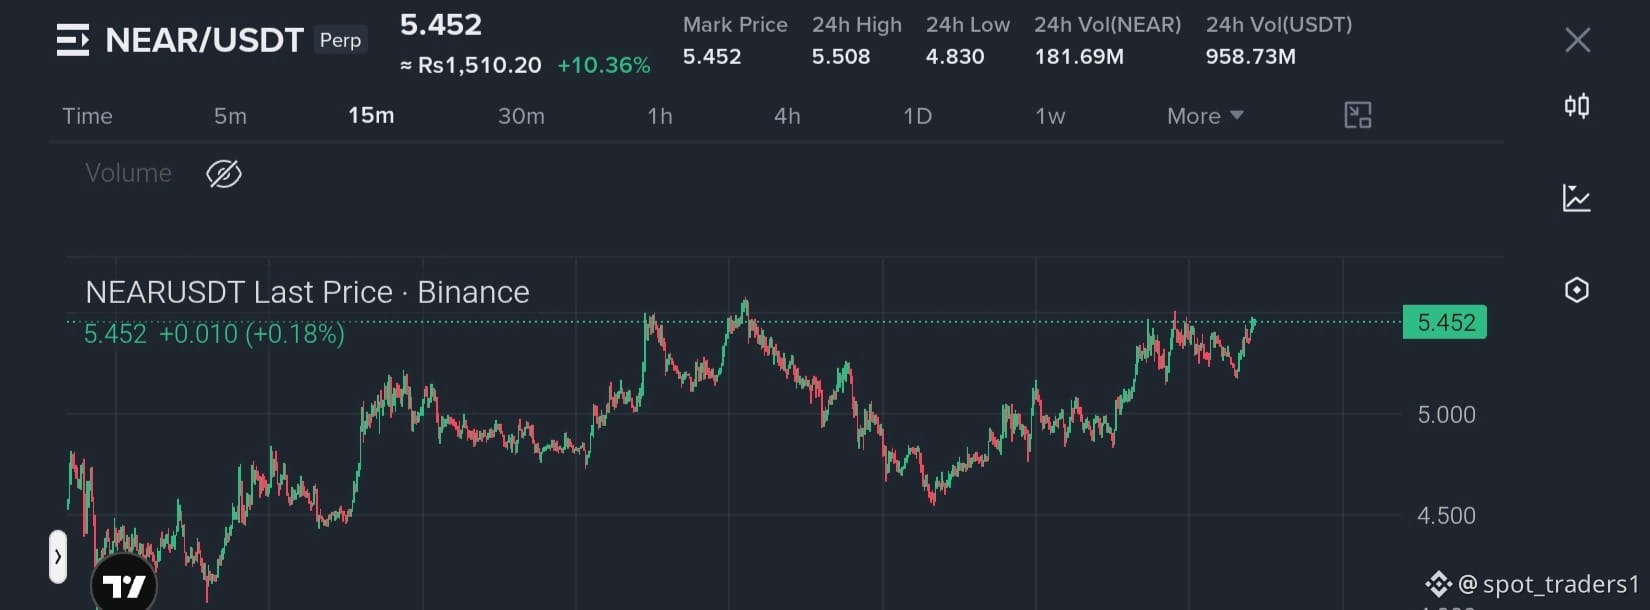
$NEAR is steadily pushing higher with consistent momentum. Price is approaching the next major resistance around $5.6, and a breakout above this level could open the way for further upside. Long setup.
Entry: $5.2 - $5.4
TP: $6 - $7 - $8 - $10
SL: $4.86
{future}(NEARUSDT)
$NEAR is steadily pushing higher with consistent momentum. Price is approaching the next major resistance around $5.6, and a breakout above this level could open the way for further upside. Long setup.
Entry: $5.2 - $5.4
TP: $6 - $7 - $8 - $10
SL: $4.86
Entry: $5.2 - $5.4
TP: $6 - $7 - $8 - $10
SL: $4.86
65
·
--
Bullish
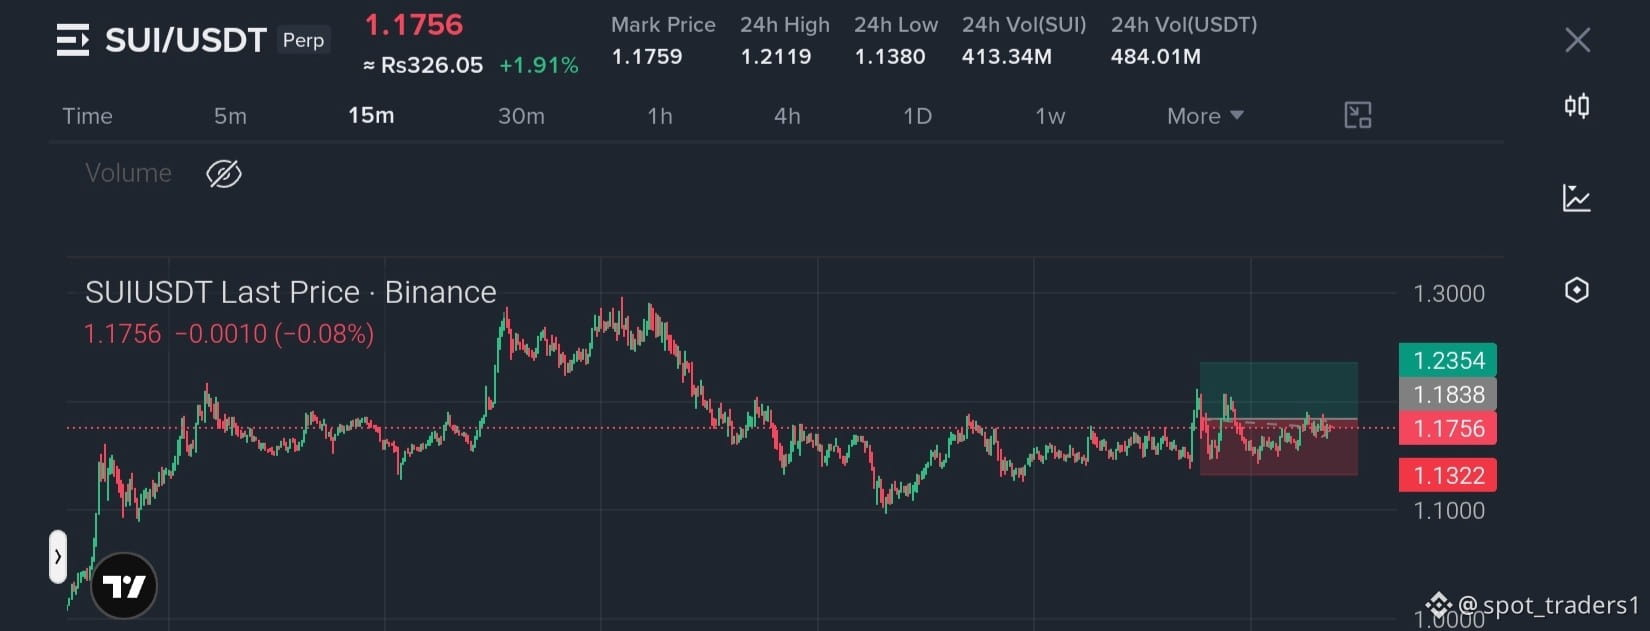
$SUI is showing strong momentum and looks solid at the current level. If this zone continues to hold, SUI could potentially push higher. Long setup.
Entry: $1.15 - $1.2
TP: $1.25 - $1.3 - $1.4 - $1.6 - $2
SL: $1.07
{future}(SUIUSDT)
$SUI is showing strong momentum and looks solid at the current level. If this zone continues to hold, SUI could potentially push higher. Long setup.
Entry: $1.15 - $1.2
TP: $1.25 - $1.3 - $1.4 - $1.6 - $2
SL: $1.07
Entry: $1.15 - $1.2
TP: $1.25 - $1.3 - $1.4 - $1.6 - $2
SL: $1.07
67
Log in to explore more content
Join global crypto users on Binance Square
⚡️ Get latest and useful information about crypto.
💬 Trusted by the world’s largest crypto exchange.
👍 Discover real insights from verified creators.
Email / Phone number
Trending Topics
EtherGains70.9%InQ3
130,602 views
1,066 Discussing
One of the best third quarters in history 💰
September closed out last night, and with it, the quarter. For the quarter, BTC is up 42%—the second-best Q3 on record. ETH had a record-breaking Q3 overall, up 70%.
Looking at the chart, things are still looking good: we’re holding support, but we’re testing it more and more often. Plus, ETF momentum is weakening — inflows are gradually declining, and yesterday saw outflows for the first time in a long while.
Yes, historically, October has been a good month for crypto — it’s not called “Uptober” for nothing. But it’s also one of the most volatile months. Last year, for example, we managed to hit a new all-time high (ATH) and experience a flash crash.
🚀 High Accuracy Trades.
$BTC
$ETH
$SOL
#EtherGains70.9%InQ3 #DollarIndexHitsHighestSinceMay2025 #CFTCSubmitsTwoEventContractRulesToWhiteHouse #MicronBeatsEarningsLiftsGuidance
Knowledge is Power
·0 Likes
·211 views
TreasuryLetsStatesFileStablecoinCertificationsEarly
7,023 views
74 Discussing
US10YearYieldNears5.3%
138,868 views
1,088 Discussing