

أميرة سيد
1.3k Posts

أميرة سيد
Report
Block User
Professional Trader | Free Chart Analysis | Signal & Update about Crypto |
Open Trade
Occasional Trader
1.2 Years
29 Following
1.0K+ Followers
483 Liked
Posts
Portfolio
All
Quotes
·
--
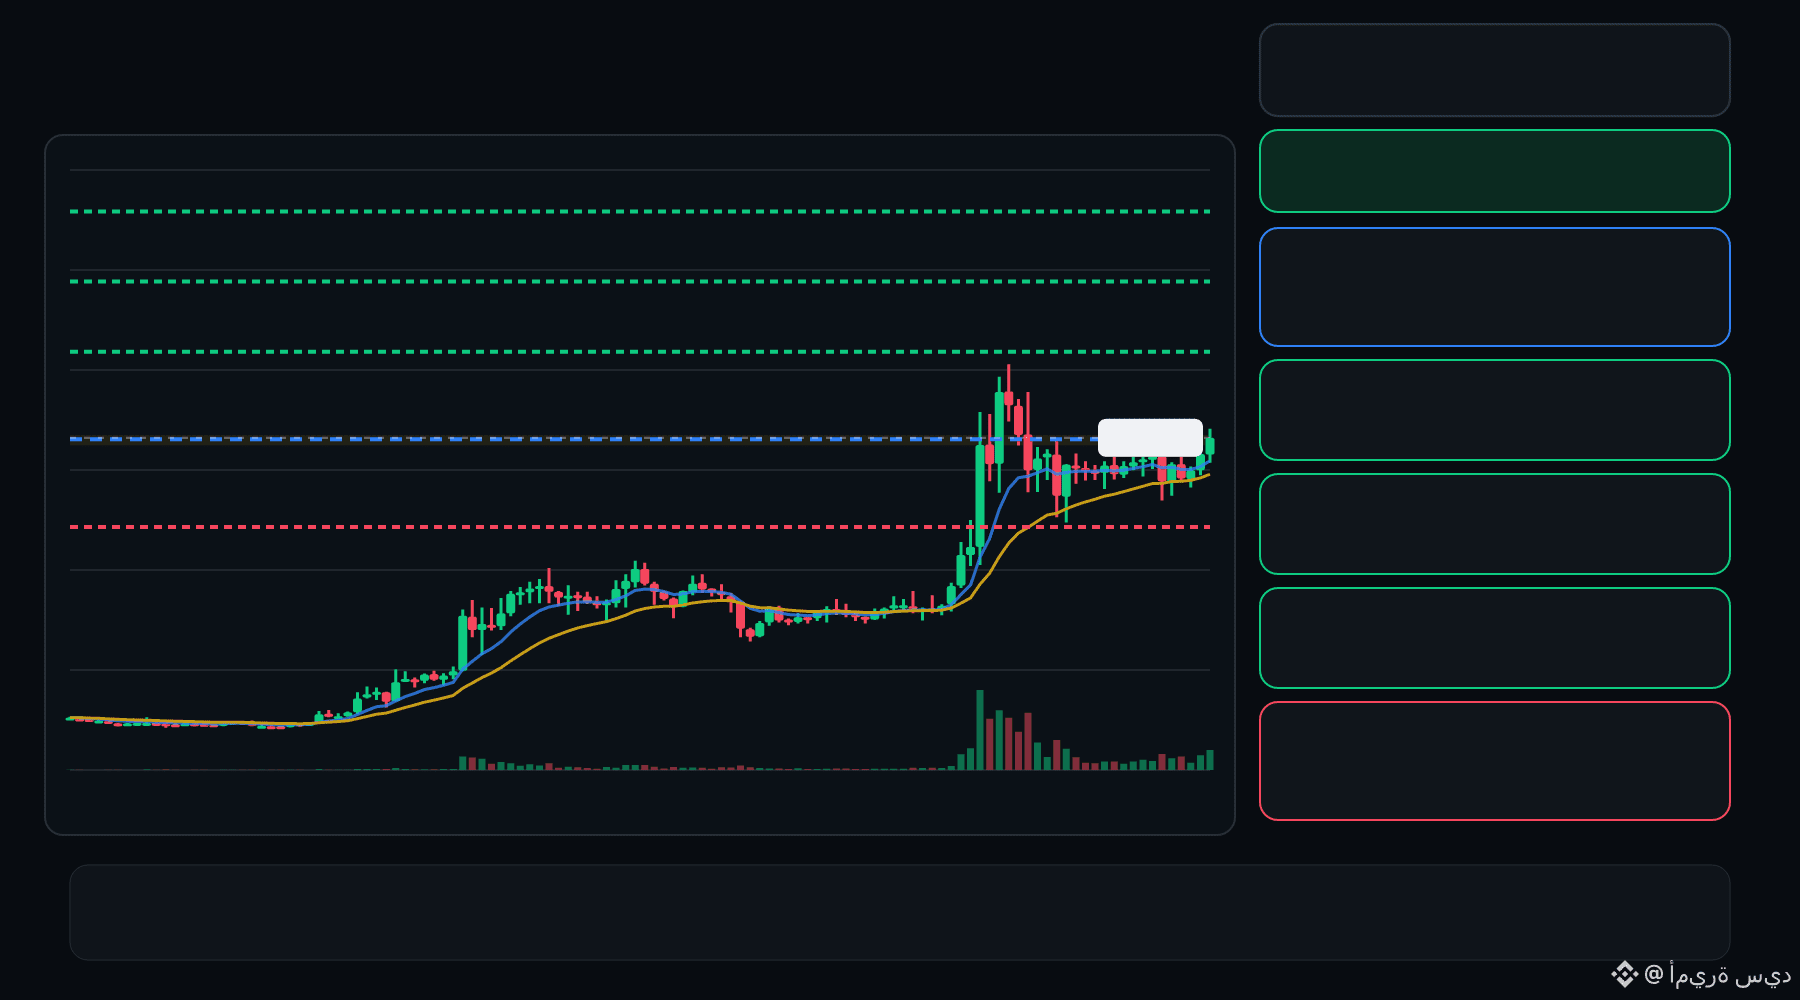
🟢 COLLECT bulls are defending the pullback… is continuation setting up ⁉️
🟩 COLLECT LONG
Entry: 0.02376 – 0.02393
TP1: 0.02568
TP2: 0.02715
TP3: 0.02862
Stop Loss: 0.02201
The 15M chart shows a bullish structure with momentum and volume confirmation. A controlled retest of the entry zone may give the setup a cleaner trigger.
Plan: Wait for confirmation/rejection inside the entry zone; don’t chase the move.
DYOR | Manage Risk | Avoid Over-Leverage
🟢 COLLECT bulls are defending the pullback… is continuation setting up ⁉️
🟩 COLLECT LONG
Entry: 0.02376 – 0.02393
TP1: 0.02568
TP2: 0.02715
TP3: 0.02862
Stop Loss: 0.02201
The 15M chart shows a bullish structure with momentum and volume confirmation. A controlled retest of the entry zone may give the setup a cleaner trigger.
Plan: Wait for confirmation/rejection inside the entry zone; don’t chase the move.
DYOR | Manage Risk | Avoid Over-Leverage
🟩 COLLECT LONG
Entry: 0.02376 – 0.02393
TP1: 0.02568
TP2: 0.02715
TP3: 0.02862
Stop Loss: 0.02201
The 15M chart shows a bullish structure with momentum and volume confirmation. A controlled retest of the entry zone may give the setup a cleaner trigger.
Plan: Wait for confirmation/rejection inside the entry zone; don’t chase the move.
DYOR | Manage Risk | Avoid Over-Leverage
1
·
--
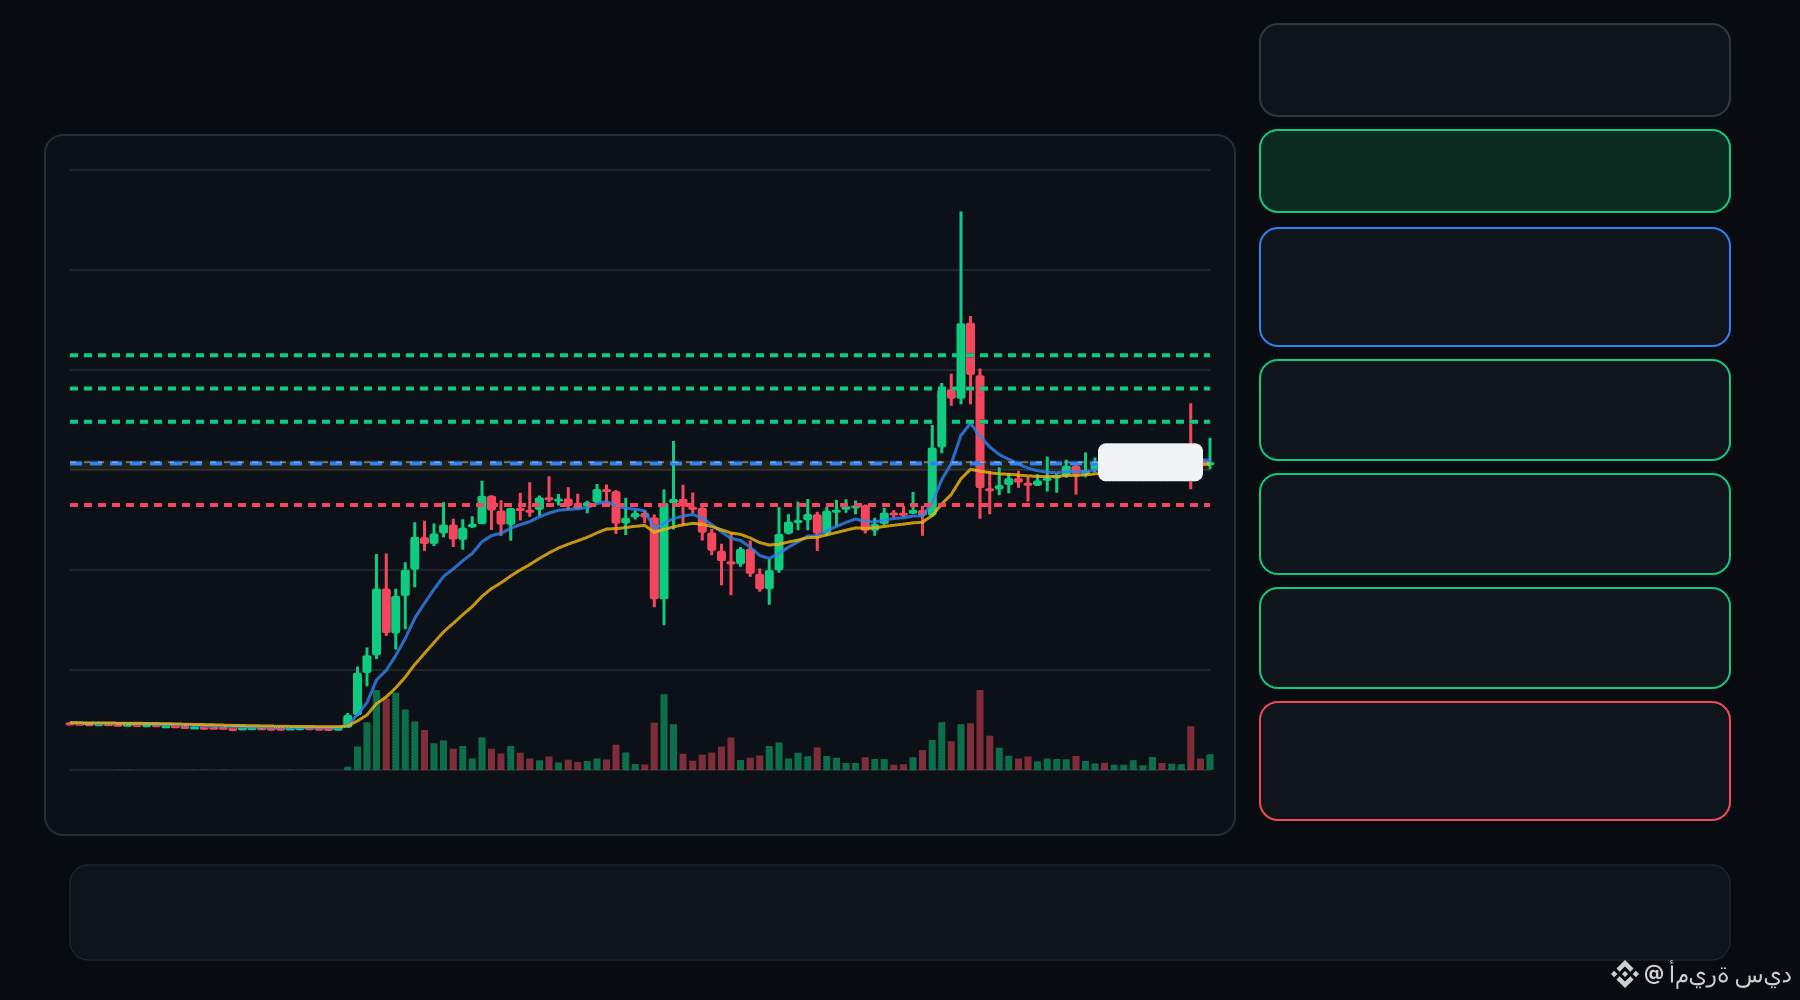
🟢 AIN bulls are defending the pullback… is continuation setting up ⁉️
🟩 AIN LONG
Entry: 0.05476 – 0.05552
TP1: 0.06017
TP2: 0.06420
TP3: 0.06822
Stop Loss: 0.05011
The 15M chart shows a bullish structure with momentum and volume confirmation. A controlled retest of the entry zone may give the setup a cleaner trigger.
Plan: Wait for confirmation/rejection inside the entry zone; don’t chase the move.
DYOR | Manage Risk | Avoid Over-Leverage
🟢 AIN bulls are defending the pullback… is continuation setting up ⁉️
🟩 AIN LONG
Entry: 0.05476 – 0.05552
TP1: 0.06017
TP2: 0.06420
TP3: 0.06822
Stop Loss: 0.05011
The 15M chart shows a bullish structure with momentum and volume confirmation. A controlled retest of the entry zone may give the setup a cleaner trigger.
Plan: Wait for confirmation/rejection inside the entry zone; don’t chase the move.
DYOR | Manage Risk | Avoid Over-Leverage
🟩 AIN LONG
Entry: 0.05476 – 0.05552
TP1: 0.06017
TP2: 0.06420
TP3: 0.06822
Stop Loss: 0.05011
The 15M chart shows a bullish structure with momentum and volume confirmation. A controlled retest of the entry zone may give the setup a cleaner trigger.
Plan: Wait for confirmation/rejection inside the entry zone; don’t chase the move.
DYOR | Manage Risk | Avoid Over-Leverage
3
·
--
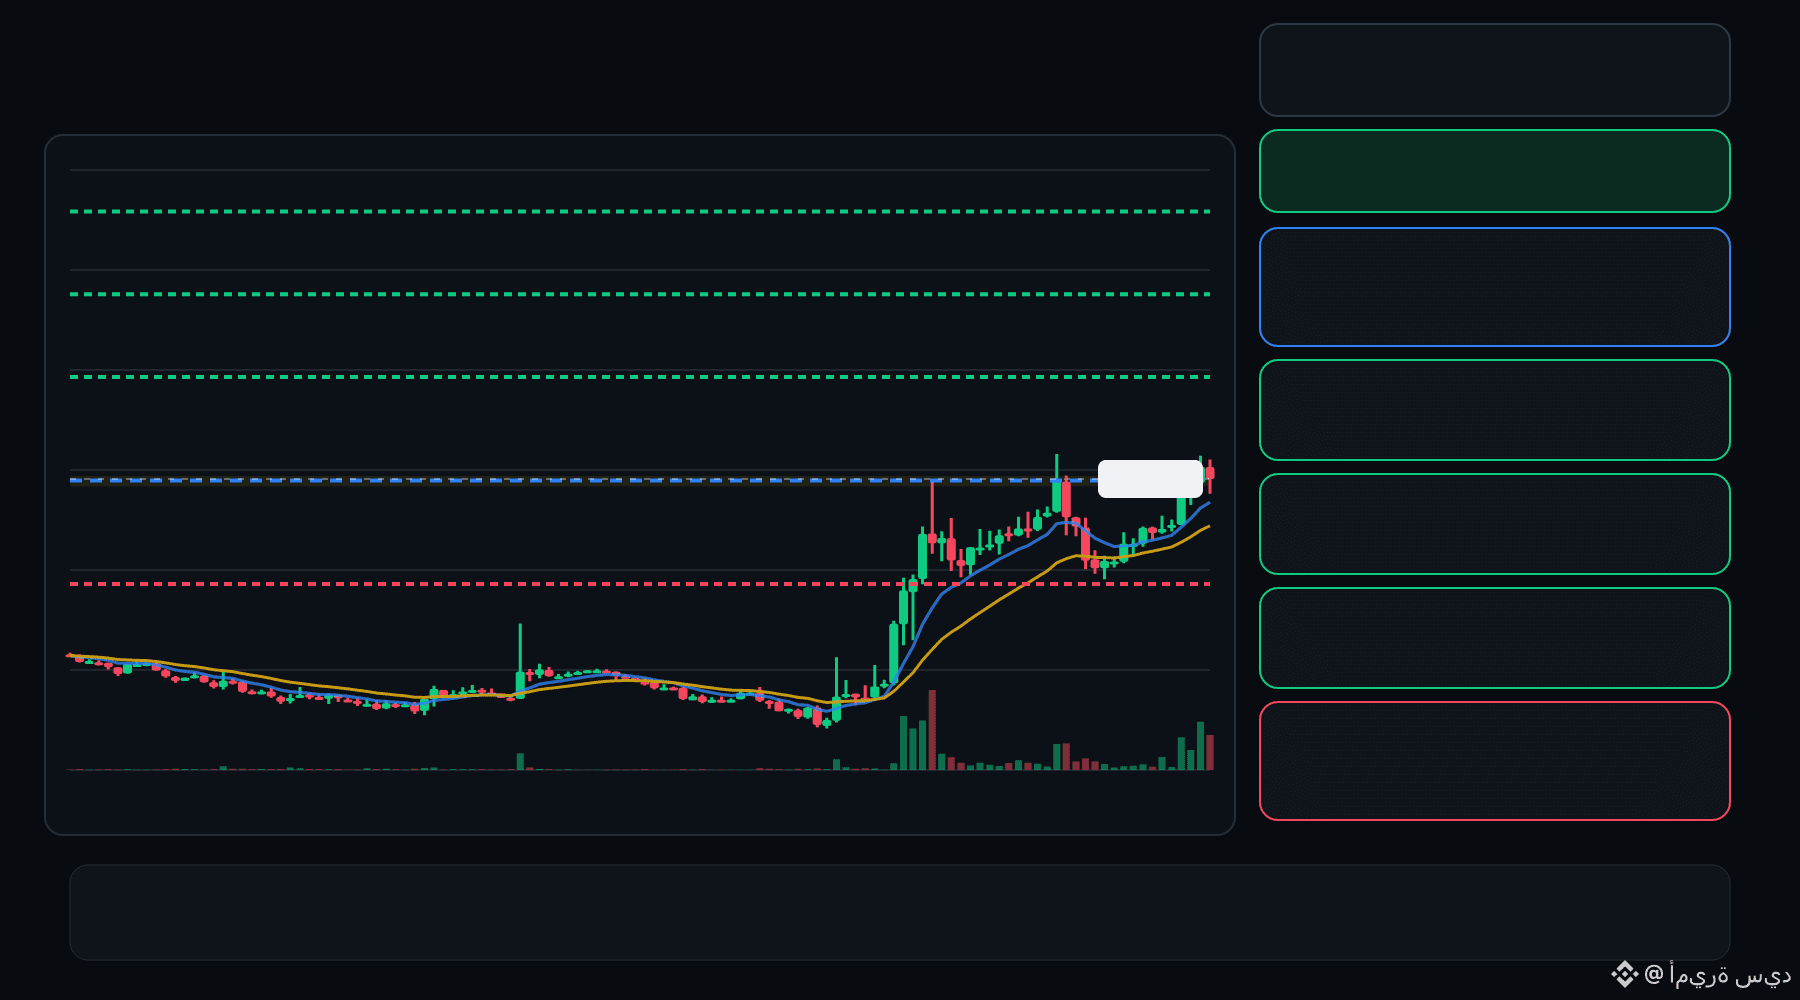
🟢 PHAROS bulls are defending the pullback… is continuation setting up ⁉️
🟩 PHAROS LONG
Entry: 0.8199 – 0.8241
TP1: 0.8718
TP2: 0.9116
TP3: 0.9514
Stop Loss: 0.7723
The 15M chart shows a bullish structure with momentum and volume confirmation. A controlled retest of the entry zone may give the setup a cleaner trigger.
Plan: Wait for confirmation/rejection inside the entry zone; don’t chase the move.
DYOR | Manage Risk | Avoid Over-Leverage
🟢 PHAROS bulls are defending the pullback… is continuation setting up ⁉️
🟩 PHAROS LONG
Entry: 0.8199 – 0.8241
TP1: 0.8718
TP2: 0.9116
TP3: 0.9514
Stop Loss: 0.7723
The 15M chart shows a bullish structure with momentum and volume confirmation. A controlled retest of the entry zone may give the setup a cleaner trigger.
Plan: Wait for confirmation/rejection inside the entry zone; don’t chase the move.
DYOR | Manage Risk | Avoid Over-Leverage
🟩 PHAROS LONG
Entry: 0.8199 – 0.8241
TP1: 0.8718
TP2: 0.9116
TP3: 0.9514
Stop Loss: 0.7723
The 15M chart shows a bullish structure with momentum and volume confirmation. A controlled retest of the entry zone may give the setup a cleaner trigger.
Plan: Wait for confirmation/rejection inside the entry zone; don’t chase the move.
DYOR | Manage Risk | Avoid Over-Leverage
·
--
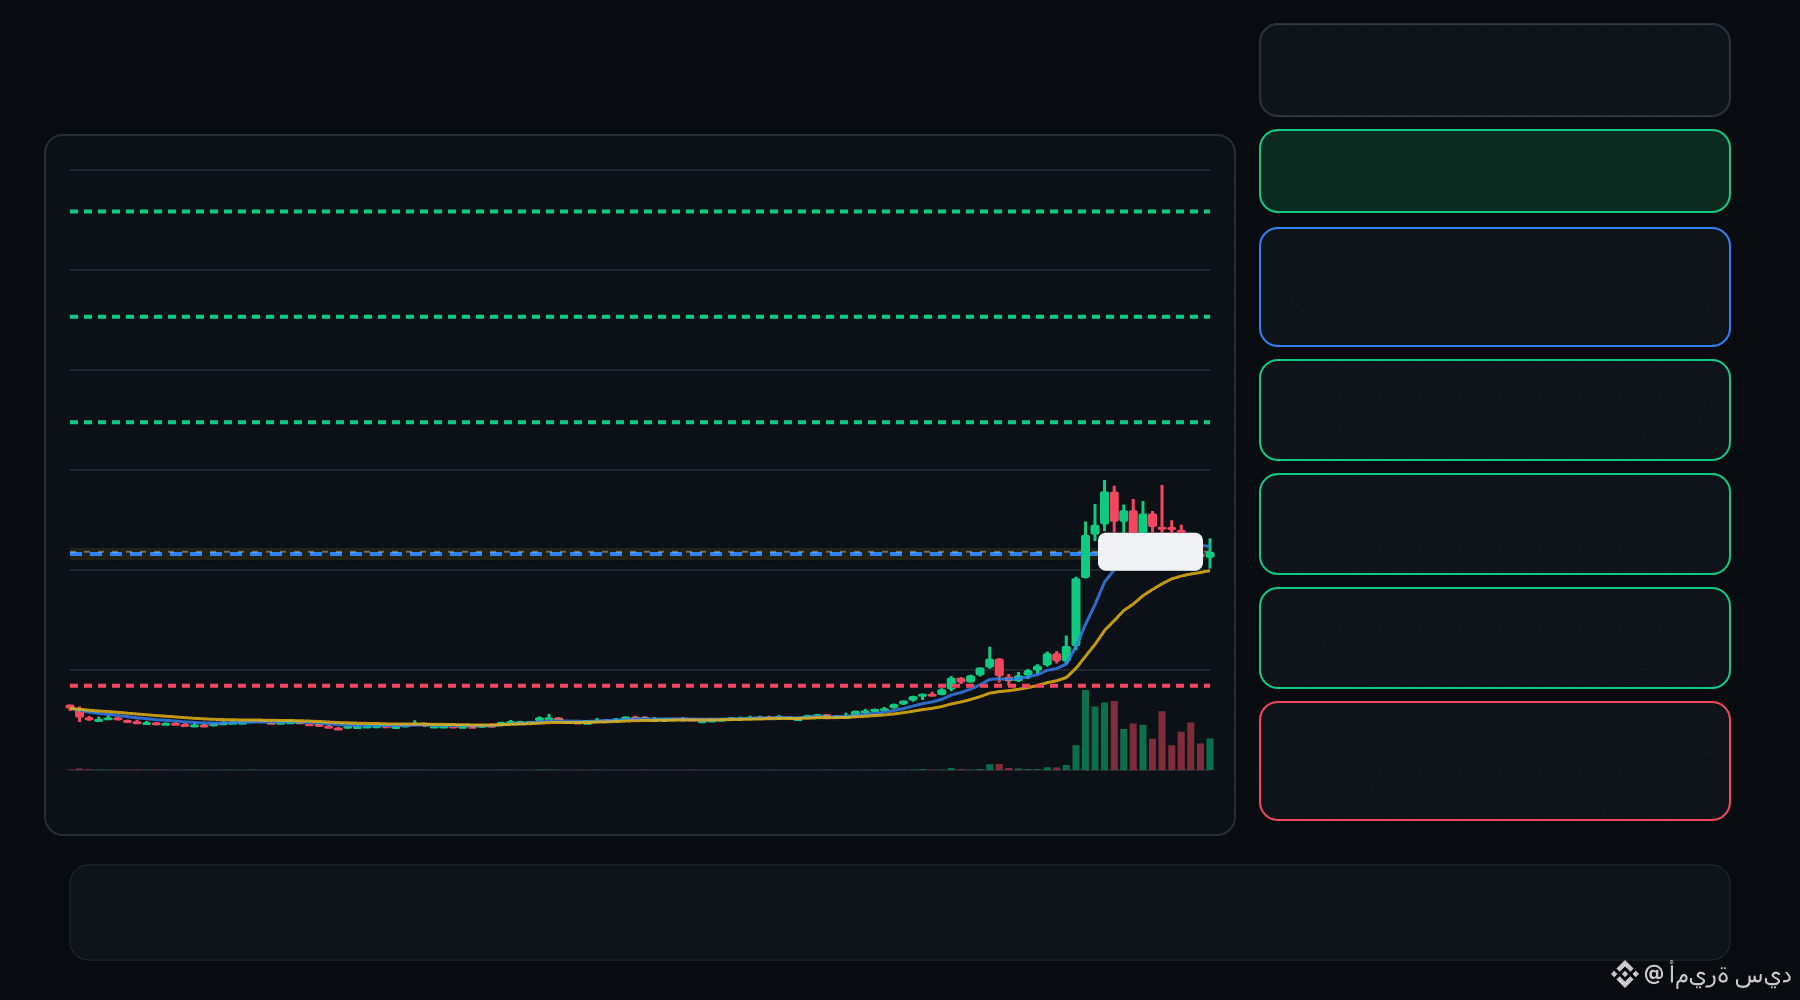
🟢 BEAMX bulls are defending the pullback… is continuation setting up ⁉️
🟩 BEAMX LONG
Entry: 0.002739 – 0.002784
TP1: 0.003263
TP2: 0.003665
TP3: 0.004067
Stop Loss: 0.002260
The 15M chart shows a bullish structure with momentum and volume confirmation. A controlled retest of the entry zone may give the setup a cleaner trigger.
Plan: Wait for confirmation/rejection inside the entry zone; don’t chase the move.
DYOR | Manage Risk | Avoid Over-Leverage
🟢 BEAMX bulls are defending the pullback… is continuation setting up ⁉️
🟩 BEAMX LONG
Entry: 0.002739 – 0.002784
TP1: 0.003263
TP2: 0.003665
TP3: 0.004067
Stop Loss: 0.002260
The 15M chart shows a bullish structure with momentum and volume confirmation. A controlled retest of the entry zone may give the setup a cleaner trigger.
Plan: Wait for confirmation/rejection inside the entry zone; don’t chase the move.
DYOR | Manage Risk | Avoid Over-Leverage
🟩 BEAMX LONG
Entry: 0.002739 – 0.002784
TP1: 0.003263
TP2: 0.003665
TP3: 0.004067
Stop Loss: 0.002260
The 15M chart shows a bullish structure with momentum and volume confirmation. A controlled retest of the entry zone may give the setup a cleaner trigger.
Plan: Wait for confirmation/rejection inside the entry zone; don’t chase the move.
DYOR | Manage Risk | Avoid Over-Leverage
·
--
🟢 AIN bulls are defending the pullback… is continuation setting up ⁉️
🟩 AIN LONG
Entry: 0.05483 – 0.05553
TP1: 0.06229
TP2: 0.06798
TP3: 0.07367
Stop Loss: 0.04807
The 15M chart shows a bullish structure with momentum and volume confirmation. A controlled retest of the entry zone may give the setup a cleaner trigger.
Plan: Wait for confirmation/rejection inside the entry zone; don’t chase the move.
DYOR | Manage Risk | Avoid Over-Leverage
🟢 AIN bulls are defending the pullback… is continuation setting up ⁉️
🟩 AIN LONG
Entry: 0.05483 – 0.05553
TP1: 0.06229
TP2: 0.06798
TP3: 0.07367
Stop Loss: 0.04807
The 15M chart shows a bullish structure with momentum and volume confirmation. A controlled retest of the entry zone may give the setup a cleaner trigger.
Plan: Wait for confirmation/rejection inside the entry zone; don’t chase the move.
DYOR | Manage Risk | Avoid Over-Leverage
🟩 AIN LONG
Entry: 0.05483 – 0.05553
TP1: 0.06229
TP2: 0.06798
TP3: 0.07367
Stop Loss: 0.04807
The 15M chart shows a bullish structure with momentum and volume confirmation. A controlled retest of the entry zone may give the setup a cleaner trigger.
Plan: Wait for confirmation/rejection inside the entry zone; don’t chase the move.
DYOR | Manage Risk | Avoid Over-Leverage
·
--
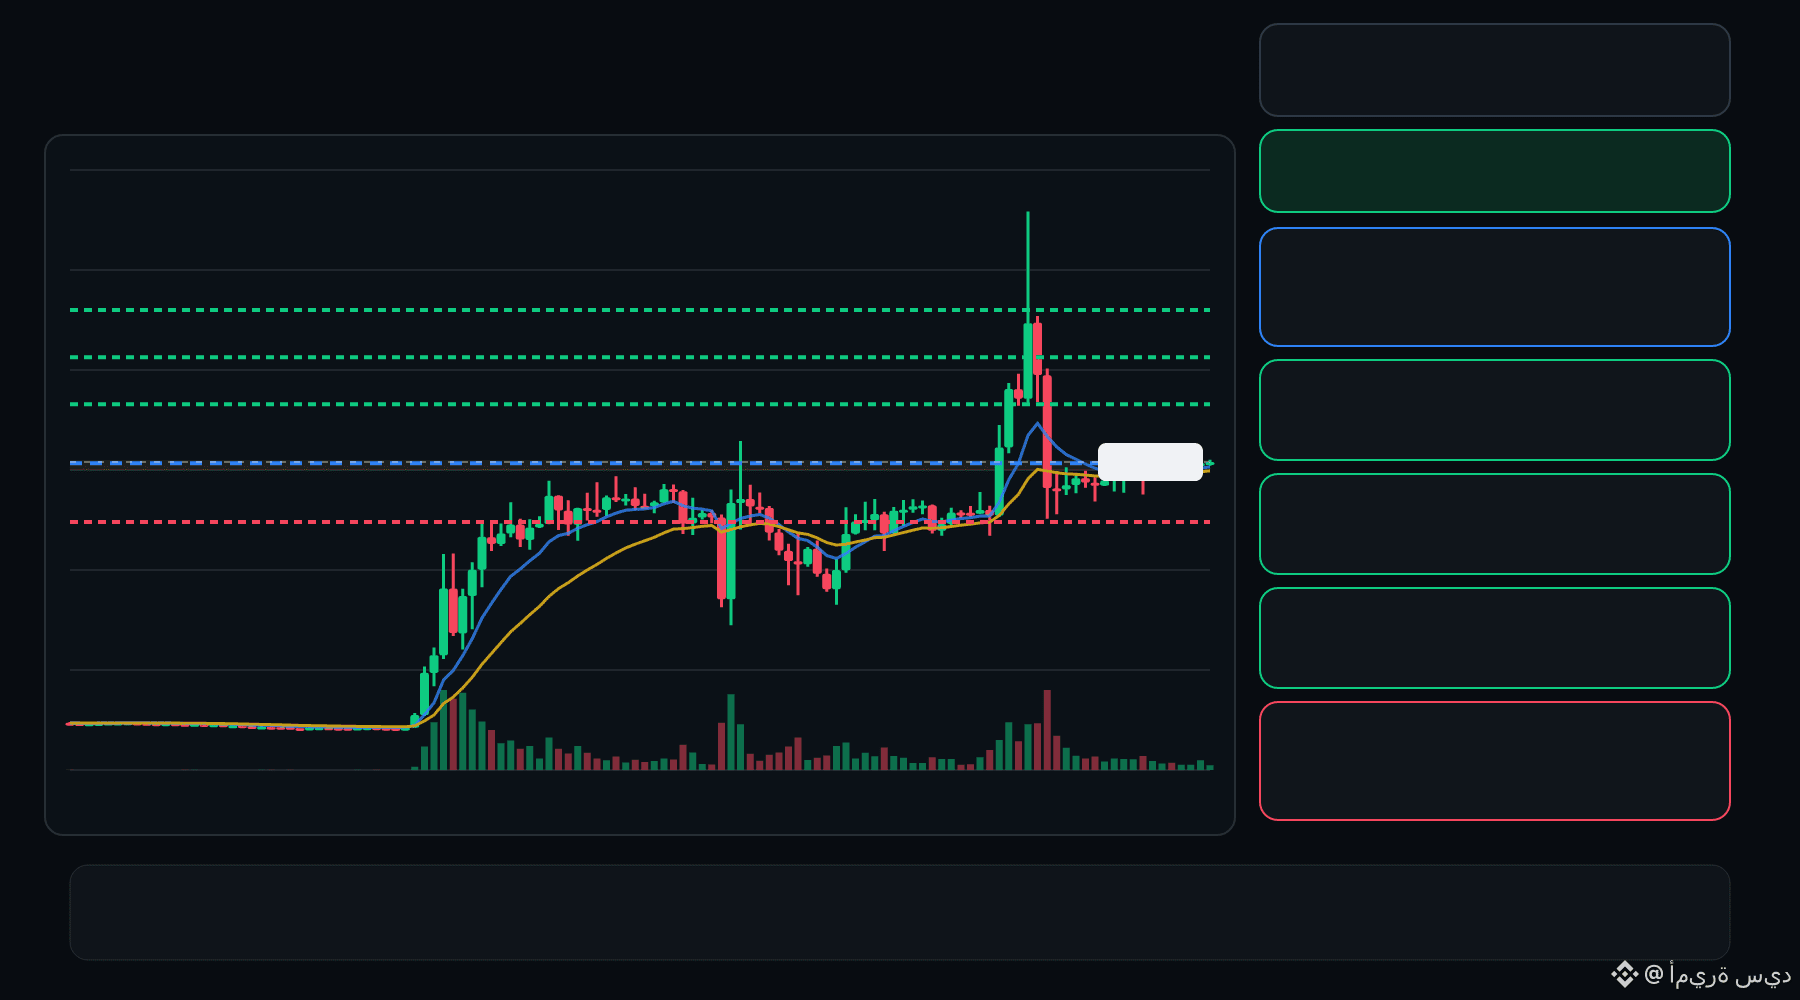
🔴 US bears are pressing the pullback… is the rejection getting deeper ⁉️
🔴 US SHORT
Entry: 0.01863 – 0.01871
TP1: 0.01765
TP2: 0.01684
TP3: 0.01602
Stop Loss: 0.01969
The 15M chart shows a bearish structure with momentum and volume confirmation. A controlled retest of the entry zone may give the setup a cleaner trigger.
Plan: Wait for confirmation/rejection inside the entry zone; don’t chase the move.
DYOR | Manage Risk | Avoid Over-Leverage
🔴 US bears are pressing the pullback… is the rejection getting deeper ⁉️
🔴 US SHORT
Entry: 0.01863 – 0.01871
TP1: 0.01765
TP2: 0.01684
TP3: 0.01602
Stop Loss: 0.01969
The 15M chart shows a bearish structure with momentum and volume confirmation. A controlled retest of the entry zone may give the setup a cleaner trigger.
Plan: Wait for confirmation/rejection inside the entry zone; don’t chase the move.
DYOR | Manage Risk | Avoid Over-Leverage
🔴 US SHORT
Entry: 0.01863 – 0.01871
TP1: 0.01765
TP2: 0.01684
TP3: 0.01602
Stop Loss: 0.01969
The 15M chart shows a bearish structure with momentum and volume confirmation. A controlled retest of the entry zone may give the setup a cleaner trigger.
Plan: Wait for confirmation/rejection inside the entry zone; don’t chase the move.
DYOR | Manage Risk | Avoid Over-Leverage
1
·
--
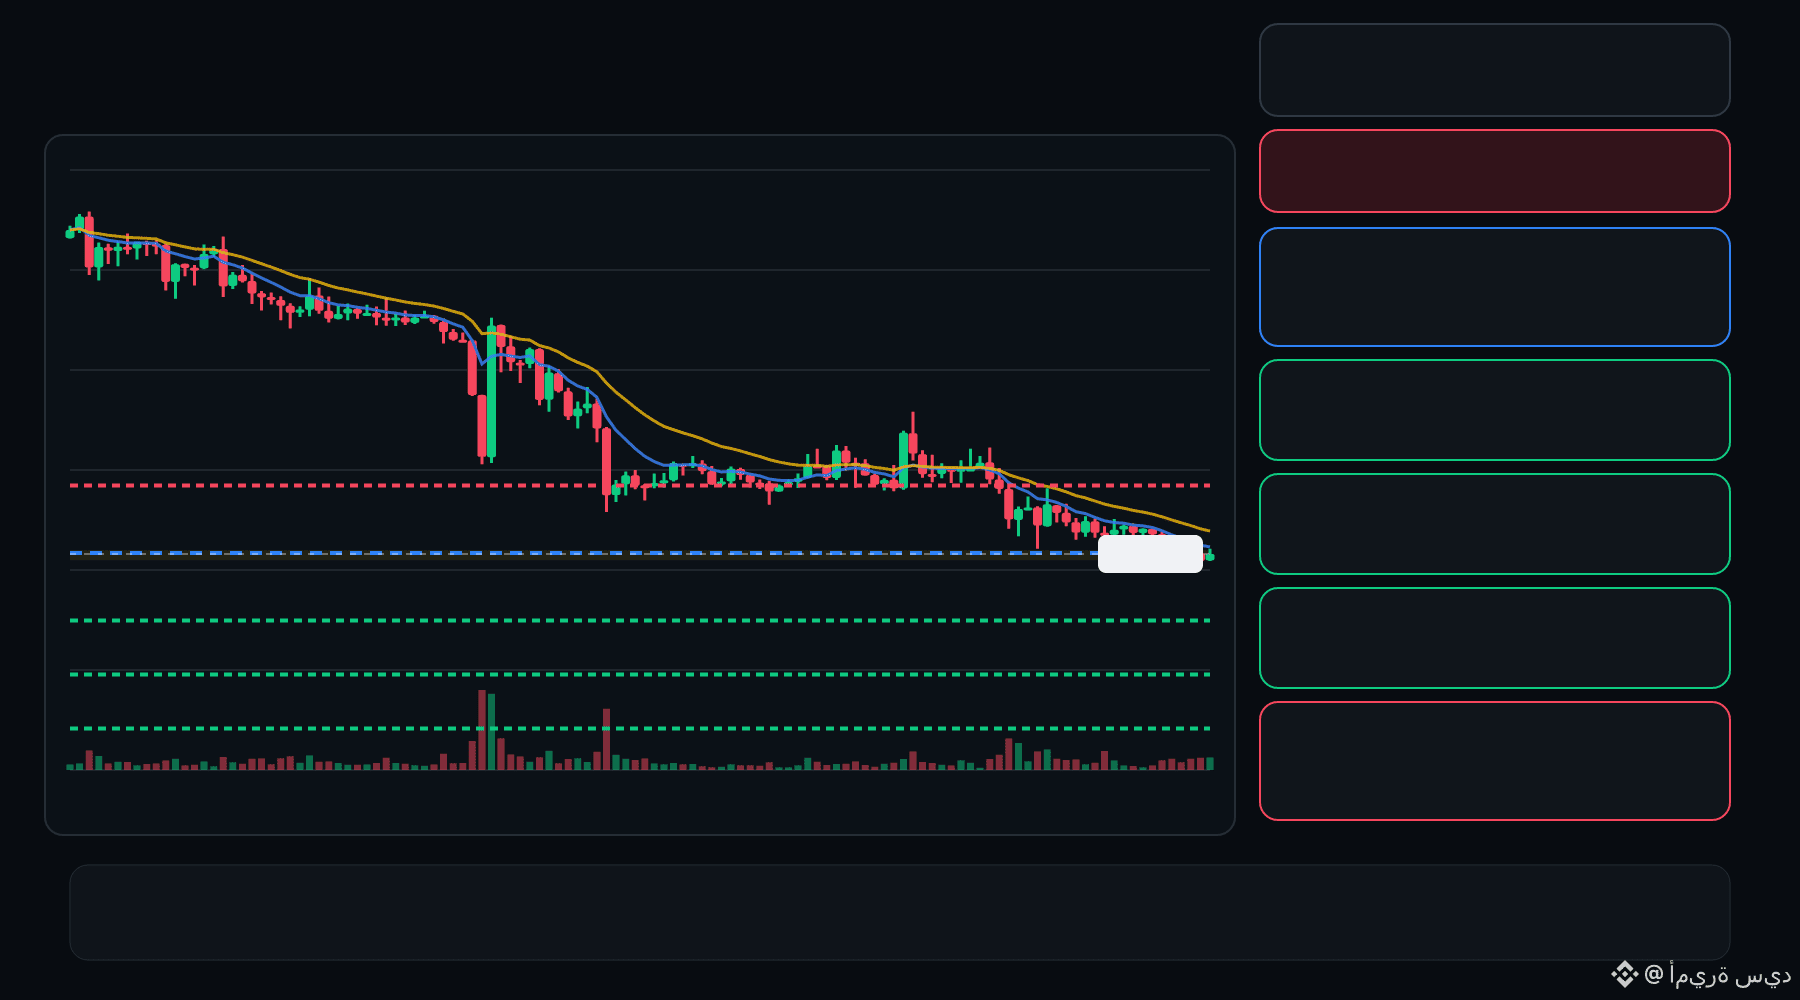
🟢 NOM bulls are defending the pullback… is continuation setting up ⁉️
🟩 NOM LONG
Entry: 0.002673 – 0.002698
TP1: 0.002978
TP2: 0.003212
TP3: 0.003446
Stop Loss: 0.002393
The 15M chart shows a bullish structure with momentum and volume confirmation. A controlled retest of the entry zone may give the setup a cleaner trigger.
Plan: Wait for confirmation/rejection inside the entry zone; don’t chase the move.
DYOR | Manage Risk | Avoid Over-Leverage
🟢 NOM bulls are defending the pullback… is continuation setting up ⁉️
🟩 NOM LONG
Entry: 0.002673 – 0.002698
TP1: 0.002978
TP2: 0.003212
TP3: 0.003446
Stop Loss: 0.002393
The 15M chart shows a bullish structure with momentum and volume confirmation. A controlled retest of the entry zone may give the setup a cleaner trigger.
Plan: Wait for confirmation/rejection inside the entry zone; don’t chase the move.
DYOR | Manage Risk | Avoid Over-Leverage
🟩 NOM LONG
Entry: 0.002673 – 0.002698
TP1: 0.002978
TP2: 0.003212
TP3: 0.003446
Stop Loss: 0.002393
The 15M chart shows a bullish structure with momentum and volume confirmation. A controlled retest of the entry zone may give the setup a cleaner trigger.
Plan: Wait for confirmation/rejection inside the entry zone; don’t chase the move.
DYOR | Manage Risk | Avoid Over-Leverage
·
--
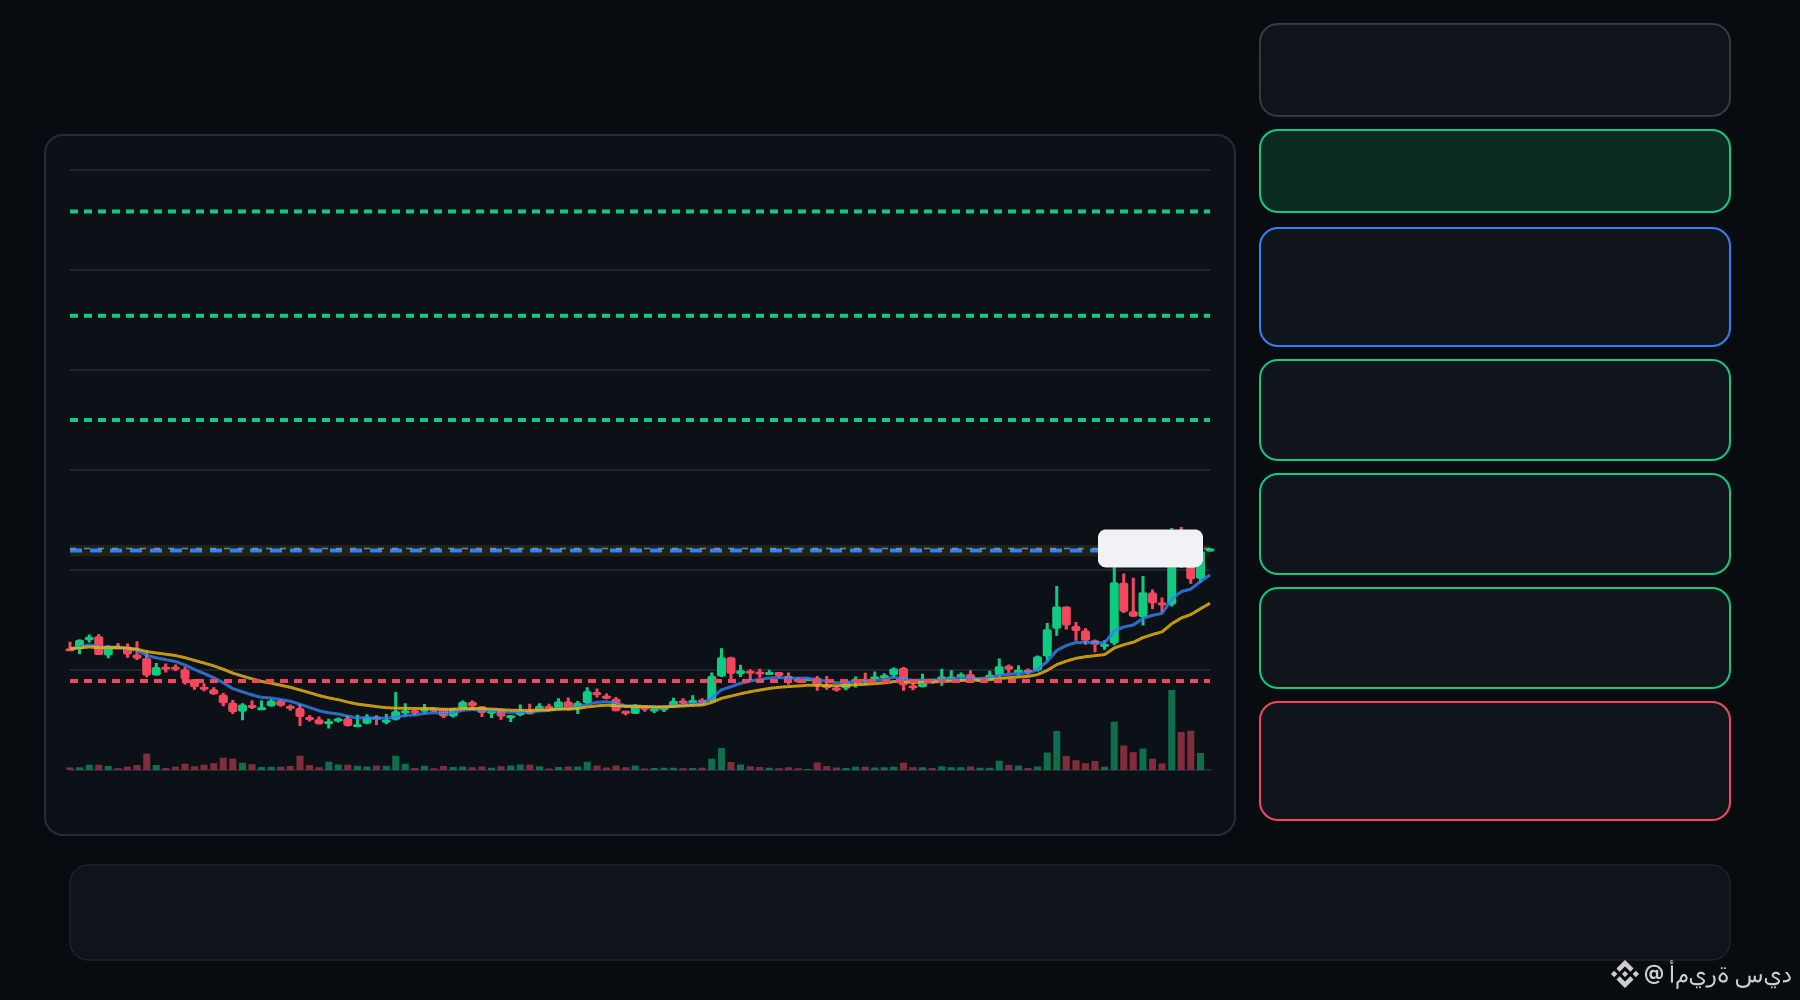
🟢 IOTA bulls are defending the pullback… is continuation setting up ⁉️
🟩 IOTA LONG
Entry: 0.05910 – 0.05945
TP1: 0.06228
TP2: 0.06468
TP3: 0.06708
Stop Loss: 0.05627
The 15M chart shows a bullish structure with momentum and volume confirmation. A controlled retest of the entry zone may give the setup a cleaner trigger.
Plan: Wait for confirmation/rejection inside the entry zone; don’t chase the move.
DYOR | Manage Risk | Avoid Over-Leverage
🟢 IOTA bulls are defending the pullback… is continuation setting up ⁉️
🟩 IOTA LONG
Entry: 0.05910 – 0.05945
TP1: 0.06228
TP2: 0.06468
TP3: 0.06708
Stop Loss: 0.05627
The 15M chart shows a bullish structure with momentum and volume confirmation. A controlled retest of the entry zone may give the setup a cleaner trigger.
Plan: Wait for confirmation/rejection inside the entry zone; don’t chase the move.
DYOR | Manage Risk | Avoid Over-Leverage
🟩 IOTA LONG
Entry: 0.05910 – 0.05945
TP1: 0.06228
TP2: 0.06468
TP3: 0.06708
Stop Loss: 0.05627
The 15M chart shows a bullish structure with momentum and volume confirmation. A controlled retest of the entry zone may give the setup a cleaner trigger.
Plan: Wait for confirmation/rejection inside the entry zone; don’t chase the move.
DYOR | Manage Risk | Avoid Over-Leverage
·
--
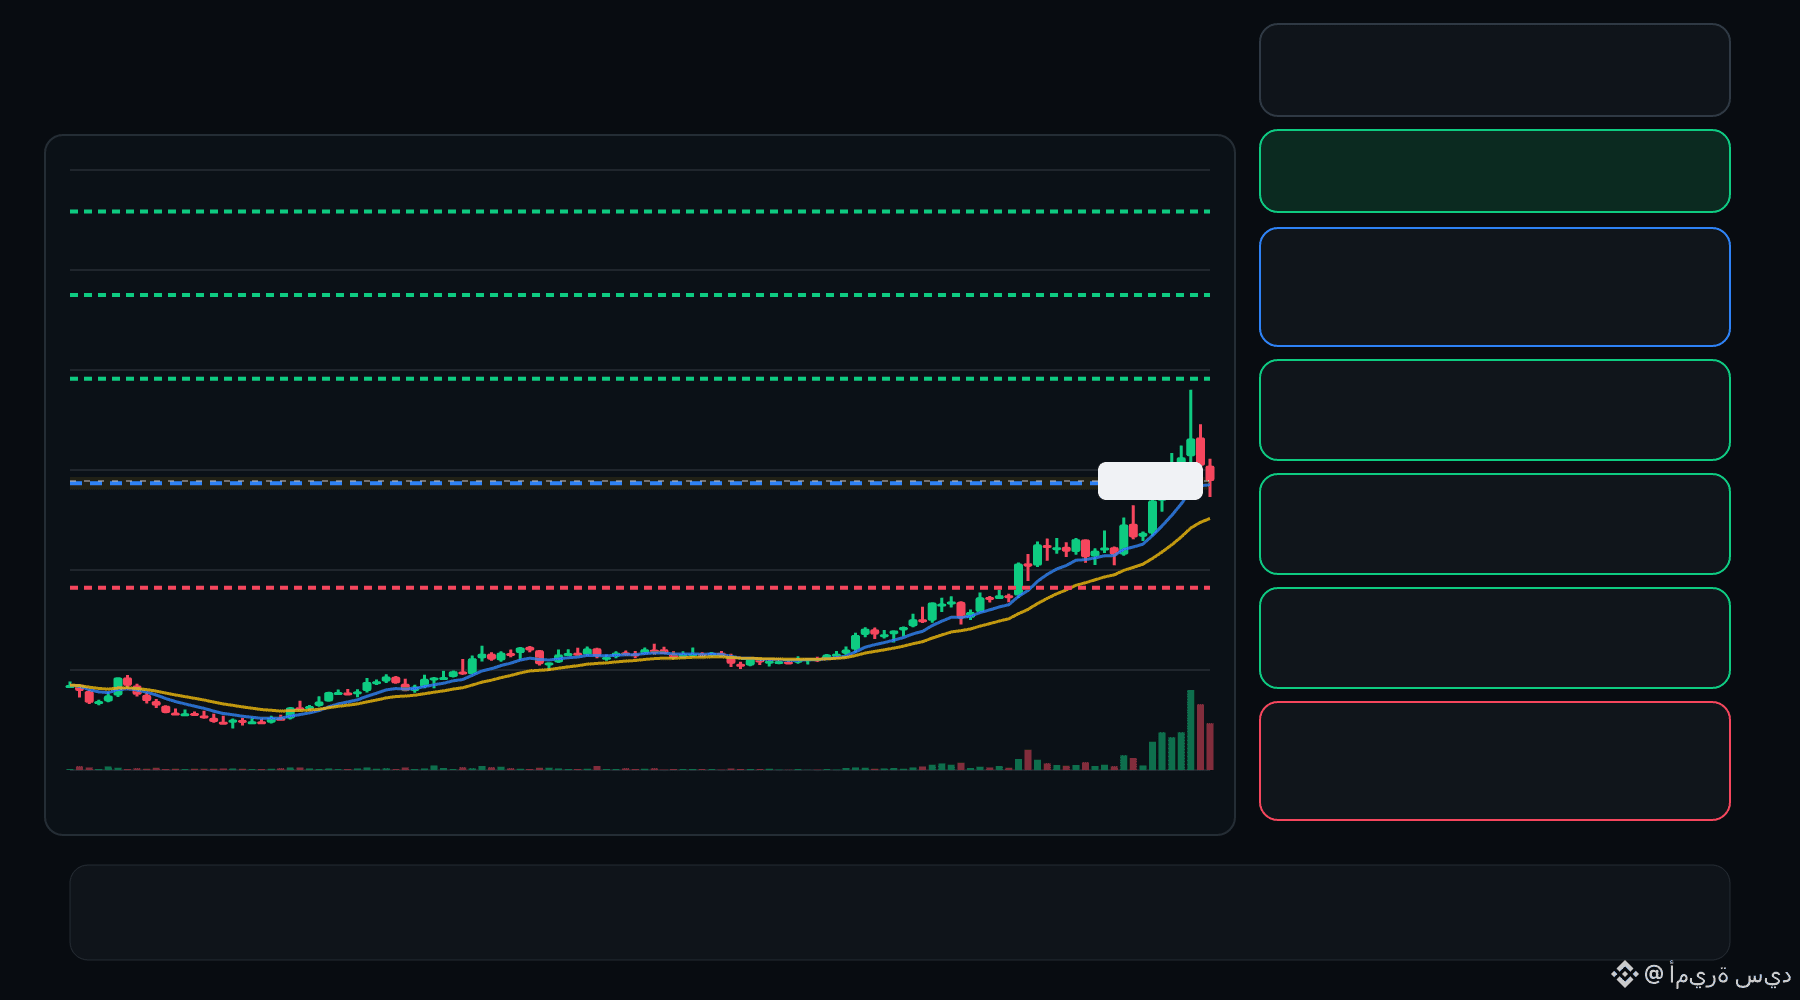
🔴 BR bears are pressing the pullback… is the rejection getting deeper ⁉️
🔴 BR SHORT
Entry: 0.4888 – 0.4911
TP1: 0.4604
TP2: 0.4367
TP3: 0.4130
Stop Loss: 0.5195
The 15M chart shows a bearish structure with momentum and volume confirmation. A controlled retest of the entry zone may give the setup a cleaner trigger.
Plan: Wait for confirmation/rejection inside the entry zone; don’t chase the move.
DYOR | Manage Risk | Avoid Over-Leverage
🔴 BR bears are pressing the pullback… is the rejection getting deeper ⁉️
🔴 BR SHORT
Entry: 0.4888 – 0.4911
TP1: 0.4604
TP2: 0.4367
TP3: 0.4130
Stop Loss: 0.5195
The 15M chart shows a bearish structure with momentum and volume confirmation. A controlled retest of the entry zone may give the setup a cleaner trigger.
Plan: Wait for confirmation/rejection inside the entry zone; don’t chase the move.
DYOR | Manage Risk | Avoid Over-Leverage
🔴 BR SHORT
Entry: 0.4888 – 0.4911
TP1: 0.4604
TP2: 0.4367
TP3: 0.4130
Stop Loss: 0.5195
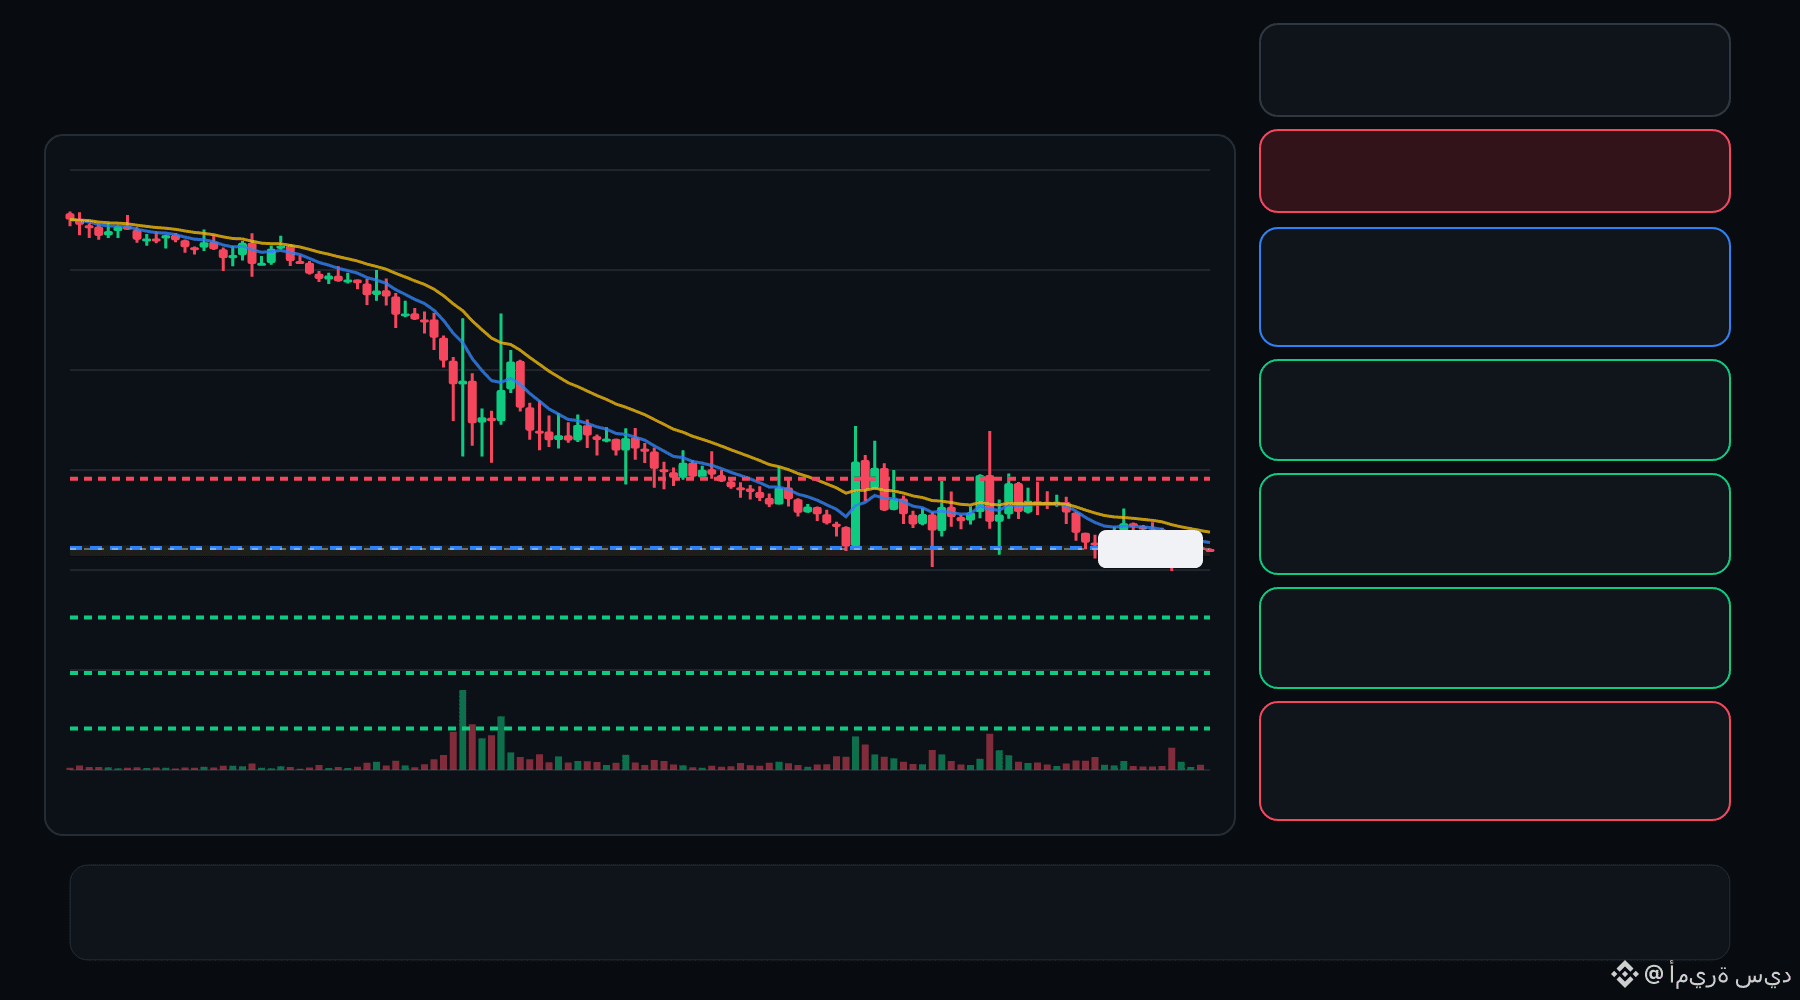
The 15M chart shows a bearish structure with momentum and volume confirmation. A controlled retest of the entry zone may give the setup a cleaner trigger.
Plan: Wait for confirmation/rejection inside the entry zone; don’t chase the move.
DYOR | Manage Risk | Avoid Over-Leverage
·
--
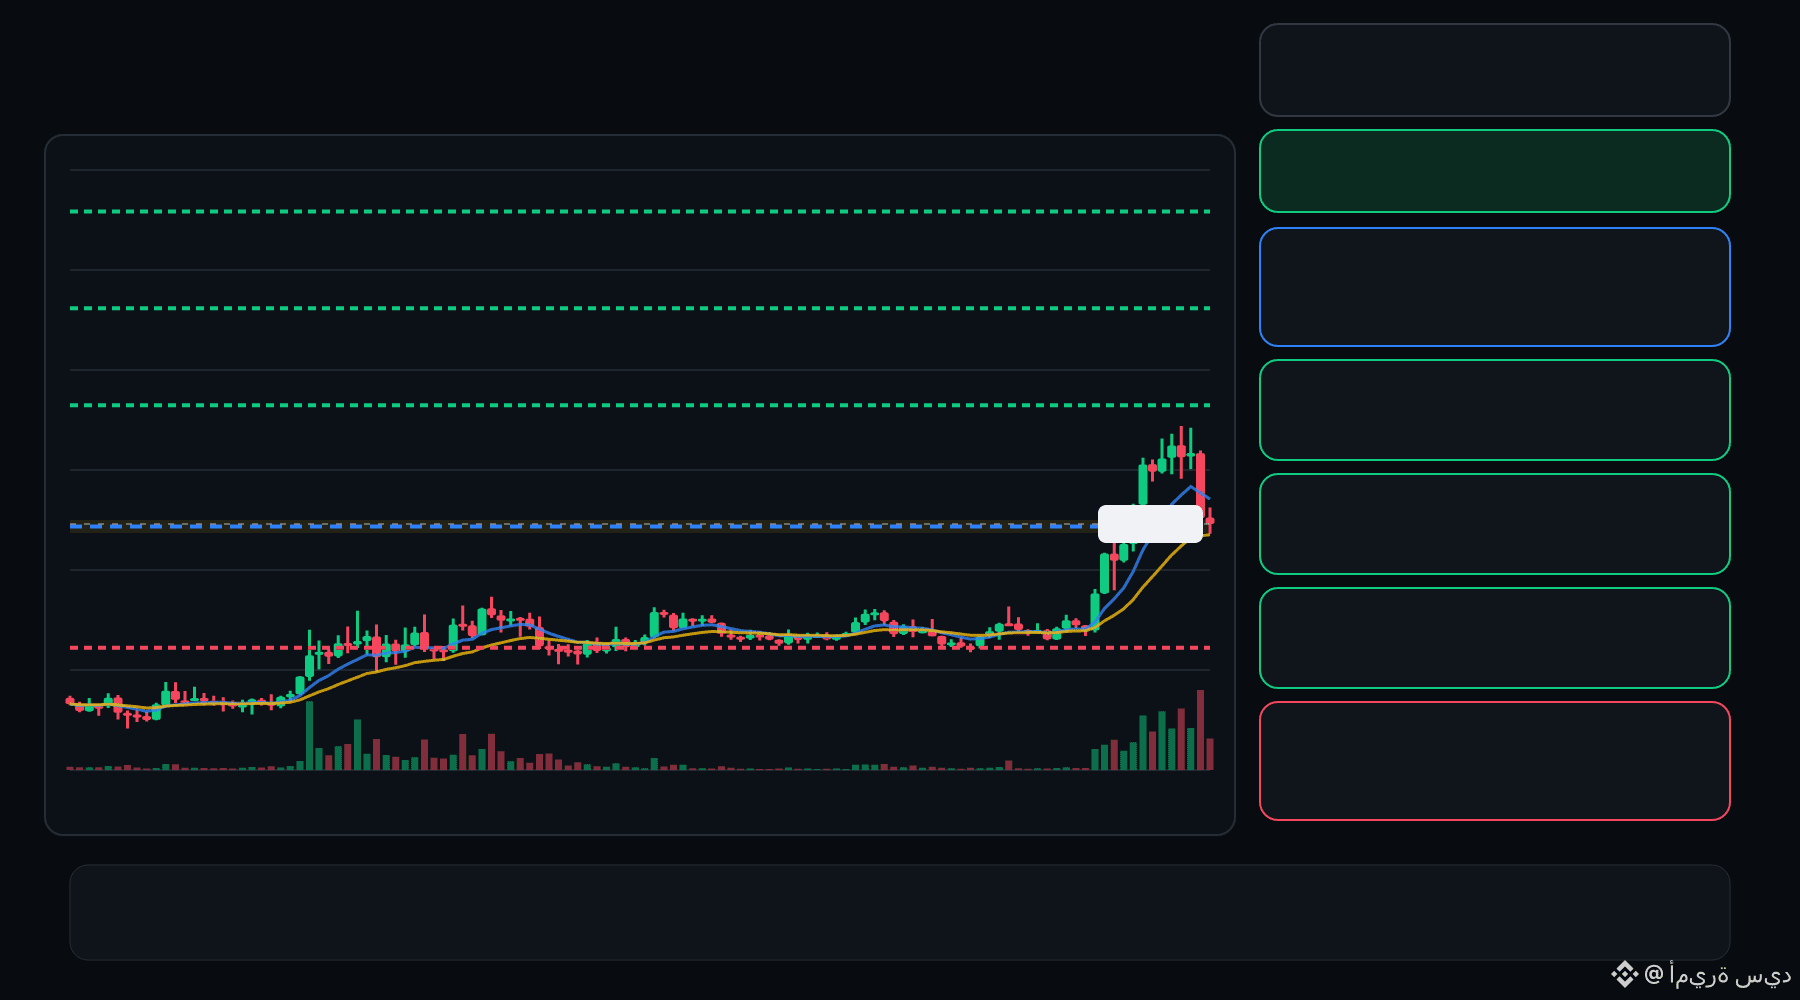
🟢 ATH bulls are defending the pullback… is continuation setting up ⁉️
🟩 ATH LONG
Entry: 0.007796 – 0.007880
TP1: 0.008612
TP2: 0.009230
TP3: 0.009849
Stop Loss: 0.007065
The 15M chart shows a bullish structure with momentum and volume confirmation. A controlled retest of the entry zone may give the setup a cleaner trigger.
Plan: Wait for confirmation/rejection inside the entry zone; don’t chase the move.
DYOR | Manage Risk | Avoid Over-Leverage
🟢 ATH bulls are defending the pullback… is continuation setting up ⁉️
🟩 ATH LONG
Entry: 0.007796 – 0.007880
TP1: 0.008612
TP2: 0.009230
TP3: 0.009849
Stop Loss: 0.007065
The 15M chart shows a bullish structure with momentum and volume confirmation. A controlled retest of the entry zone may give the setup a cleaner trigger.
Plan: Wait for confirmation/rejection inside the entry zone; don’t chase the move.
DYOR | Manage Risk | Avoid Over-Leverage
🟩 ATH LONG
Entry: 0.007796 – 0.007880
TP1: 0.008612
TP2: 0.009230
TP3: 0.009849
Stop Loss: 0.007065
The 15M chart shows a bullish structure with momentum and volume confirmation. A controlled retest of the entry zone may give the setup a cleaner trigger.
Plan: Wait for confirmation/rejection inside the entry zone; don’t chase the move.
DYOR | Manage Risk | Avoid Over-Leverage
·
--
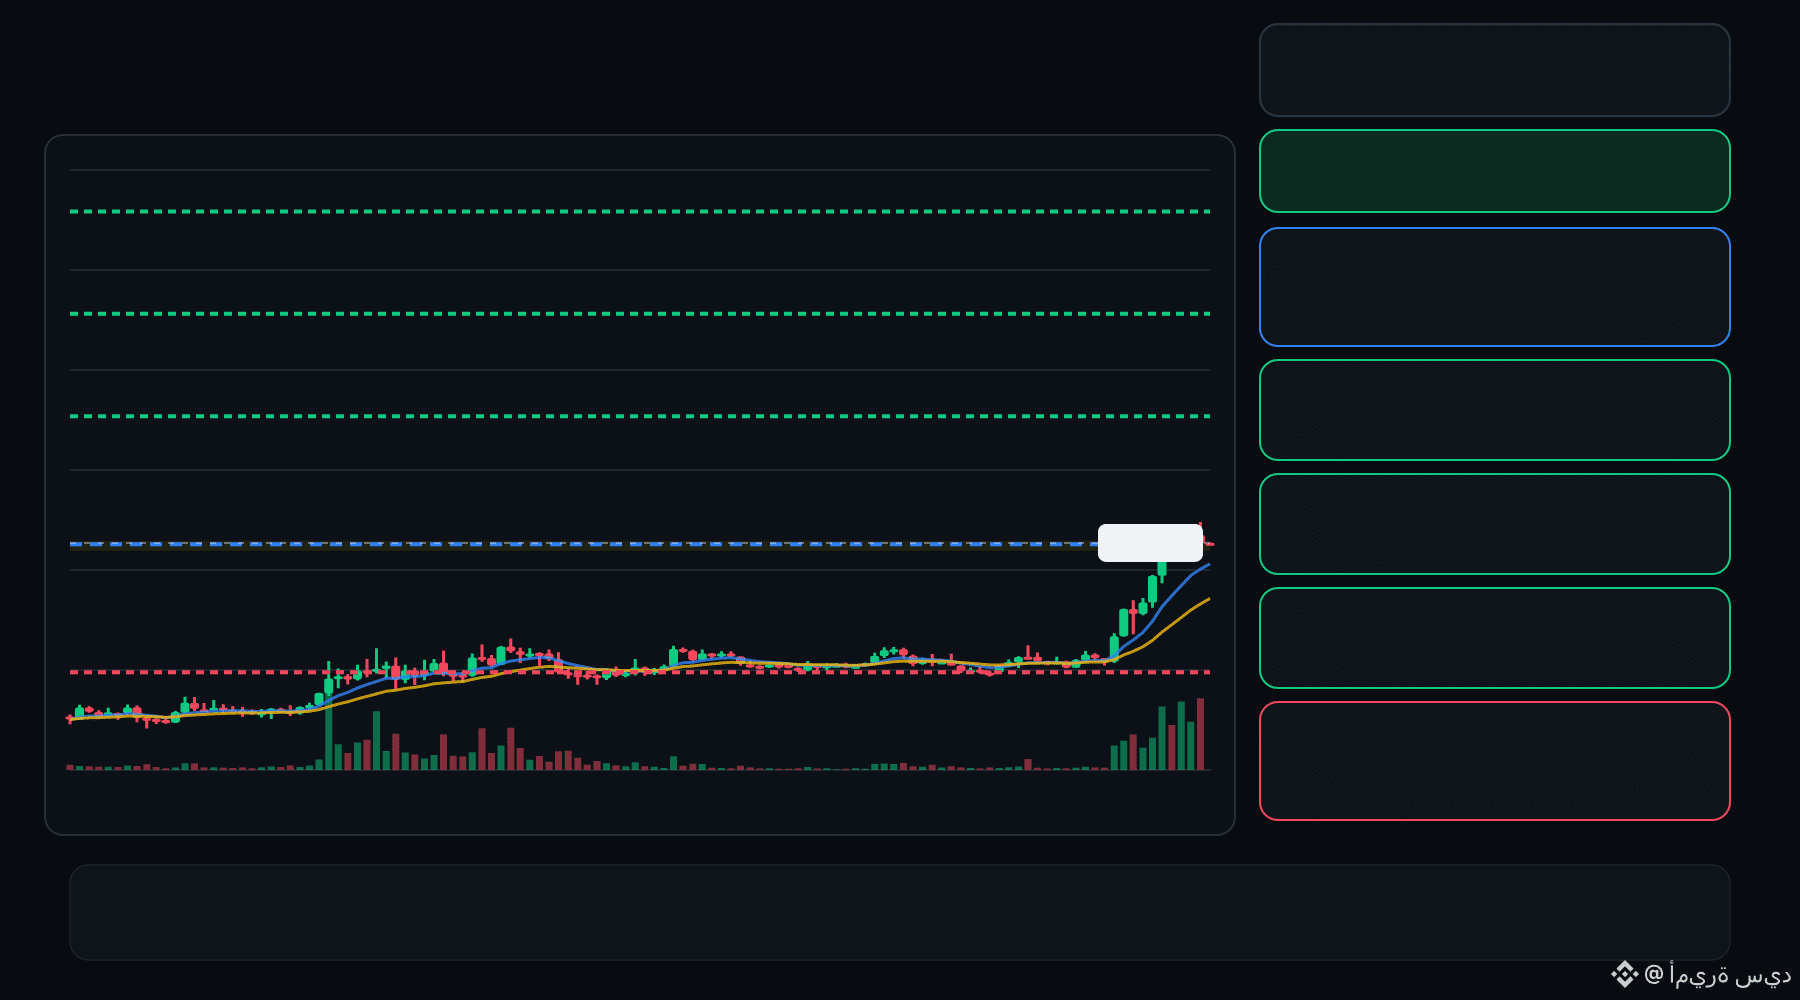
🟢 ATH bulls are defending the pullback… is continuation setting up ⁉️
🟩 ATH LONG
Entry: 0.008238 – 0.008305
TP1: 0.009468
TP2: 0.01043
TP3: 0.01138
Stop Loss: 0.007075
The 15M chart shows a bullish structure with momentum and volume confirmation. A controlled retest of the entry zone may give the setup a cleaner trigger.
Plan: Wait for confirmation/rejection inside the entry zone; don’t chase the move.
DYOR | Manage Risk | Avoid Over-Leverage
🟢 ATH bulls are defending the pullback… is continuation setting up ⁉️
🟩 ATH LONG
Entry: 0.008238 – 0.008305
TP1: 0.009468
TP2: 0.01043
TP3: 0.01138
Stop Loss: 0.007075
The 15M chart shows a bullish structure with momentum and volume confirmation. A controlled retest of the entry zone may give the setup a cleaner trigger.
Plan: Wait for confirmation/rejection inside the entry zone; don’t chase the move.
DYOR | Manage Risk | Avoid Over-Leverage
🟩 ATH LONG
Entry: 0.008238 – 0.008305
TP1: 0.009468
TP2: 0.01043
TP3: 0.01138
Stop Loss: 0.007075
The 15M chart shows a bullish structure with momentum and volume confirmation. A controlled retest of the entry zone may give the setup a cleaner trigger.
Plan: Wait for confirmation/rejection inside the entry zone; don’t chase the move.
DYOR | Manage Risk | Avoid Over-Leverage
1
·
--
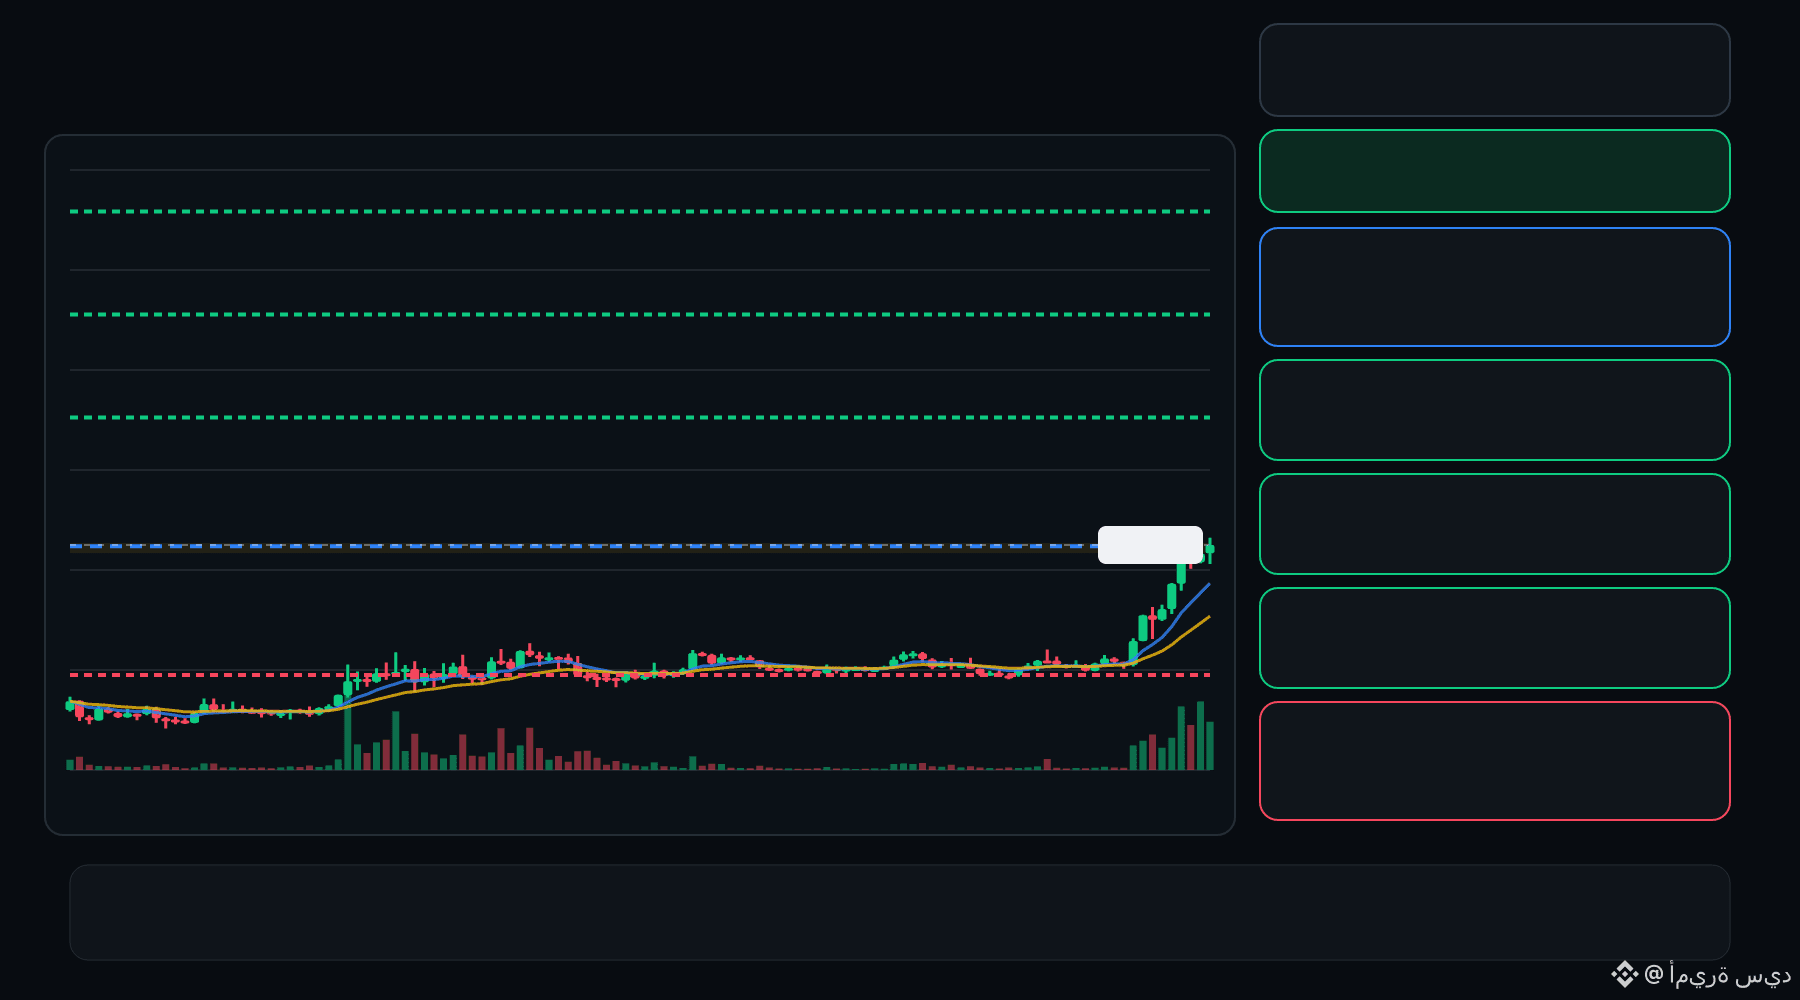
🟢 ATH bulls are defending the pullback… is continuation setting up ⁉️
🟩 ATH LONG
Entry: 0.008315 – 0.008377
TP1: 0.009616
TP2: 0.01063
TP3: 0.01165
Stop Loss: 0.007077
The 15M chart shows a bullish structure with momentum and volume confirmation. A controlled retest of the entry zone may give the setup a cleaner trigger.
Plan: Wait for confirmation/rejection inside the entry zone; don’t chase the move.
DYOR | Manage Risk | Avoid Over-Leverage
🟢 ATH bulls are defending the pullback… is continuation setting up ⁉️
🟩 ATH LONG
Entry: 0.008315 – 0.008377
TP1: 0.009616
TP2: 0.01063
TP3: 0.01165
Stop Loss: 0.007077
The 15M chart shows a bullish structure with momentum and volume confirmation. A controlled retest of the entry zone may give the setup a cleaner trigger.
Plan: Wait for confirmation/rejection inside the entry zone; don’t chase the move.
DYOR | Manage Risk | Avoid Over-Leverage
🟩 ATH LONG
Entry: 0.008315 – 0.008377
TP1: 0.009616
TP2: 0.01063
TP3: 0.01165
Stop Loss: 0.007077
The 15M chart shows a bullish structure with momentum and volume confirmation. A controlled retest of the entry zone may give the setup a cleaner trigger.
Plan: Wait for confirmation/rejection inside the entry zone; don’t chase the move.
DYOR | Manage Risk | Avoid Over-Leverage
2
·
--
🔴 BR bears are pressing the pullback… is the rejection getting deeper ⁉️
🔴 BR SHORT
Entry: 0.4994 – 0.5026
TP1: 0.4604
TP2: 0.4279
TP3: 0.3954
Stop Loss: 0.5416
The 15M chart shows a bearish structure with momentum and volume confirmation. A controlled retest of the entry zone may give the setup a cleaner trigger.
Plan: Wait for confirmation/rejection inside the entry zone; don’t chase the move.
DYOR | Manage Risk | Avoid Over-Leverage
🔴 BR bears are pressing the pullback… is the rejection getting deeper ⁉️
🔴 BR SHORT
Entry: 0.4994 – 0.5026
TP1: 0.4604
TP2: 0.4279
TP3: 0.3954
Stop Loss: 0.5416
The 15M chart shows a bearish structure with momentum and volume confirmation. A controlled retest of the entry zone may give the setup a cleaner trigger.
Plan: Wait for confirmation/rejection inside the entry zone; don’t chase the move.
DYOR | Manage Risk | Avoid Over-Leverage
🔴 BR SHORT
Entry: 0.4994 – 0.5026
TP1: 0.4604
TP2: 0.4279
TP3: 0.3954
Stop Loss: 0.5416
The 15M chart shows a bearish structure with momentum and volume confirmation. A controlled retest of the entry zone may give the setup a cleaner trigger.
Plan: Wait for confirmation/rejection inside the entry zone; don’t chase the move.
DYOR | Manage Risk | Avoid Over-Leverage
·
--
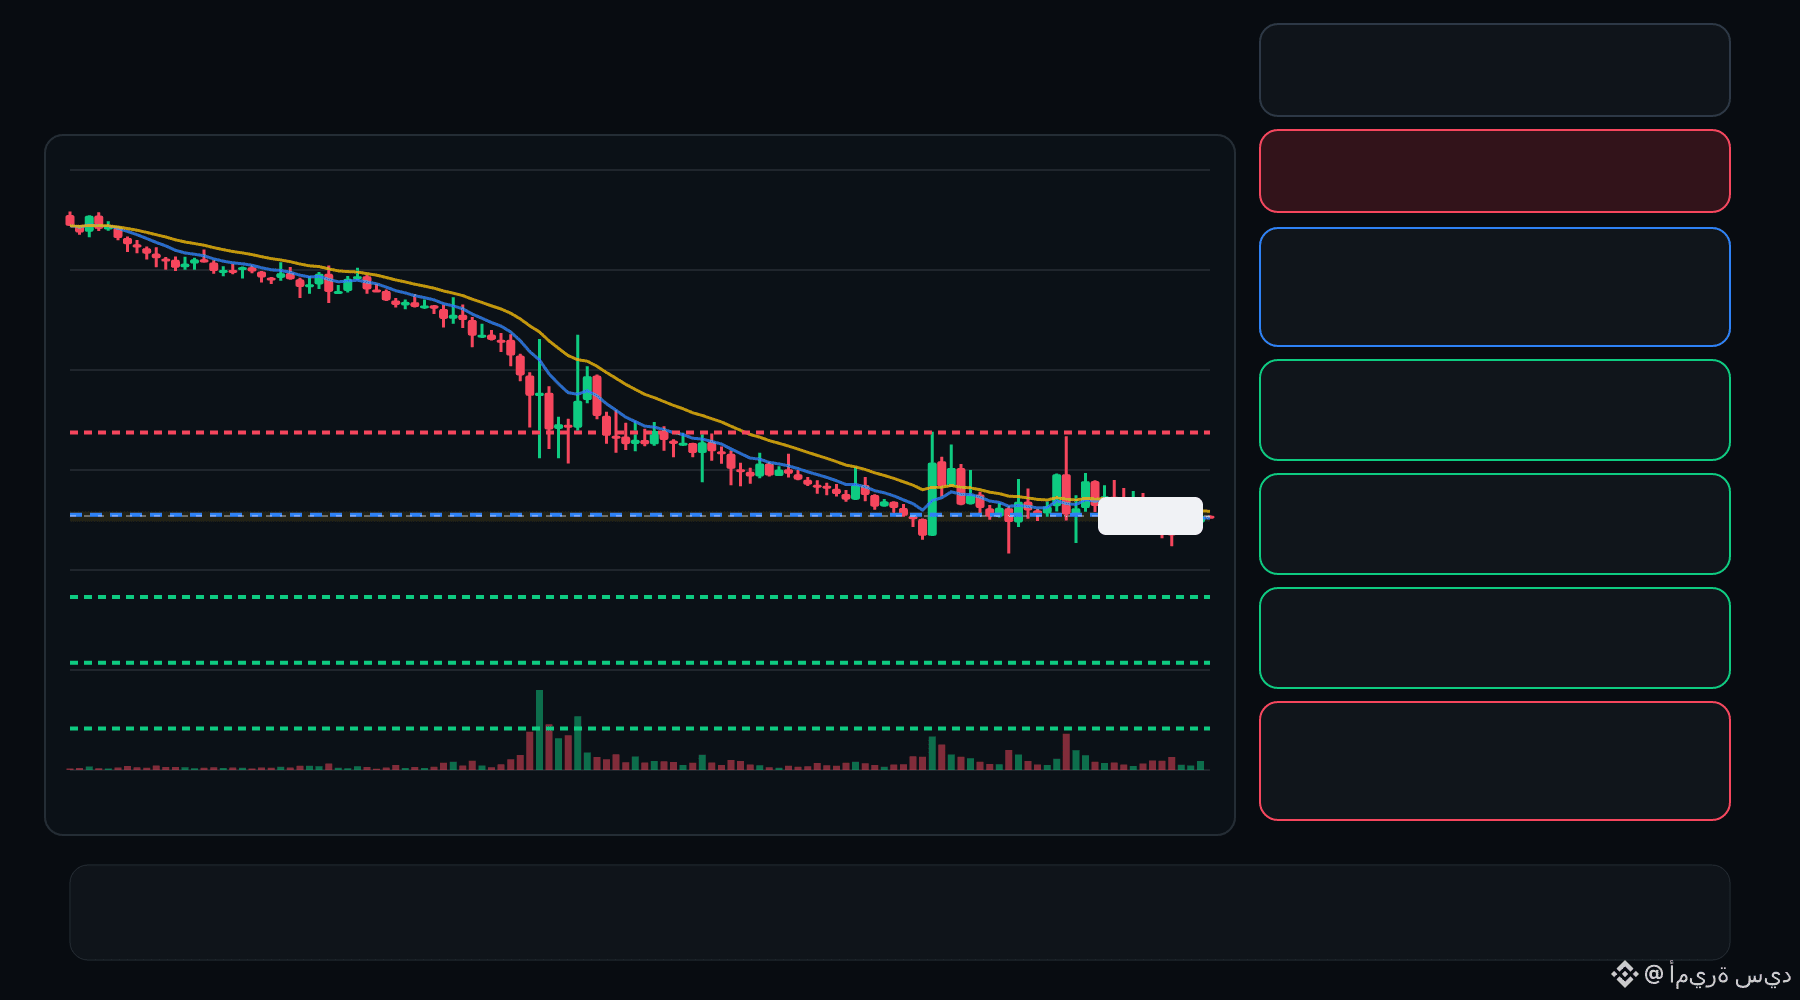
🟢 SPORTFUN bulls are defending the pullback… is continuation setting up ⁉️
🟩 SPORTFUN LONG
Entry: 0.02176 – 0.02193
TP1: 0.02322
TP2: 0.02432
TP3: 0.02542
Stop Loss: 0.02047
The 15M chart shows a bullish structure with momentum and volume confirmation. A controlled retest of the entry zone may give the setup a cleaner trigger.
Plan: Wait for confirmation/rejection inside the entry zone; don’t chase the move.
DYOR | Manage Risk | Avoid Over-Leverage
🟢 SPORTFUN bulls are defending the pullback… is continuation setting up ⁉️
🟩 SPORTFUN LONG
Entry: 0.02176 – 0.02193
TP1: 0.02322
TP2: 0.02432
TP3: 0.02542
Stop Loss: 0.02047
The 15M chart shows a bullish structure with momentum and volume confirmation. A controlled retest of the entry zone may give the setup a cleaner trigger.
Plan: Wait for confirmation/rejection inside the entry zone; don’t chase the move.
DYOR | Manage Risk | Avoid Over-Leverage
🟩 SPORTFUN LONG
Entry: 0.02176 – 0.02193
TP1: 0.02322
TP2: 0.02432
TP3: 0.02542
Stop Loss: 0.02047
The 15M chart shows a bullish structure with momentum and volume confirmation. A controlled retest of the entry zone may give the setup a cleaner trigger.
Plan: Wait for confirmation/rejection inside the entry zone; don’t chase the move.
DYOR | Manage Risk | Avoid Over-Leverage
·
--
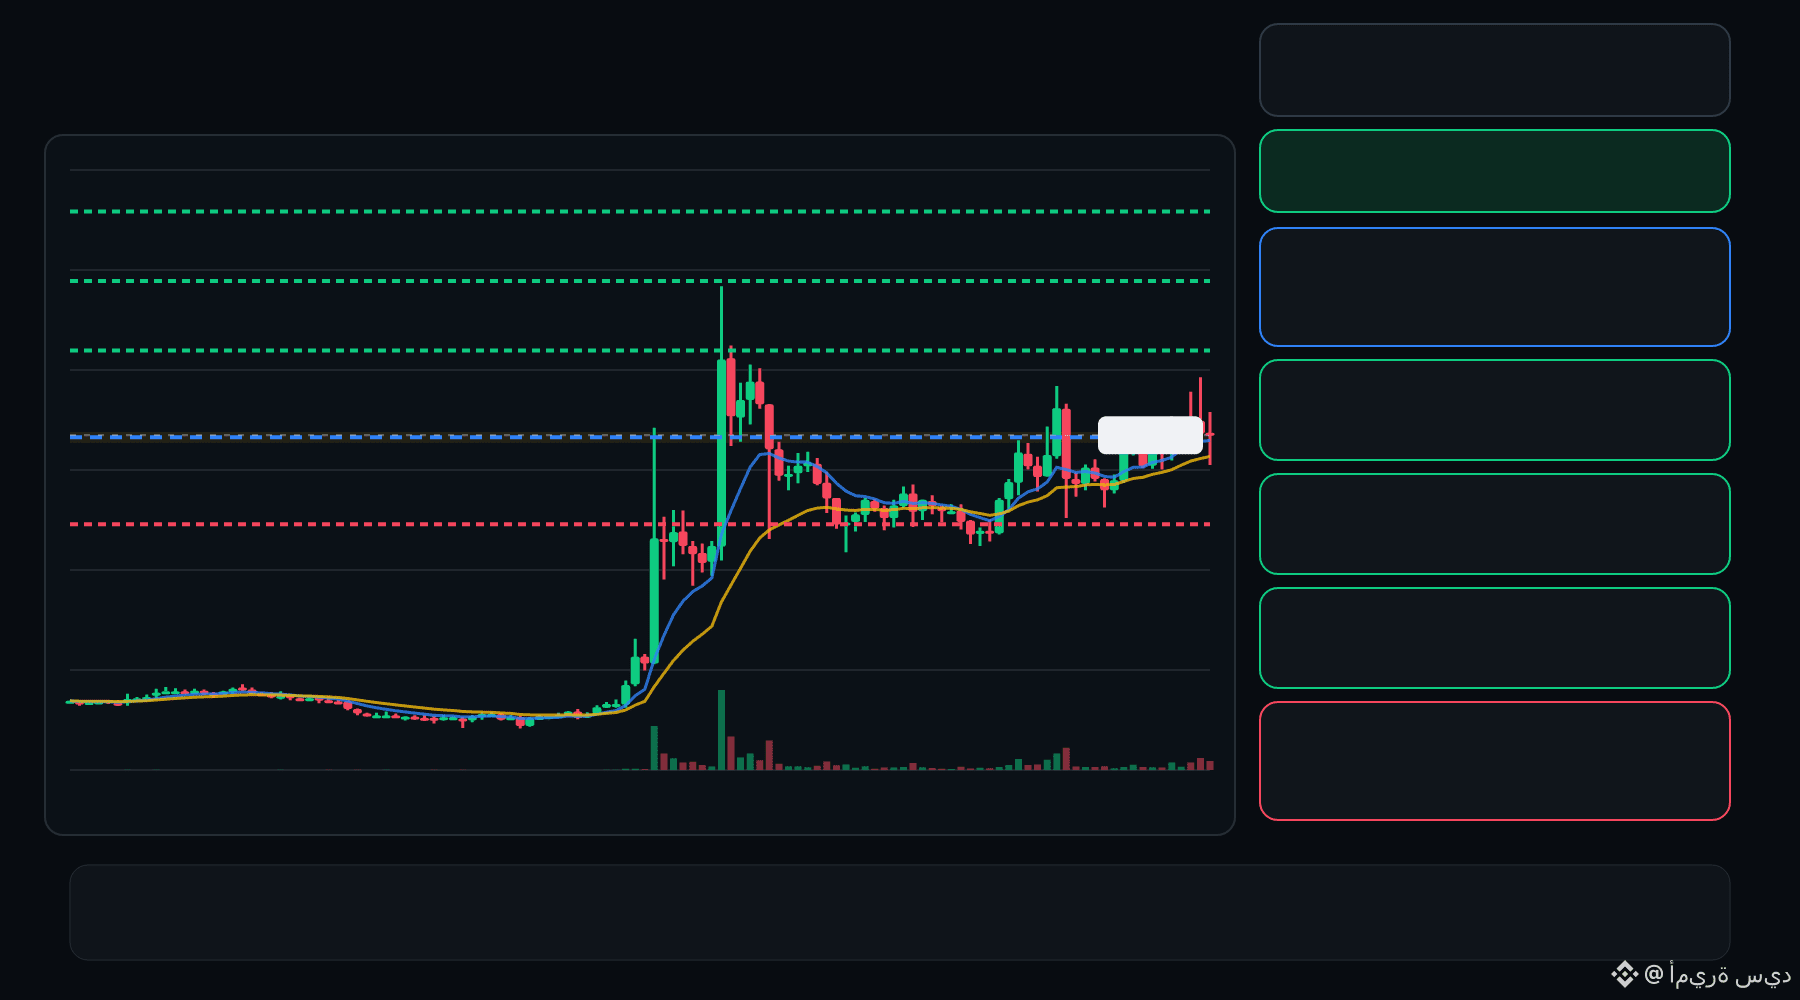
🔴 MAGMA bears are pressing the pullback… is the rejection getting deeper ⁉️
🔴 MAGMA SHORT
Entry: 0.2357 – 0.2390
TP1: 0.2026
TP2: 0.1748
TP3: 0.1469
Stop Loss: 0.2722
The 15M chart shows a bearish structure with momentum and volume confirmation. A controlled retest of the entry zone may give the setup a cleaner trigger.
Plan: Wait for confirmation/rejection inside the entry zone; don’t chase the move.
DYOR | Manage Risk | Avoid Over-Leverage
🔴 MAGMA bears are pressing the pullback… is the rejection getting deeper ⁉️
🔴 MAGMA SHORT
Entry: 0.2357 – 0.2390
TP1: 0.2026
TP2: 0.1748
TP3: 0.1469
Stop Loss: 0.2722
The 15M chart shows a bearish structure with momentum and volume confirmation. A controlled retest of the entry zone may give the setup a cleaner trigger.
Plan: Wait for confirmation/rejection inside the entry zone; don’t chase the move.
DYOR | Manage Risk | Avoid Over-Leverage
🔴 MAGMA SHORT
Entry: 0.2357 – 0.2390
TP1: 0.2026
TP2: 0.1748
TP3: 0.1469
Stop Loss: 0.2722
The 15M chart shows a bearish structure with momentum and volume confirmation. A controlled retest of the entry zone may give the setup a cleaner trigger.
Plan: Wait for confirmation/rejection inside the entry zone; don’t chase the move.
DYOR | Manage Risk | Avoid Over-Leverage
·
--
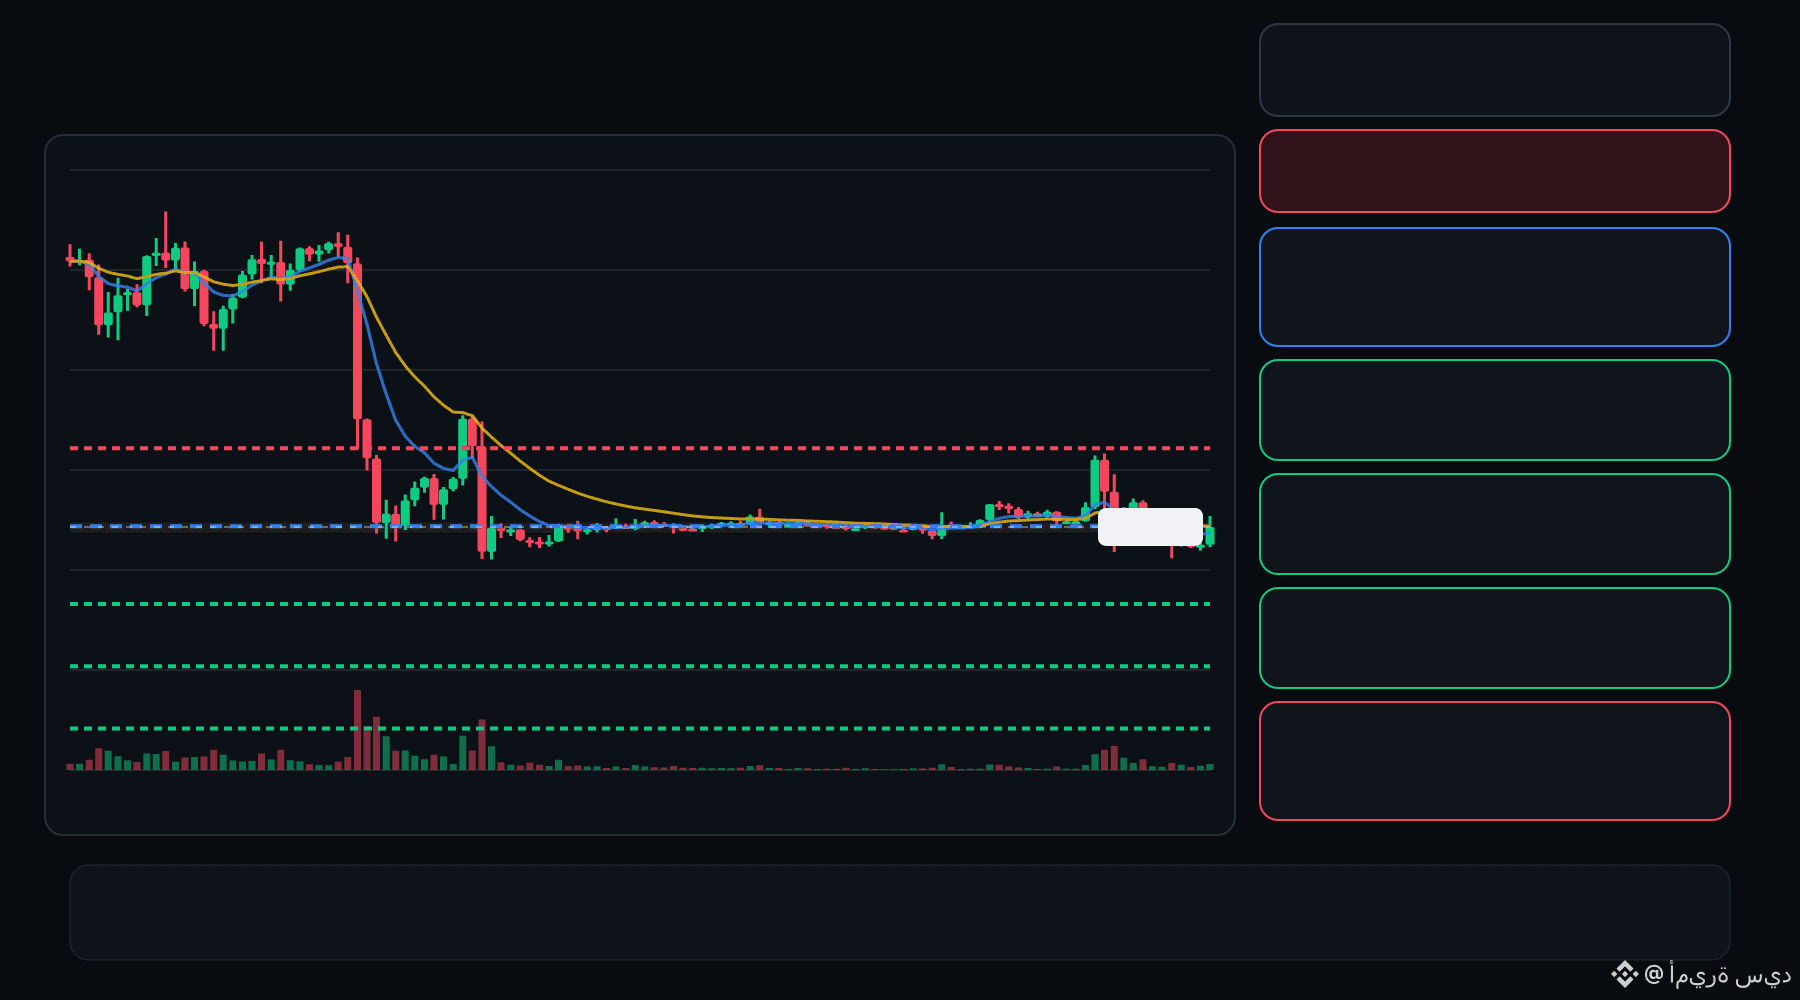
🟢 STRK bulls are defending the pullback… is continuation setting up ⁉️
🟩 STRK LONG
Entry: 0.05367 – 0.05397
TP1: 0.05617
TP2: 0.05804
TP3: 0.05991
Stop Loss: 0.05148
The 15M chart shows a bullish structure with momentum and volume confirmation. A controlled retest of the entry zone may give the setup a cleaner trigger.
Plan: Wait for confirmation/rejection inside the entry zone; don’t chase the move.
DYOR | Manage Risk | Avoid Over-Leverage
🟢 STRK bulls are defending the pullback… is continuation setting up ⁉️
🟩 STRK LONG
Entry: 0.05367 – 0.05397
TP1: 0.05617
TP2: 0.05804
TP3: 0.05991
Stop Loss: 0.05148
The 15M chart shows a bullish structure with momentum and volume confirmation. A controlled retest of the entry zone may give the setup a cleaner trigger.
Plan: Wait for confirmation/rejection inside the entry zone; don’t chase the move.
DYOR | Manage Risk | Avoid Over-Leverage
🟩 STRK LONG
Entry: 0.05367 – 0.05397
TP1: 0.05617
TP2: 0.05804
TP3: 0.05991
Stop Loss: 0.05148
The 15M chart shows a bullish structure with momentum and volume confirmation. A controlled retest of the entry zone may give the setup a cleaner trigger.
Plan: Wait for confirmation/rejection inside the entry zone; don’t chase the move.
DYOR | Manage Risk | Avoid Over-Leverage
·
--
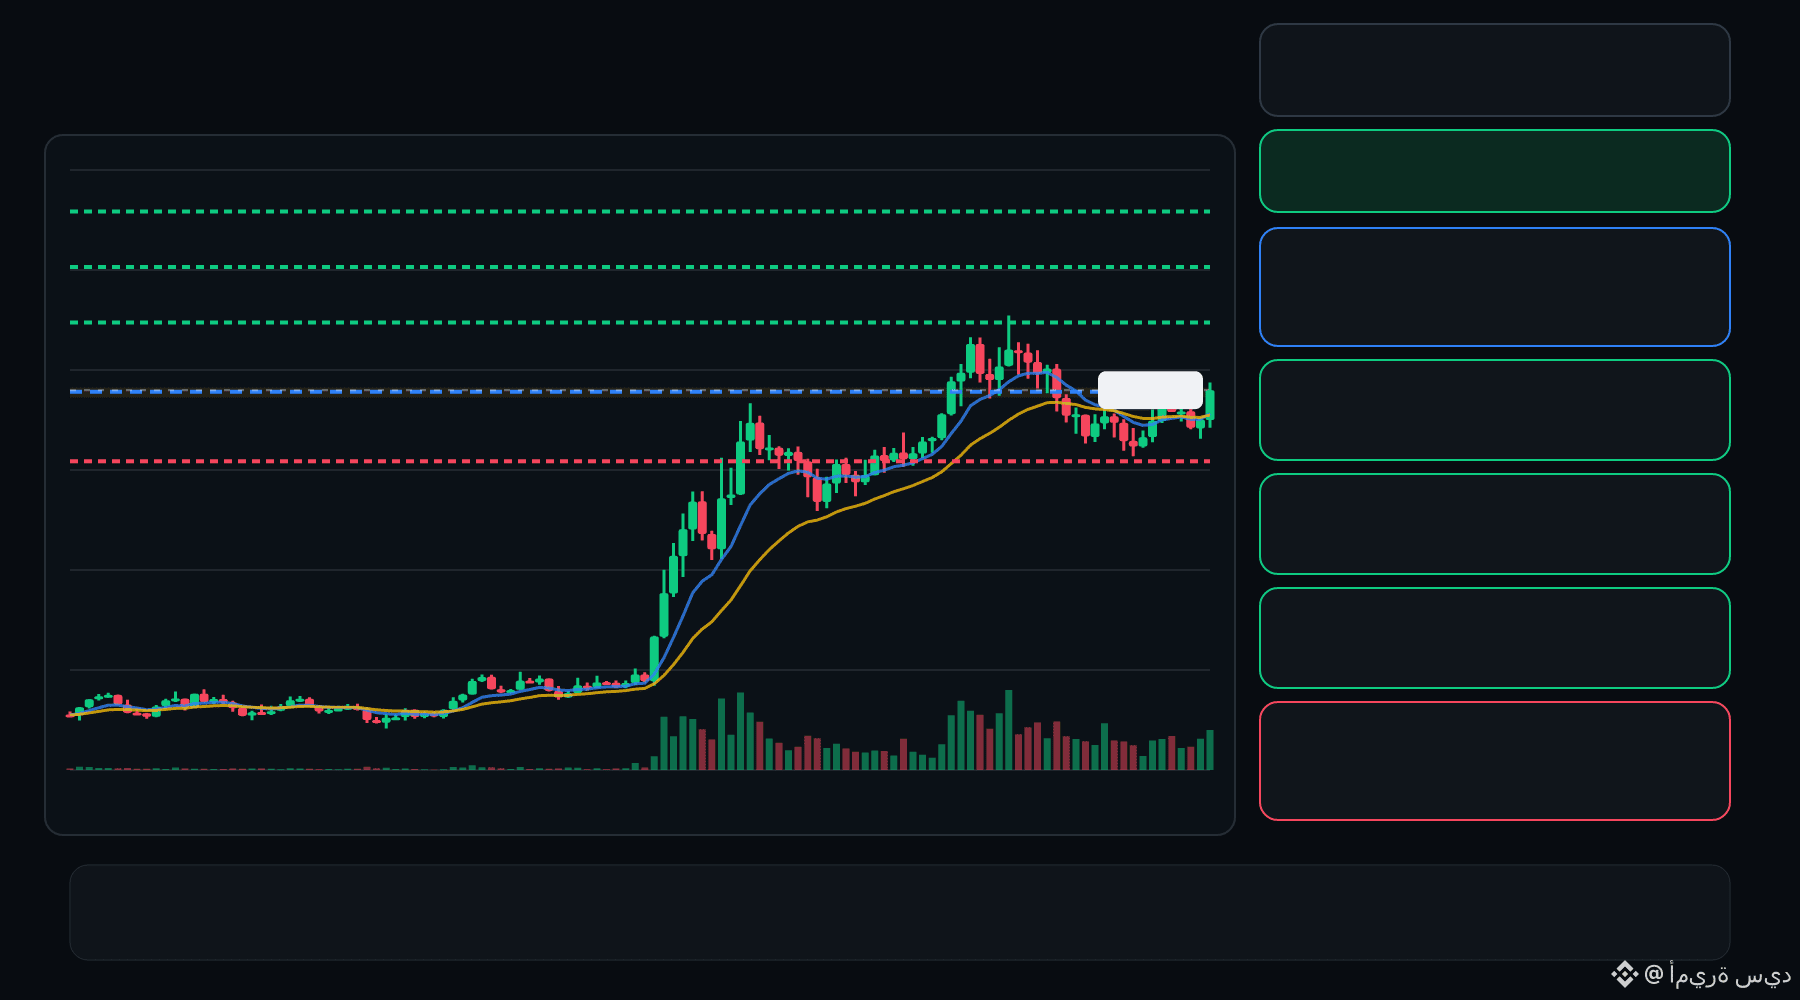
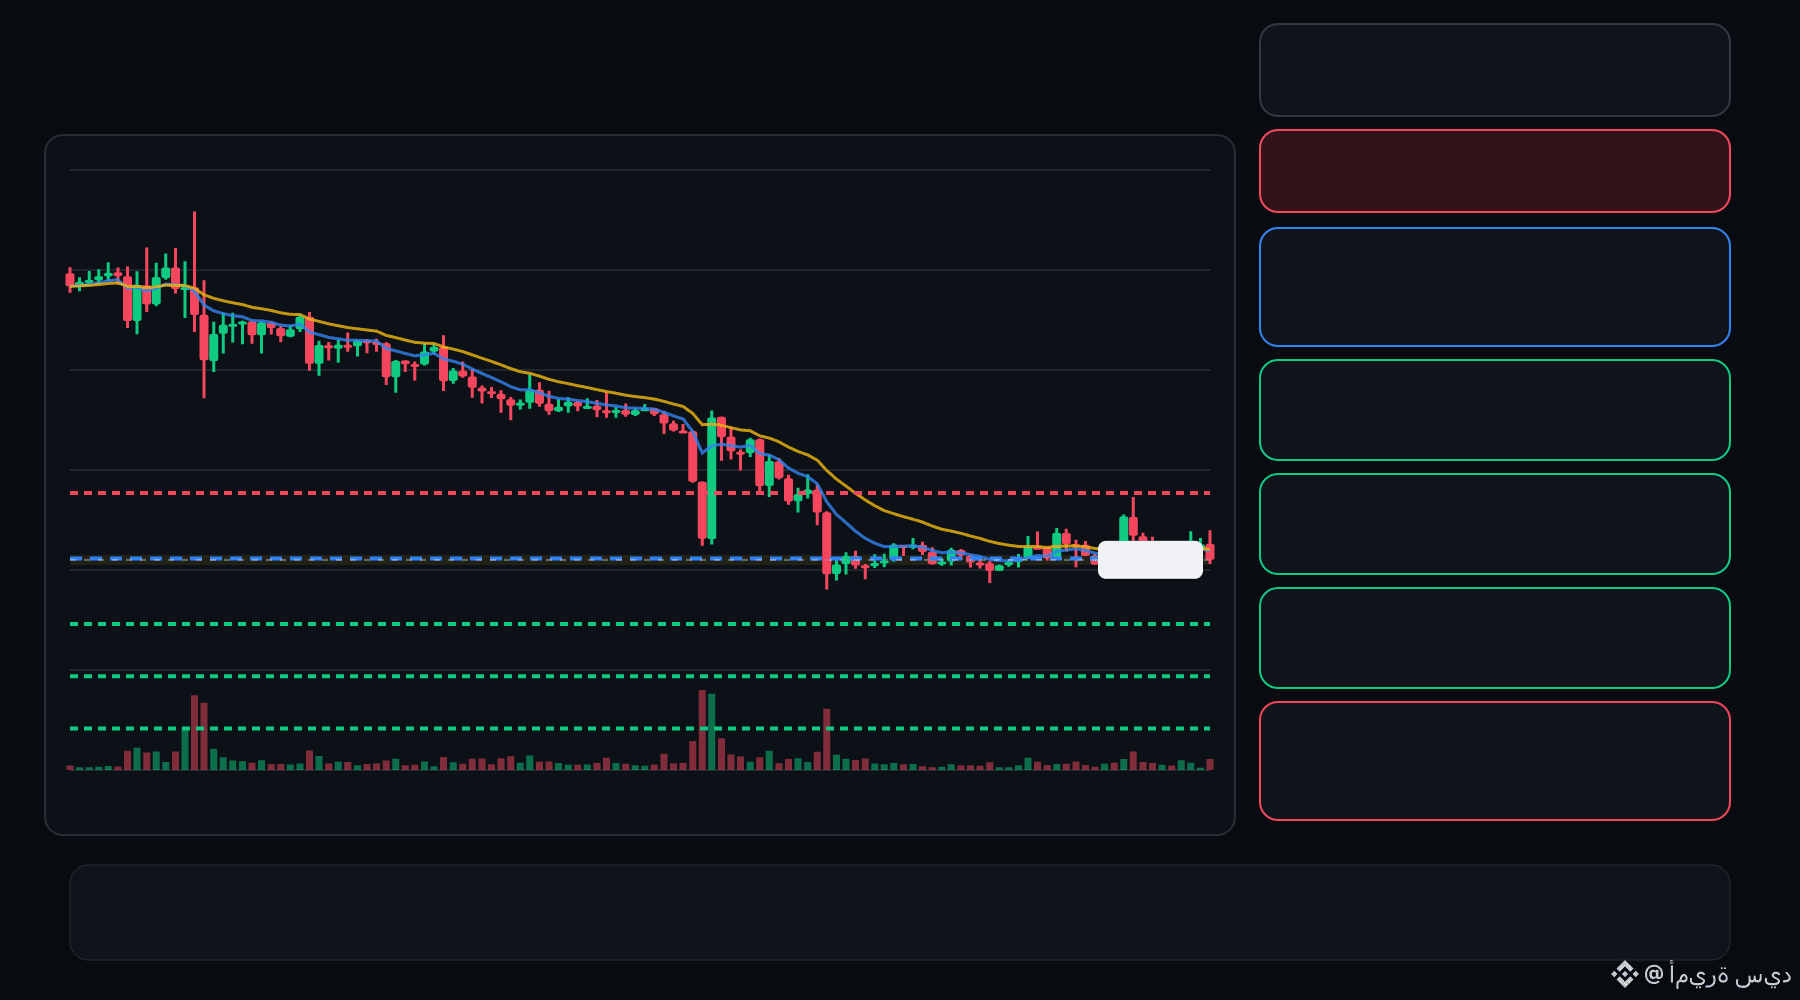
🔴 US bears are pressing the pullback… is the rejection getting deeper ⁉️
🔴 US SHORT
Entry: 0.01974 – 0.01986
TP1: 0.01873
TP2: 0.01788
TP3: 0.01702
Stop Loss: 0.02087
The 15M chart shows a bearish structure with momentum and volume confirmation. A controlled retest of the entry zone may give the setup a cleaner trigger.
Plan: Wait for confirmation/rejection inside the entry zone; don’t chase the move.
DYOR | Manage Risk | Avoid Over-Leverage
🔴 US bears are pressing the pullback… is the rejection getting deeper ⁉️
🔴 US SHORT
Entry: 0.01974 – 0.01986
TP1: 0.01873
TP2: 0.01788
TP3: 0.01702
Stop Loss: 0.02087
The 15M chart shows a bearish structure with momentum and volume confirmation. A controlled retest of the entry zone may give the setup a cleaner trigger.
Plan: Wait for confirmation/rejection inside the entry zone; don’t chase the move.
DYOR | Manage Risk | Avoid Over-Leverage
🔴 US SHORT
Entry: 0.01974 – 0.01986
TP1: 0.01873
TP2: 0.01788
TP3: 0.01702
Stop Loss: 0.02087
The 15M chart shows a bearish structure with momentum and volume confirmation. A controlled retest of the entry zone may give the setup a cleaner trigger.
Plan: Wait for confirmation/rejection inside the entry zone; don’t chase the move.
DYOR | Manage Risk | Avoid Over-Leverage
·
--
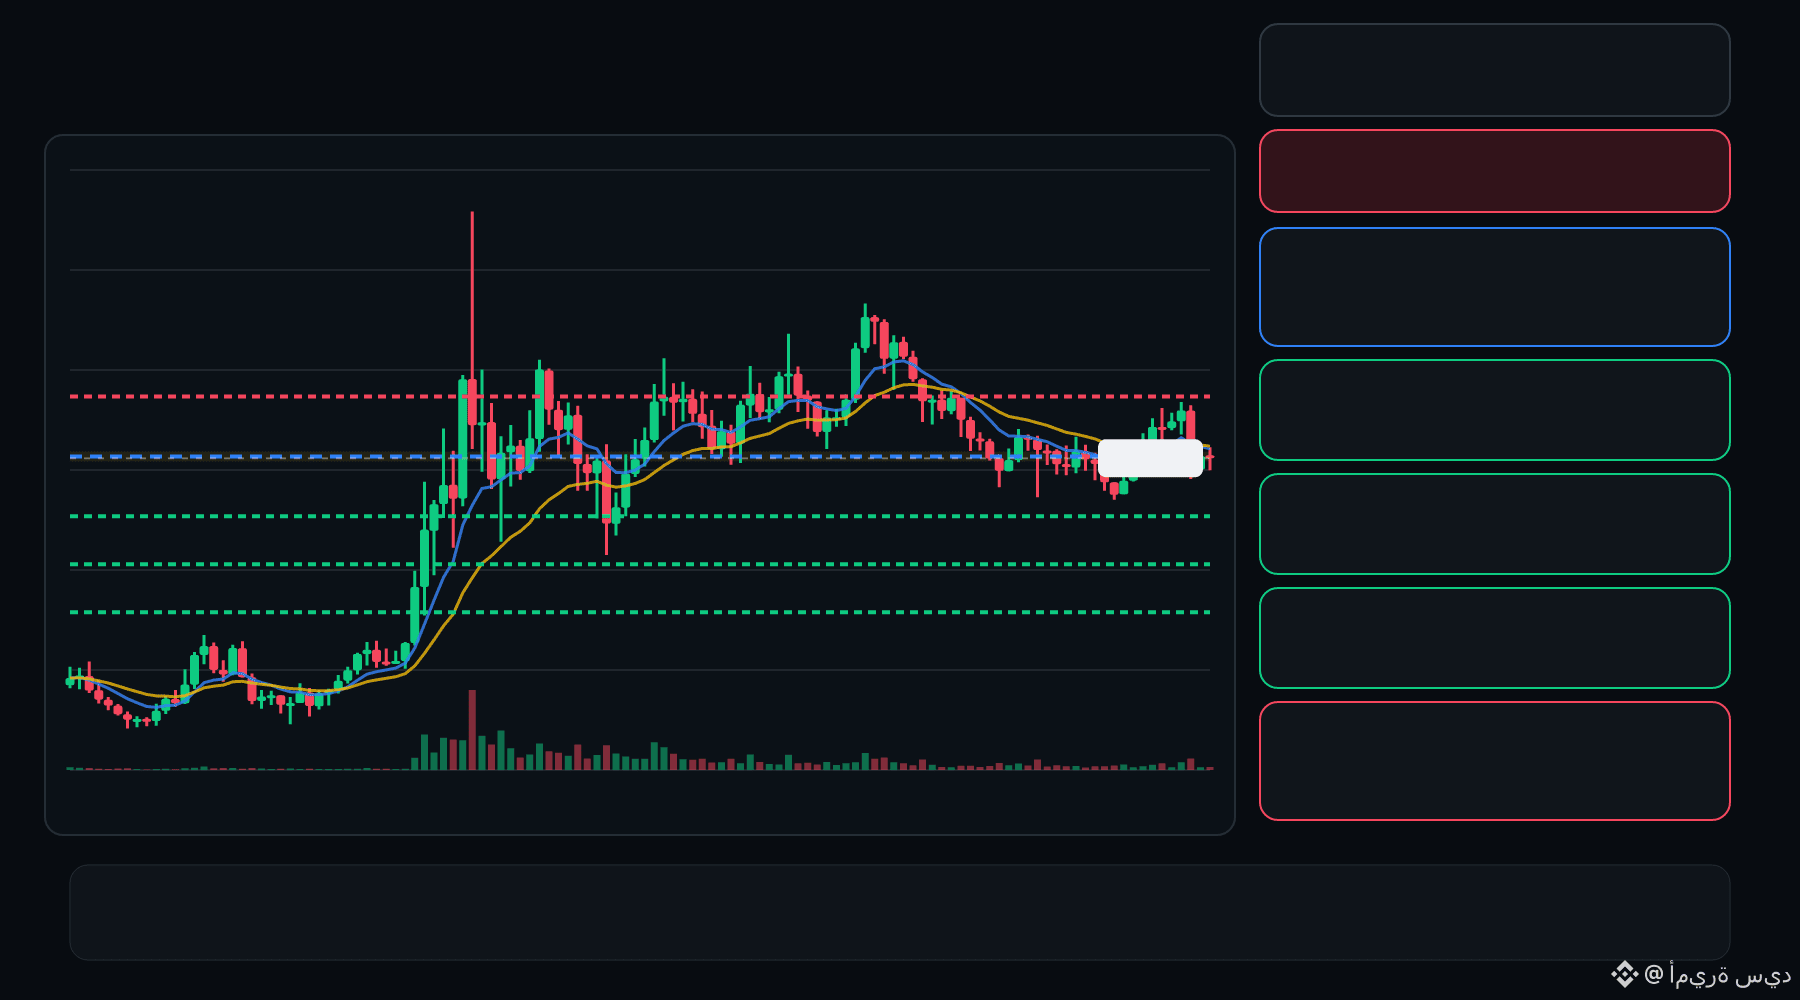
🔴 ONE bears are pressing the pullback… is the rejection getting deeper ⁉️
🔴 ONE SHORT
Entry: 0.002446 – 0.002458
TP1: 0.002380
TP2: 0.002323
TP3: 0.002266
Stop Loss: 0.002524
The 15M chart shows a bearish structure with momentum and volume confirmation. A controlled retest of the entry zone may give the setup a cleaner trigger.
Plan: Wait for confirmation/rejection inside the entry zone; don’t chase the move.
DYOR | Manage Risk | Avoid Over-Leverage
🔴 ONE bears are pressing the pullback… is the rejection getting deeper ⁉️
🔴 ONE SHORT
Entry: 0.002446 – 0.002458
TP1: 0.002380
TP2: 0.002323
TP3: 0.002266
Stop Loss: 0.002524
The 15M chart shows a bearish structure with momentum and volume confirmation. A controlled retest of the entry zone may give the setup a cleaner trigger.
Plan: Wait for confirmation/rejection inside the entry zone; don’t chase the move.
DYOR | Manage Risk | Avoid Over-Leverage
🔴 ONE SHORT
Entry: 0.002446 – 0.002458
TP1: 0.002380
TP2: 0.002323
TP3: 0.002266
Stop Loss: 0.002524
The 15M chart shows a bearish structure with momentum and volume confirmation. A controlled retest of the entry zone may give the setup a cleaner trigger.
Plan: Wait for confirmation/rejection inside the entry zone; don’t chase the move.
DYOR | Manage Risk | Avoid Over-Leverage
12
·
--
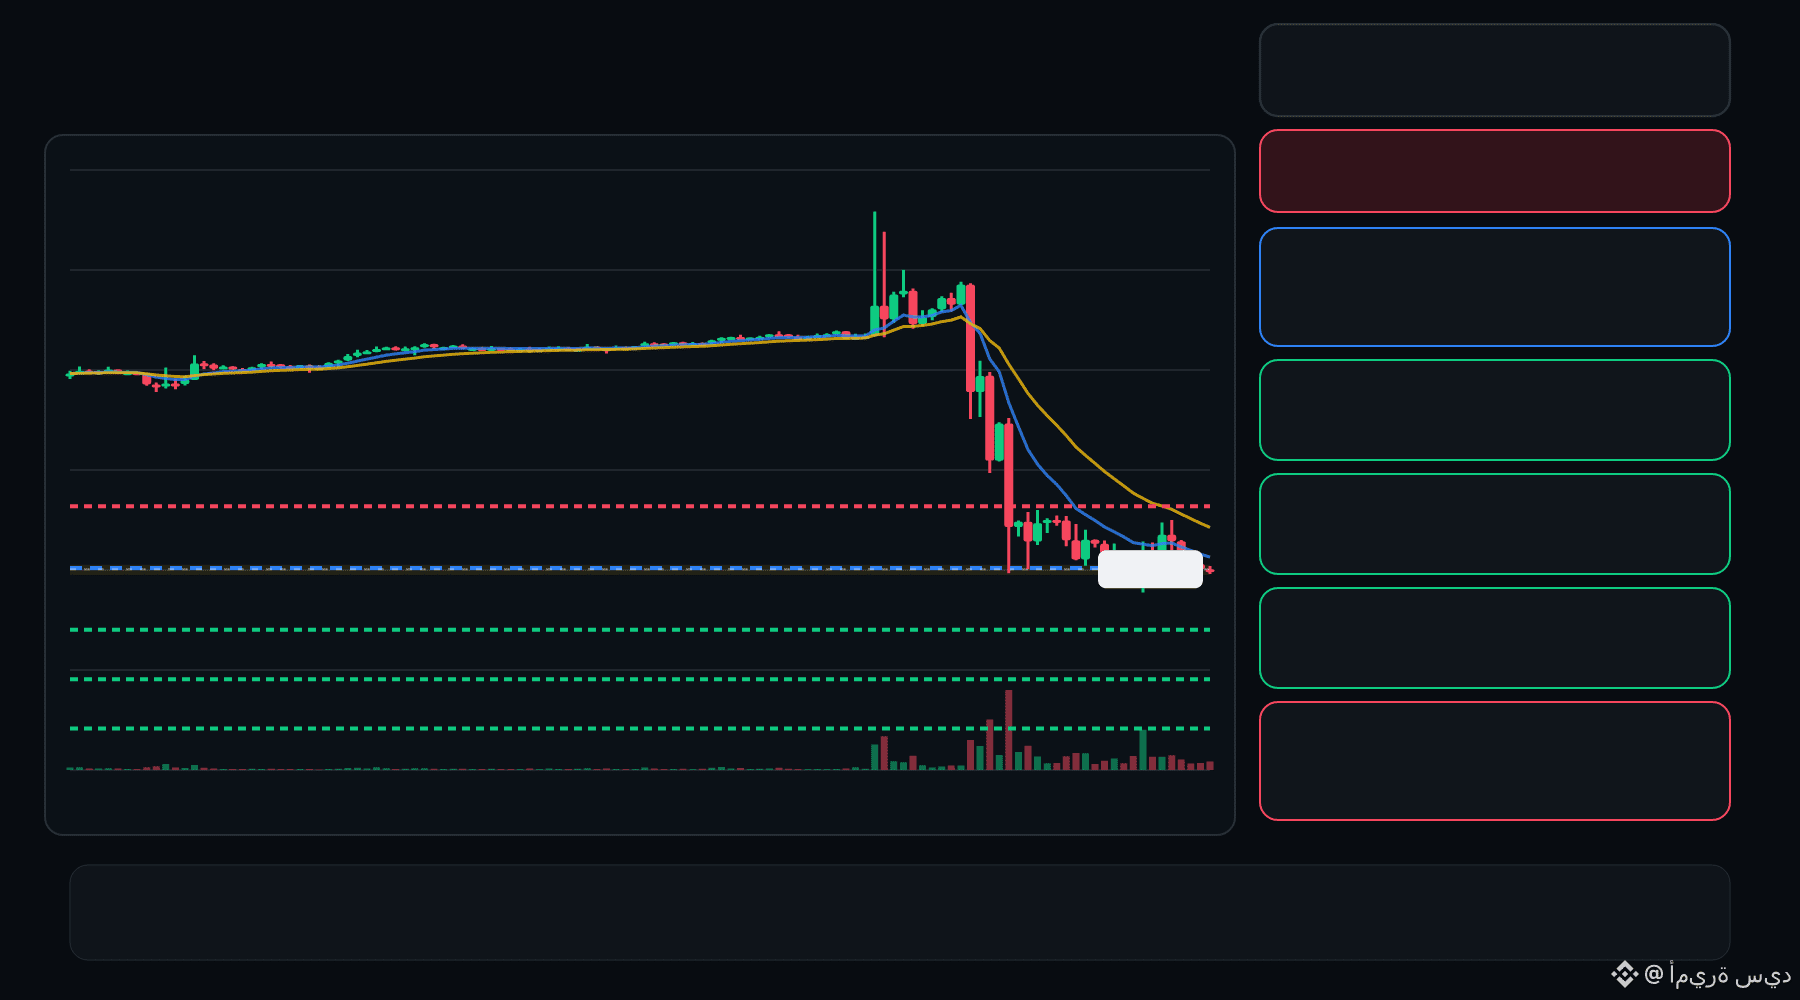
🔴 BTW bears are pressing the pullback… is the rejection getting deeper ⁉️
🔴 BTW SHORT
Entry: 0.9145 – 0.9304
TP1: 0.7763
TP2: 0.6594
TP3: 0.5425
Stop Loss: 1.069
The 15M chart shows a bearish structure with momentum and volume confirmation. A controlled retest of the entry zone may give the setup a cleaner trigger.
Plan: Wait for confirmation/rejection inside the entry zone; don’t chase the move.
DYOR | Manage Risk | Avoid Over-Leverage
🔴 BTW bears are pressing the pullback… is the rejection getting deeper ⁉️
🔴 BTW SHORT
Entry: 0.9145 – 0.9304
TP1: 0.7763
TP2: 0.6594
TP3: 0.5425
Stop Loss: 1.069
The 15M chart shows a bearish structure with momentum and volume confirmation. A controlled retest of the entry zone may give the setup a cleaner trigger.
Plan: Wait for confirmation/rejection inside the entry zone; don’t chase the move.
DYOR | Manage Risk | Avoid Over-Leverage
🔴 BTW SHORT
Entry: 0.9145 – 0.9304
TP1: 0.7763
TP2: 0.6594
TP3: 0.5425
Stop Loss: 1.069
The 15M chart shows a bearish structure with momentum and volume confirmation. A controlled retest of the entry zone may give the setup a cleaner trigger.
Plan: Wait for confirmation/rejection inside the entry zone; don’t chase the move.
DYOR | Manage Risk | Avoid Over-Leverage
·
--
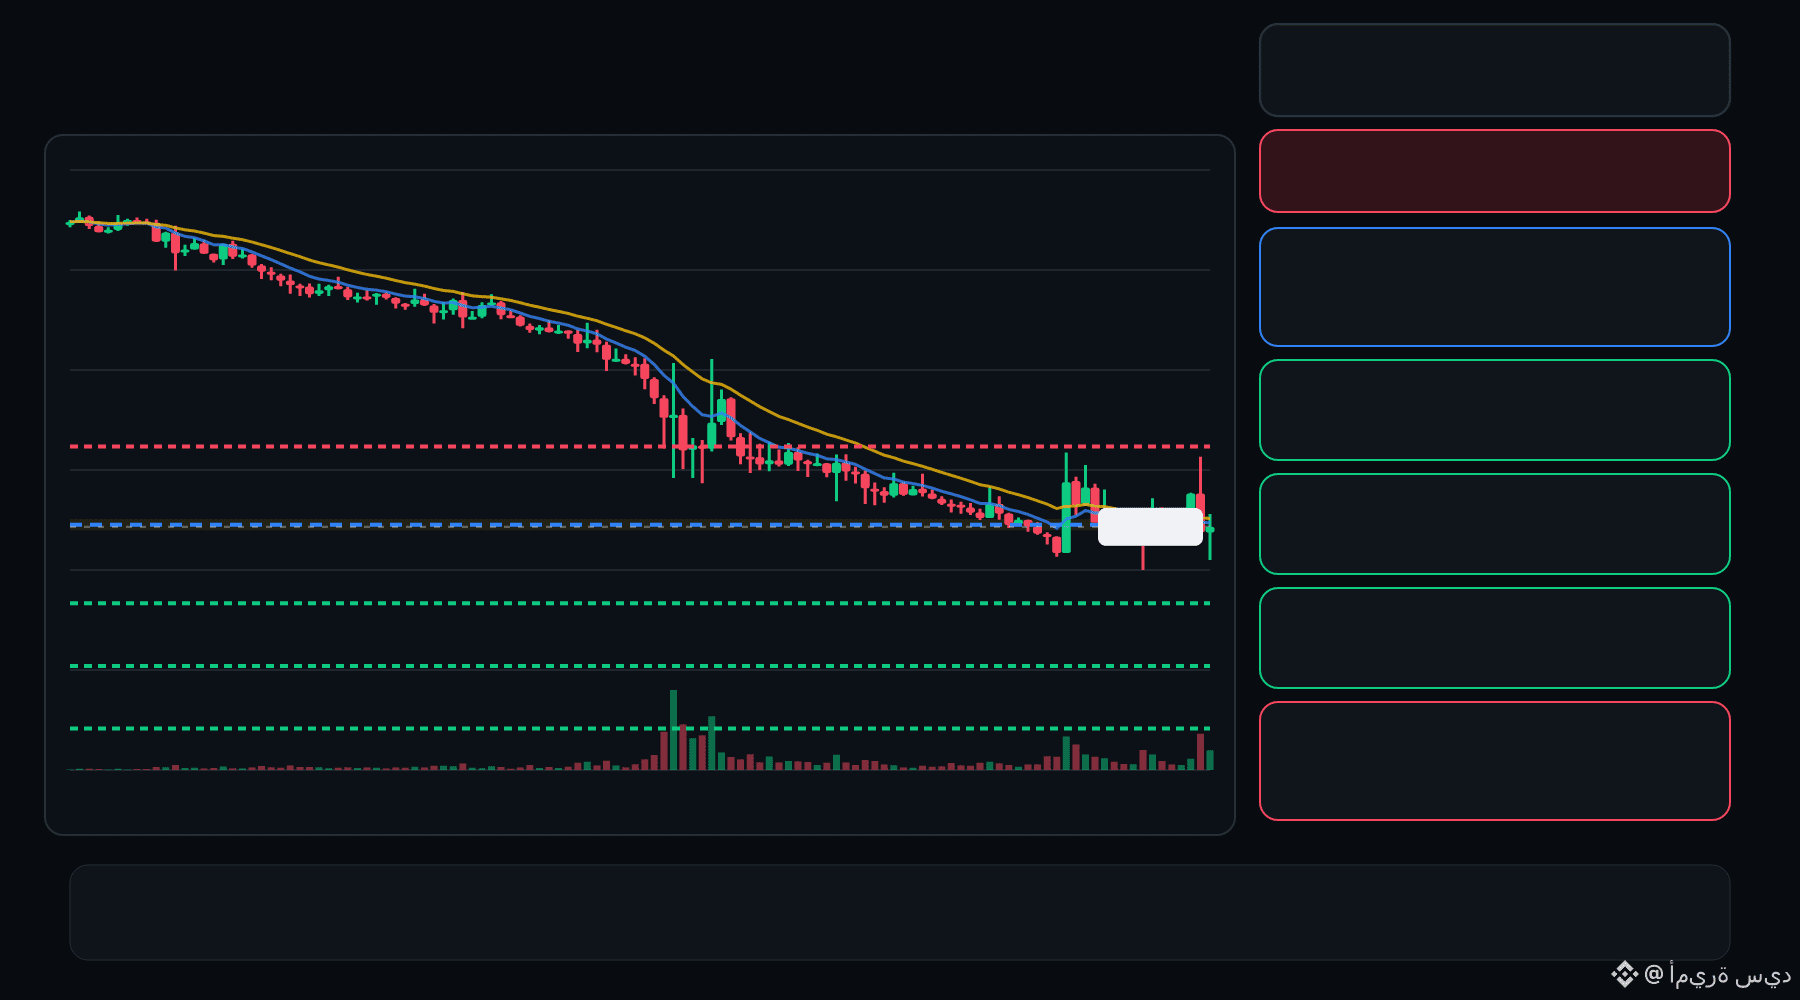
🔴 BR bears are pressing the pullback… is the rejection getting deeper ⁉️
🔴 BR SHORT
Entry: 0.5023 – 0.5078
TP1: 0.4650
TP2: 0.4329
TP3: 0.4008
Stop Loss: 0.5451
The 15M chart shows a bearish structure with momentum and volume confirmation. A controlled retest of the entry zone may give the setup a cleaner trigger.
Plan: Wait for confirmation/rejection inside the entry zone; don’t chase the move.
DYOR | Manage Risk | Avoid Over-Leverage
🔴 BR bears are pressing the pullback… is the rejection getting deeper ⁉️
🔴 BR SHORT
Entry: 0.5023 – 0.5078
TP1: 0.4650
TP2: 0.4329
TP3: 0.4008
Stop Loss: 0.5451
The 15M chart shows a bearish structure with momentum and volume confirmation. A controlled retest of the entry zone may give the setup a cleaner trigger.
Plan: Wait for confirmation/rejection inside the entry zone; don’t chase the move.
DYOR | Manage Risk | Avoid Over-Leverage
🔴 BR SHORT
Entry: 0.5023 – 0.5078
TP1: 0.4650
TP2: 0.4329
TP3: 0.4008
Stop Loss: 0.5451
The 15M chart shows a bearish structure with momentum and volume confirmation. A controlled retest of the entry zone may give the setup a cleaner trigger.
Plan: Wait for confirmation/rejection inside the entry zone; don’t chase the move.
DYOR | Manage Risk | Avoid Over-Leverage
8
Log in to explore more content
Join global crypto users on Binance Square
⚡️ Get latest and useful information about crypto.
💬 Trusted by the world’s largest crypto exchange.
👍 Discover real insights from verified creators.
Email / Phone number
Trending Topics
BitcoinSpotETFsDraw$6.34BInflowsInQ3
294 views
14 Discussing
🚨 $6.34 BILLION JUST CHASED BITCOIN — BUT THE REAL STORY IS WHAT COMES NEXT
Bitcoin spot ETFs pulled in $6.34 billion during Q3.
That number deserves attention — but not because “institutions are buying Bitcoin” is new.
What matters is the change in money flow.
When billions move into spot ETFs within a single quarter, Bitcoin is no longer relying only on crypto-native traders. A deeper pool of capital is participating through regulated market infrastructure.
And that changes the game.
Think about it:
Bitcoin’s supply does not expand because demand increases.
There will still only ever be 21 million BTC.
So when large pools of capital compete for exposure to an asset with structurally limited supply, the important question becomes:
How much Bitcoin is actually available when everyone wants it at the same time?
That is where things can get interesting.
ETF inflows don’t guarantee the next candle will be green. Institutions can sell just as easily as they buy.
But $6.34B entering in one quarter is not background noise.
I’m watching the flows now more closely than the headlines.
Because sometimes the biggest move starts before retail realizes the money has already moved. 👀
Master CX Watch: Follow the money. Then watch the price.
$BTC #BitcoinSpotETFsDraw$6.34BInflowsInQ3
Master CX
·0 Likes
·25 views
EthereumValidatorExitQueueJumps392%
10,652 views
166 Discussing
IMFApprovesElSalvador$138MWithBitcoinWaiver
900 views
14 Discussing