

HNIW30
6.6k Posts

HNIW30
Report
Block User
HNIW30 here: Crypto vet sharing no-BS insights from market trenches. Real tactics to beat volatility, minus the hype. 🚨 X: @HNIW30
Open Trade
Frequent Trader
3.2 Years
200 Following
12.2K+ Followers
4.0K+ Liked
Posts
Portfolio
All
Quotes
Videos
Live
·
--
THE GOLDEN RABBIT 🌕🐇
This Mid-Autumn Festival, HNIW30 begins a magical journey with Bibi and the Golden Rabbit to collect four special treasures: Glutinous Rice Flour, Lotus Seed Paste, the Mooncake Mold, and the Golden Egg.
But in the end, they discover that the true key is not the treasure itself — it is sharing, friendship, and reunion.
That is the meaning behind our story:
“The greatest treasure is the joy we share.”
Video created using AI
[🔗 Campaign](https://www.binance.com/activity/collect-and-win/vmid-autumn-2026?ref=HNIW30)
@Binance_Vietnam
#SănThỏVàng #TrăngRằmViênMãn #Binance
THE GOLDEN RABBIT 🌕🐇
This Mid-Autumn Festival, HNIW30 begins a magical journey with Bibi and the Golden Rabbit to collect four special treasures: Glutinous Rice Flour, Lotus Seed Paste, the Mooncake Mold, and the Golden Egg.
But in the end, they discover that the true key is not the treasure itself — it is sharing, friendship, and reunion.
That is the meaning behind our story:
“The greatest treasure is the joy we share.”
Video created using AI
🔗 Campaign
@Binance Vietnam
#SănThỏVàng #TrăngRằmViênMãn #Binance
This Mid-Autumn Festival, HNIW30 begins a magical journey with Bibi and the Golden Rabbit to collect four special treasures: Glutinous Rice Flour, Lotus Seed Paste, the Mooncake Mold, and the Golden Egg.
But in the end, they discover that the true key is not the treasure itself — it is sharing, friendship, and reunion.
That is the meaning behind our story:
“The greatest treasure is the joy we share.”
Video created using AI
🔗 Campaign
@Binance Vietnam
#SănThỏVàng #TrăngRằmViênMãn #Binance
1
1
7
438
·
--
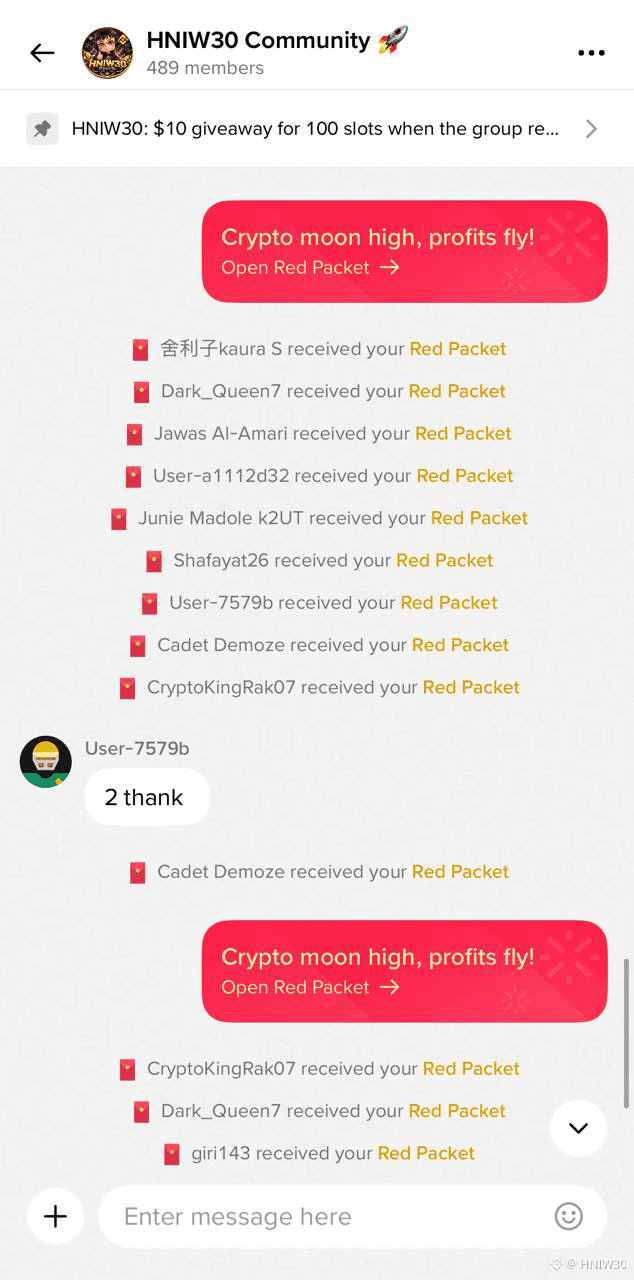
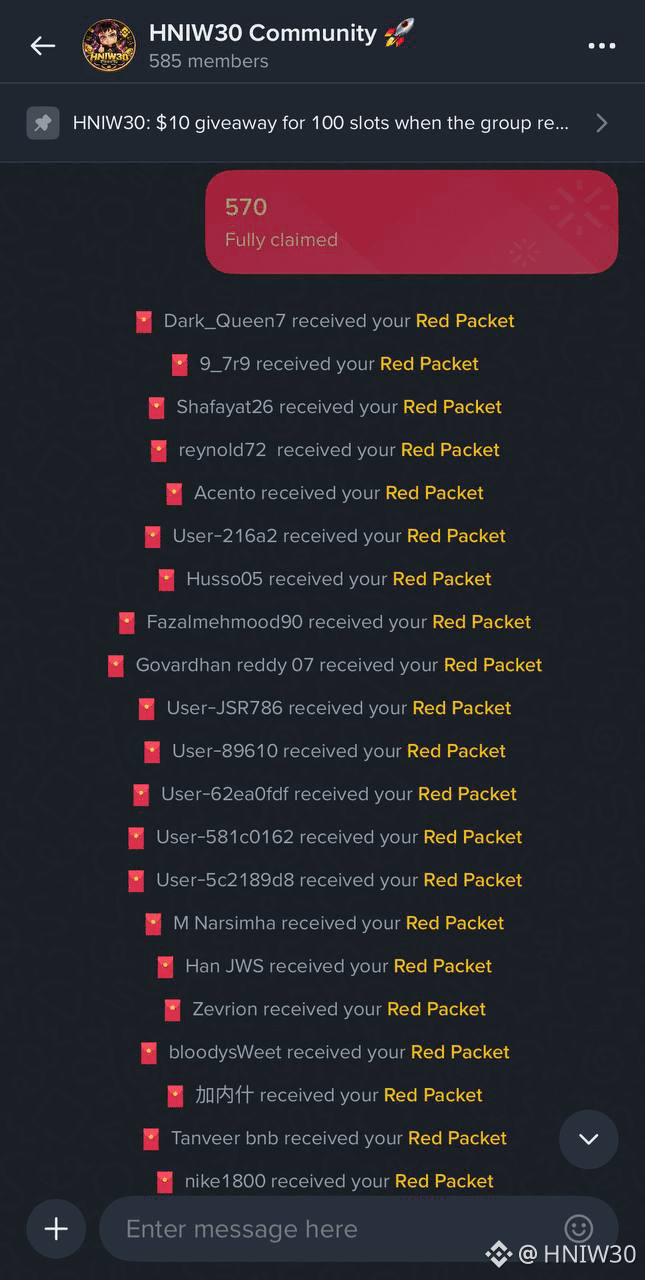
Today I sent many Red Packets in the HNIW30 Community 🎁🔥
But we’re not stopping here 👀
More Red Packets, more rewards, and more surprises are coming!
🚀 Join us now before the next drop!
#Binance #BitcoinSlipsBelow$84000
Today I sent many Red Packets in the HNIW30 Community 🎁🔥
But we’re not stopping here 👀
More Red Packets, more rewards, and more surprises are coming!
🚀 Join us now before the next drop!
#Binance #BitcoinSlipsBelow$84000
But we’re not stopping here 👀
More Red Packets, more rewards, and more surprises are coming!
🚀 Join us now before the next drop!
#Binance #BitcoinSlipsBelow$84000
37
4
69
·
--
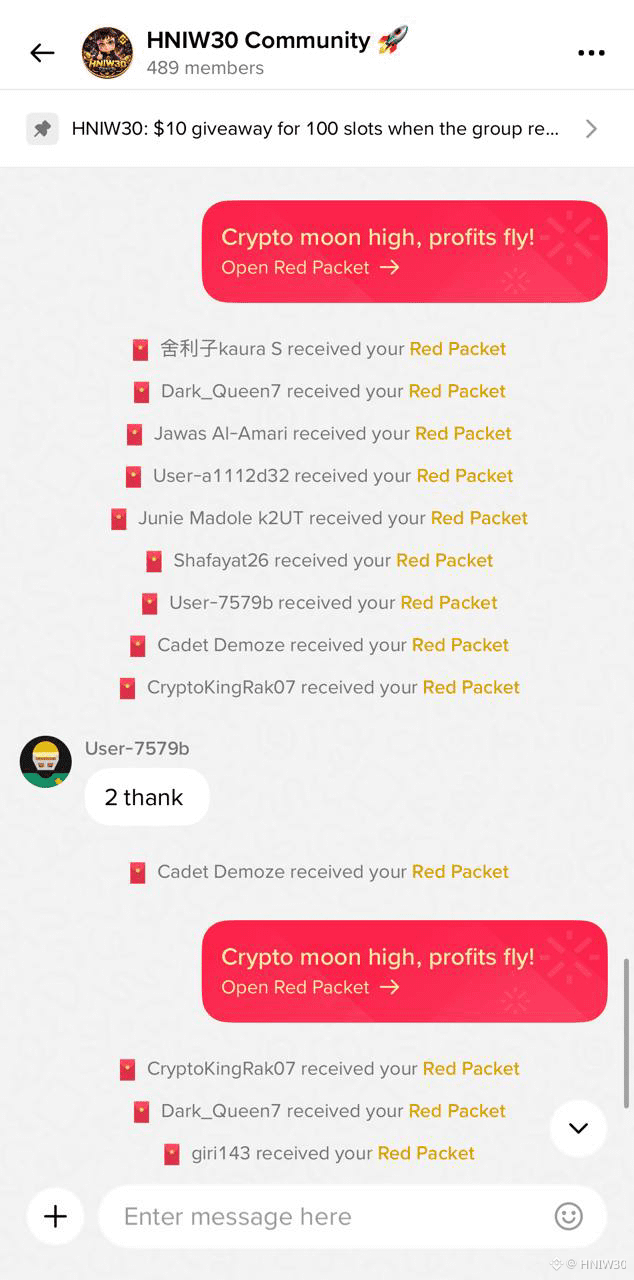
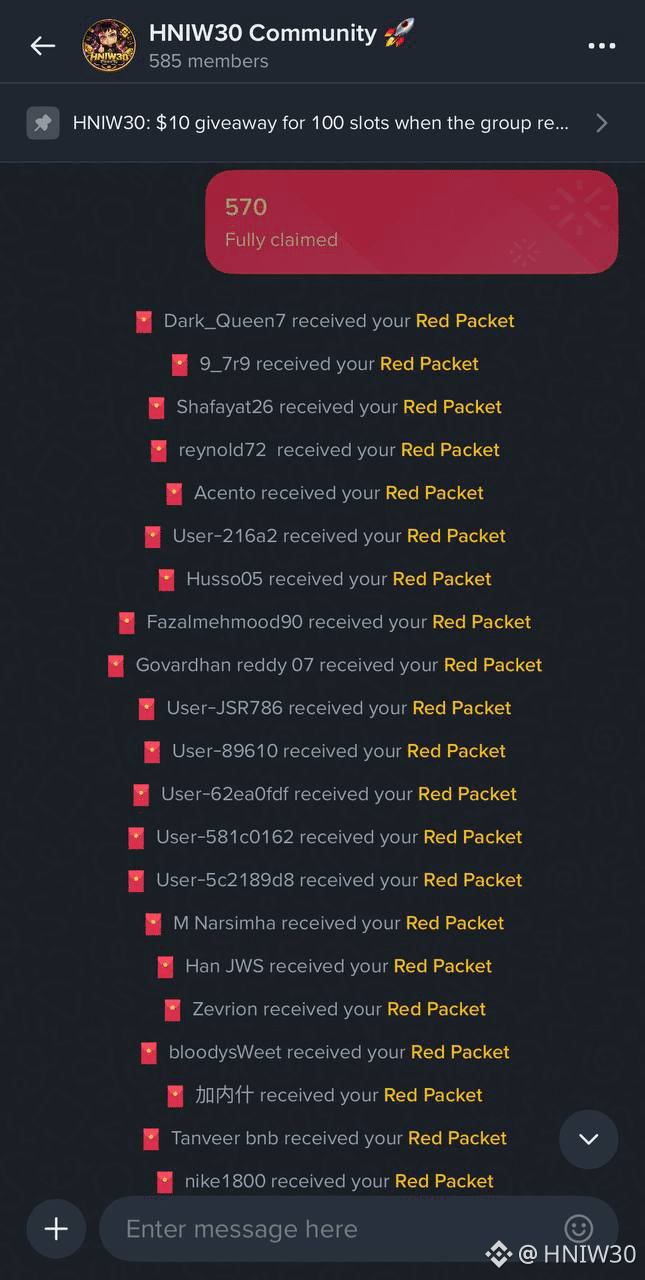
Today I sent many Red Packets in the HNIW30 Community 🎁🔥
But we’re not stopping here 👀
More Red Packets, more rewards, and more surprises are coming!
🚀 Join us now before the next drop!
#Binance #HNIW30
Today I sent many Red Packets in the HNIW30 Community 🎁🔥
But we’re not stopping here 👀
More Red Packets, more rewards, and more surprises are coming!
🚀 Join us now before the next drop!
#Binance #HNIW30
But we’re not stopping here 👀
More Red Packets, more rewards, and more surprises are coming!
🚀 Join us now before the next drop!
#Binance #HNIW30
1
5
95
·
--
AI REVENUE IS BOOMING, BUT CAN AI STOCKS KEEP RISING? 📈
One question comes to mind whenever I look at the AI stock market: Does an outstanding company always represent an attractive investment at its current price?
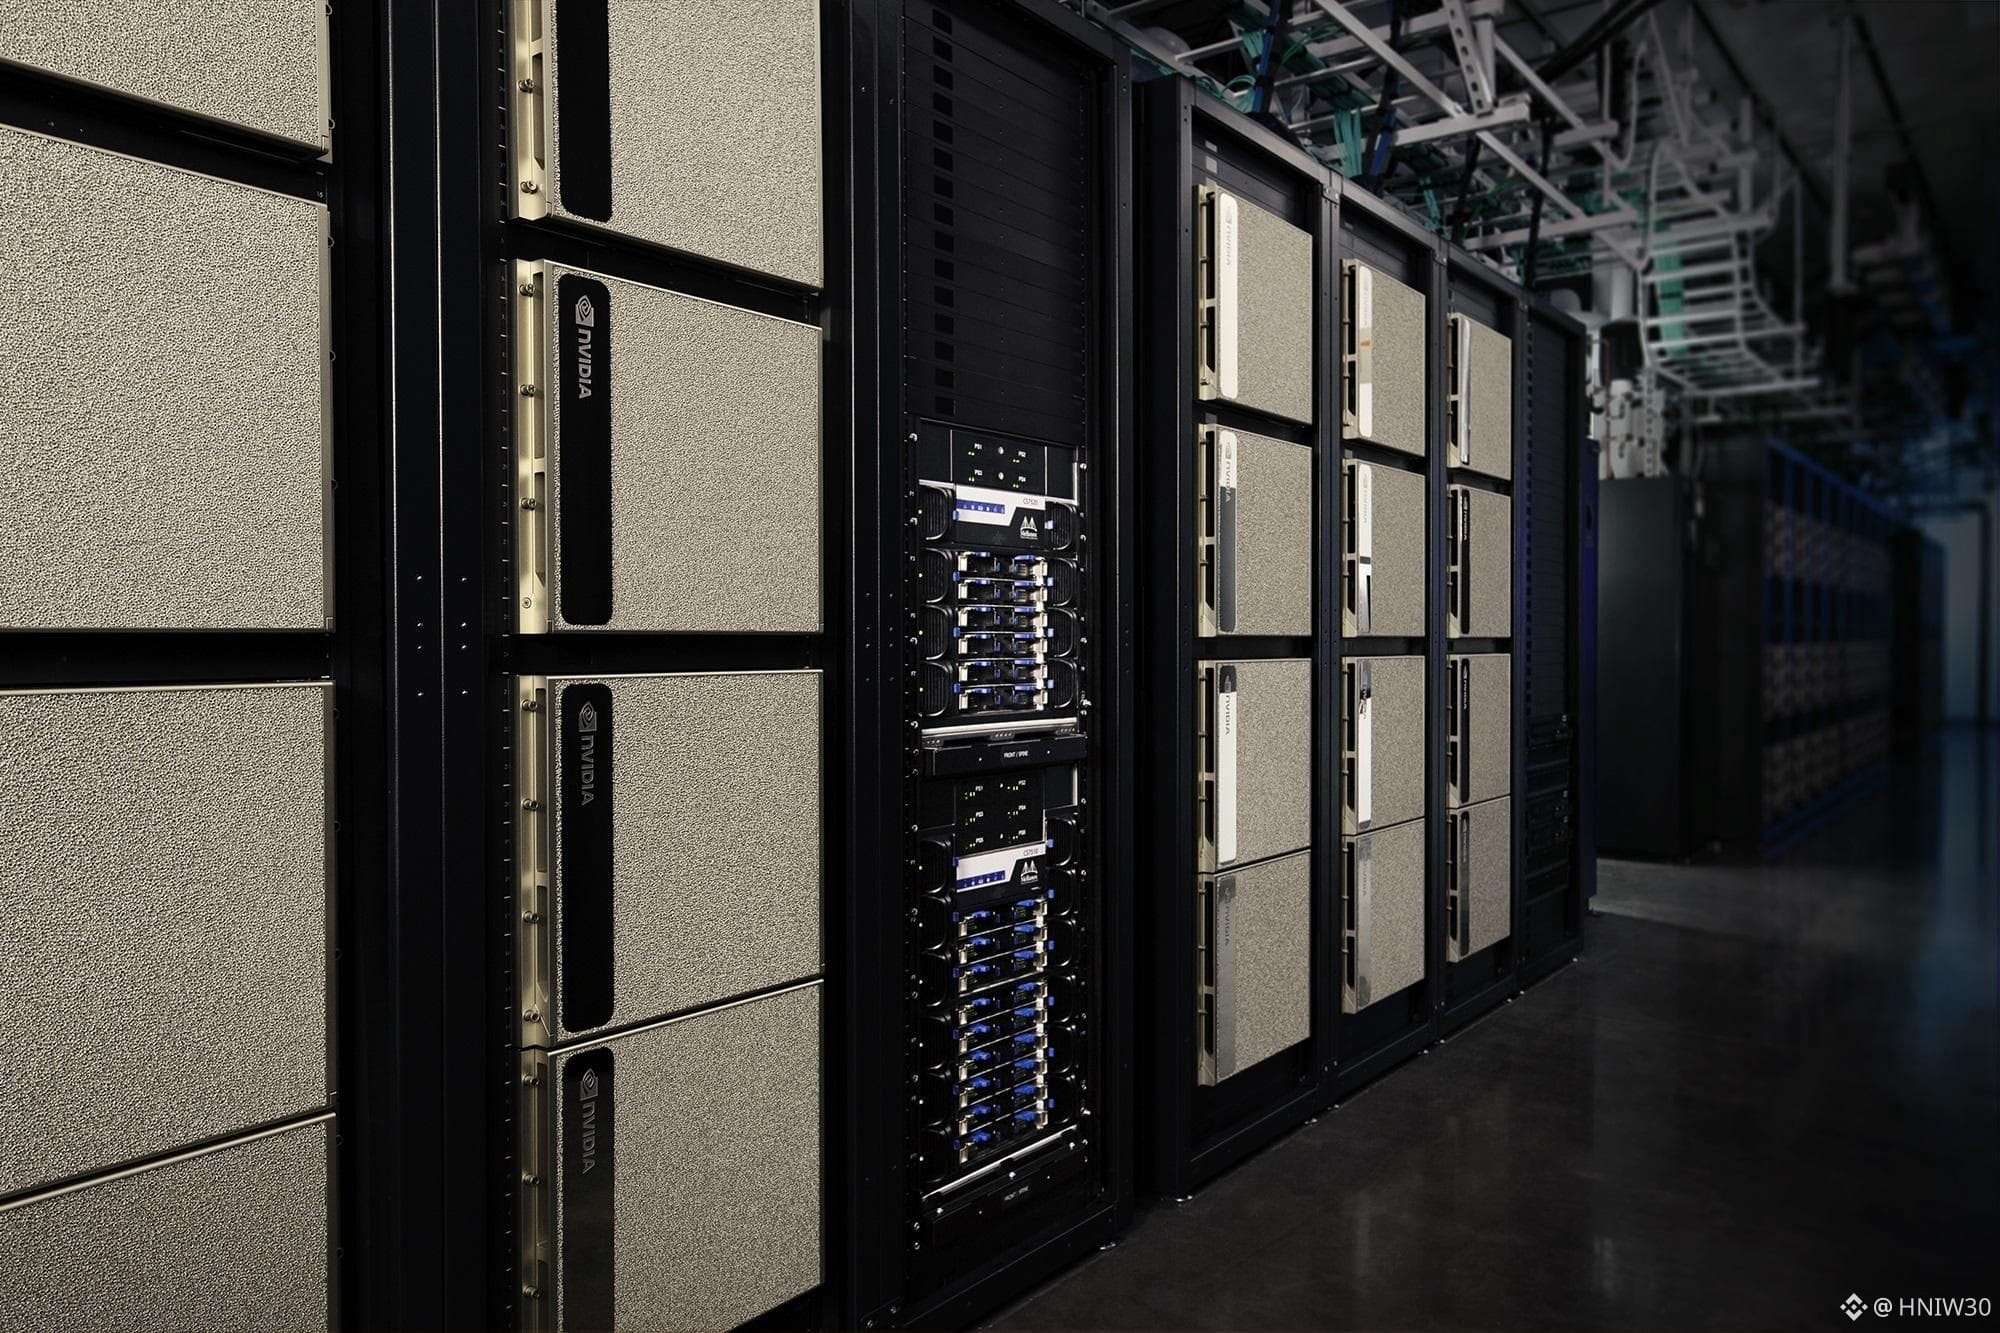
Nvidia provides an interesting example. Growing demand for AI computing has created enormous opportunities for companies producing high-performance processors.
However, I believe investors should distinguish between three important factors: business growth, market expectations, and stock valuation.
1. Revenue growth does not guarantee proportional profit growth.
A company can sell more products while facing higher research expenses, manufacturing costs, competition, and capital requirements.
Revenue growth is important, but sustainable profitability also matters.
2. Stock prices reflect expectations about the future.
Investors often price years of anticipated growth into a company's current valuation.
Even an impressive earnings report may disappoint the market if the results fail to exceed those expectations.
Therefore, the key question is not simply whether an AI company is growing. It is whether its actual performance can justify the expectations already reflected in its stock price.
3. AI investment opportunities extend beyond the most popular companies.
Memory manufacturers, networking equipment providers, cloud infrastructure companies, and AI software developers all participate in the broader AI ecosystem.
However, a less popular company is not necessarily an undervalued company.
My view is that AI technology can continue advancing even when individual AI stocks experience significant corrections.
The long-term potential of a technology and the investment return of a particular stock are related, but they are not the same thing.
For that reason, I prefer examining business fundamentals and valuation rather than relying entirely on market excitement.
When evaluating an AI stock, which matters more to you: its revenue growth or the price investors are currently paying for that growth?
#AIStocksWhatNext
AI REVENUE IS BOOMING, BUT CAN AI STOCKS KEEP RISING? 📈
One question comes to mind whenever I look at the AI stock market: Does an outstanding company always represent an attractive investment at its current price?
Nvidia provides an interesting example. Growing demand for AI computing has created enormous opportunities for companies producing high-performance processors.
However, I believe investors should distinguish between three important factors: business growth, market expectations, and stock valuation.
1. Revenue growth does not guarantee proportional profit growth.
A company can sell more products while facing higher research expenses, manufacturing costs, competition, and capital requirements.
Revenue growth is important, but sustainable profitability also matters.
2. Stock prices reflect expectations about the future.
Investors often price years of anticipated growth into a company's current valuation.
Even an impressive earnings report may disappoint the market if the results fail to exceed those expectations.
Therefore, the key question is not simply whether an AI company is growing. It is whether its actual performance can justify the expectations already reflected in its stock price.
3. AI investment opportunities extend beyond the most popular companies.
Memory manufacturers, networking equipment providers, cloud infrastructure companies, and AI software developers all participate in the broader AI ecosystem.
However, a less popular company is not necessarily an undervalued company.
My view is that AI technology can continue advancing even when individual AI stocks experience significant corrections.
The long-term potential of a technology and the investment return of a particular stock are related, but they are not the same thing.
For that reason, I prefer examining business fundamentals and valuation rather than relying entirely on market excitement.
When evaluating an AI stock, which matters more to you: its revenue growth or the price investors are currently paying for that growth?
#AIStocksWhatNext
One question comes to mind whenever I look at the AI stock market: Does an outstanding company always represent an attractive investment at its current price?
Nvidia provides an interesting example. Growing demand for AI computing has created enormous opportunities for companies producing high-performance processors.
However, I believe investors should distinguish between three important factors: business growth, market expectations, and stock valuation.
1. Revenue growth does not guarantee proportional profit growth.
A company can sell more products while facing higher research expenses, manufacturing costs, competition, and capital requirements.
Revenue growth is important, but sustainable profitability also matters.
2. Stock prices reflect expectations about the future.
Investors often price years of anticipated growth into a company's current valuation.
Even an impressive earnings report may disappoint the market if the results fail to exceed those expectations.
Therefore, the key question is not simply whether an AI company is growing. It is whether its actual performance can justify the expectations already reflected in its stock price.
3. AI investment opportunities extend beyond the most popular companies.
Memory manufacturers, networking equipment providers, cloud infrastructure companies, and AI software developers all participate in the broader AI ecosystem.
However, a less popular company is not necessarily an undervalued company.
My view is that AI technology can continue advancing even when individual AI stocks experience significant corrections.
The long-term potential of a technology and the investment return of a particular stock are related, but they are not the same thing.
For that reason, I prefer examining business fundamentals and valuation rather than relying entirely on market excitement.
When evaluating an AI stock, which matters more to you: its revenue growth or the price investors are currently paying for that growth?
#AIStocksWhatNext
2
376
·
--
Article
WHO WILL ACTUALLY CAPTURE THE PROFITS FROM THE AI REVOLUTION?The AI industry is attracting enormous investment, but I believe the most interesting question is not simply which companies will experience the fastest revenue growth.
It is which companies will successfully turn AI adoption into sustainable profits and free cash flow.
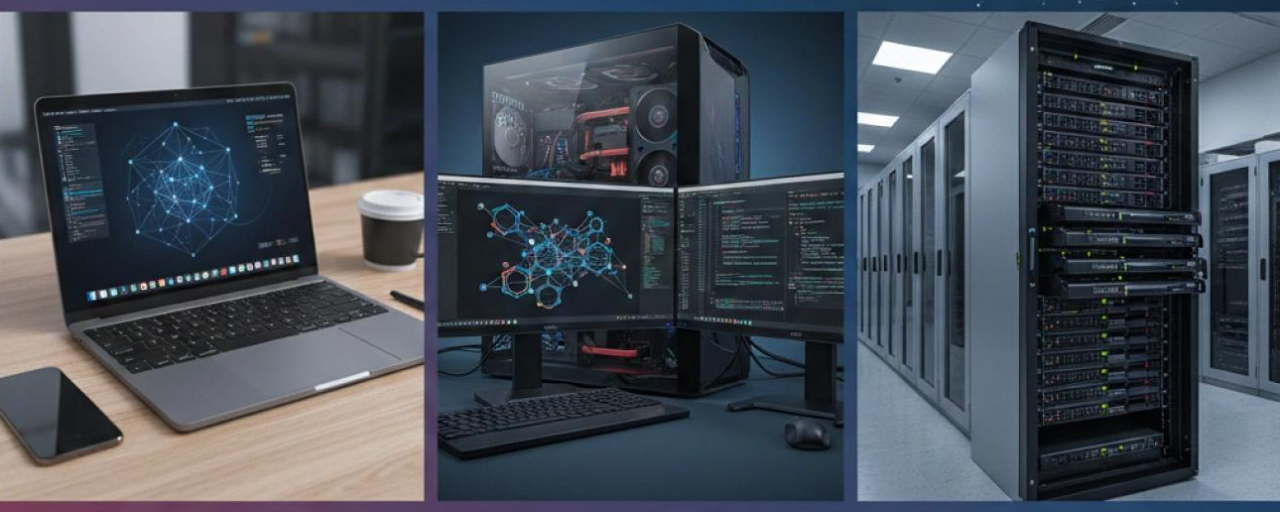
To explore this question, I divide the AI investment landscape into three major groups.
1. Semiconductor manufacturers
Companies producing advanced AI processors provide the computing power needed to train and operate AI models.
Growing computing demand creates business opportunities, but these companies must also navigate technological changes, increasing competition, and the possibility that major customers will develop their own chips.
2. Data centers and cloud infrastructure providers
These companies provide the physical and digital infrastructure required to operate AI services at scale.
As AI adoption expands, demand for computing capacity could increase.
However, data centers require substantial investment in servers, electricity, cooling systems, and maintenance.
Higher revenue does not necessarily translate into stronger free cash flow when capital expenditure is growing rapidly.
3. AI application developers
This is another part of the AI ecosystem I want to monitor closely.
If AI applications help businesses reduce costs, improve productivity, or create products that customers are willing to pay for, they could generate significant economic value.
However, intense competition may push subscription prices lower, while computing costs remain substantial.
The crucial question is whether AI application developers can retain enough value to build profitable and sustainable businesses.
My investment perspective
I believe the AI revolution may create opportunities across the entire value chain, from semiconductor manufacturing to infrastructure and software applications.
However, participating in a rapidly growing industry does not automatically guarantee attractive shareholder returns.
The ability to maintain competitive advantages, manage capital expenditure, and generate sustainable cash flow will be important factors in evaluating these opportunities.
Instead of focusing exclusively on the companies receiving the most attention today, I want to understand where lasting economic value is being created.
Which part of the AI value chain interests you most: chipmakers, infrastructure providers, or AI application developers?
#AIStocksWhatNext
WHO WILL ACTUALLY CAPTURE THE PROFITS FROM THE AI REVOLUTION?
The AI industry is attracting enormous investment, but I believe the most interesting question is not simply which companies will experience the fastest revenue growth.
It is which companies will successfully turn AI adoption into sustainable profits and free cash flow.
To explore this question, I divide the AI investment landscape into three major groups.
1. Semiconductor manufacturers
Companies producing advanced AI processors provide the computing power needed to train and operate AI models.
Growing computing demand creates business opportunities, but these companies must also navigate technological changes, increasing competition, and the possibility that major customers will develop their own chips.
2. Data centers and cloud infrastructure providers
These companies provide the physical and digital infrastructure required to operate AI services at scale.
As AI adoption expands, demand for computing capacity could increase.
However, data centers require substantial investment in servers, electricity, cooling systems, and maintenance.
Higher revenue does not necessarily translate into stronger free cash flow when capital expenditure is growing rapidly.
3. AI application developers
This is another part of the AI ecosystem I want to monitor closely.
If AI applications help businesses reduce costs, improve productivity, or create products that customers are willing to pay for, they could generate significant economic value.
However, intense competition may push subscription prices lower, while computing costs remain substantial.
The crucial question is whether AI application developers can retain enough value to build profitable and sustainable businesses.
My investment perspective
I believe the AI revolution may create opportunities across the entire value chain, from semiconductor manufacturing to infrastructure and software applications.
However, participating in a rapidly growing industry does not automatically guarantee attractive shareholder returns.
The ability to maintain competitive advantages, manage capital expenditure, and generate sustainable cash flow will be important factors in evaluating these opportunities.
Instead of focusing exclusively on the companies receiving the most attention today, I want to understand where lasting economic value is being created.
Which part of the AI value chain interests you most: chipmakers, infrastructure providers, or AI application developers?
#AIStocksWhatNext
It is which companies will successfully turn AI adoption into sustainable profits and free cash flow.
To explore this question, I divide the AI investment landscape into three major groups.
1. Semiconductor manufacturers
Companies producing advanced AI processors provide the computing power needed to train and operate AI models.
Growing computing demand creates business opportunities, but these companies must also navigate technological changes, increasing competition, and the possibility that major customers will develop their own chips.
2. Data centers and cloud infrastructure providers
These companies provide the physical and digital infrastructure required to operate AI services at scale.
As AI adoption expands, demand for computing capacity could increase.
However, data centers require substantial investment in servers, electricity, cooling systems, and maintenance.
Higher revenue does not necessarily translate into stronger free cash flow when capital expenditure is growing rapidly.
3. AI application developers
This is another part of the AI ecosystem I want to monitor closely.
If AI applications help businesses reduce costs, improve productivity, or create products that customers are willing to pay for, they could generate significant economic value.
However, intense competition may push subscription prices lower, while computing costs remain substantial.
The crucial question is whether AI application developers can retain enough value to build profitable and sustainable businesses.
My investment perspective
I believe the AI revolution may create opportunities across the entire value chain, from semiconductor manufacturing to infrastructure and software applications.
However, participating in a rapidly growing industry does not automatically guarantee attractive shareholder returns.
The ability to maintain competitive advantages, manage capital expenditure, and generate sustainable cash flow will be important factors in evaluating these opportunities.
Instead of focusing exclusively on the companies receiving the most attention today, I want to understand where lasting economic value is being created.
Which part of the AI value chain interests you most: chipmakers, infrastructure providers, or AI application developers?
#AIStocksWhatNext
483
·
--
AI NEEDS MORE THAN CHIPS: WHERE IS THE NEXT INVESTMENT OPPORTUNITY? ⚡
When investors discuss the AI boom, Nvidia and other semiconductor companies usually dominate the conversation. However, I believe an equally important question deserves attention: What happens when computing power expands faster than the infrastructure supporting it?
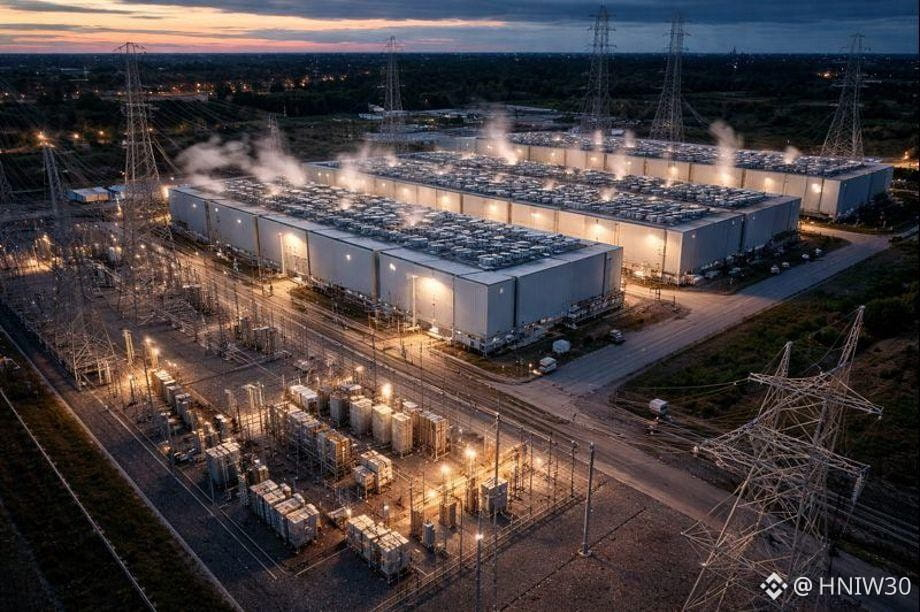
AI data centers cannot operate on powerful GPUs alone. They also require reliable electricity, advanced cooling systems, transformers, and high-capacity power grids.
This creates several potential investment opportunities beyond traditional AI stocks.
1. Electricity and power infrastructure
As technology companies expand their AI data centers, electricity demand is likely to increase. However, building new power plants and upgrading electrical grids takes considerably longer than purchasing additional servers.
Companies that provide essential power infrastructure could benefit from this growing demand.
2. Advanced cooling technologies
High-performance AI chips generate substantial heat. As computing capacity increases, efficient cooling becomes increasingly important.
Liquid cooling systems, thermal management equipment, and energy-efficient data center technologies could become essential parts of the AI supply chain.
3. The difference between demand and profitability
Not every company associated with electricity or cooling will automatically become a successful investment.
Investors still need to examine actual contracts, operating margins, capital requirements, and whether future growth is already reflected in stock valuations.
My perspective is that the next stage of AI investment may involve companies solving the physical limitations of computing, rather than only those manufacturing the chips themselves.
The AI revolution needs more than intelligence. It needs the infrastructure that keeps intelligence running.
Which sector would you explore first: semiconductor companies, electricity infrastructure, or advanced cooling technologies?
#AIStocksWhatNext
AI NEEDS MORE THAN CHIPS: WHERE IS THE NEXT INVESTMENT OPPORTUNITY? ⚡
When investors discuss the AI boom, Nvidia and other semiconductor companies usually dominate the conversation. However, I believe an equally important question deserves attention: What happens when computing power expands faster than the infrastructure supporting it?
AI data centers cannot operate on powerful GPUs alone. They also require reliable electricity, advanced cooling systems, transformers, and high-capacity power grids.
This creates several potential investment opportunities beyond traditional AI stocks.
1. Electricity and power infrastructure
As technology companies expand their AI data centers, electricity demand is likely to increase. However, building new power plants and upgrading electrical grids takes considerably longer than purchasing additional servers.
Companies that provide essential power infrastructure could benefit from this growing demand.
2. Advanced cooling technologies
High-performance AI chips generate substantial heat. As computing capacity increases, efficient cooling becomes increasingly important.
Liquid cooling systems, thermal management equipment, and energy-efficient data center technologies could become essential parts of the AI supply chain.
3. The difference between demand and profitability
Not every company associated with electricity or cooling will automatically become a successful investment.
Investors still need to examine actual contracts, operating margins, capital requirements, and whether future growth is already reflected in stock valuations.
My perspective is that the next stage of AI investment may involve companies solving the physical limitations of computing, rather than only those manufacturing the chips themselves.
The AI revolution needs more than intelligence. It needs the infrastructure that keeps intelligence running.
Which sector would you explore first: semiconductor companies, electricity infrastructure, or advanced cooling technologies?
#AIStocksWhatNext
When investors discuss the AI boom, Nvidia and other semiconductor companies usually dominate the conversation. However, I believe an equally important question deserves attention: What happens when computing power expands faster than the infrastructure supporting it?
AI data centers cannot operate on powerful GPUs alone. They also require reliable electricity, advanced cooling systems, transformers, and high-capacity power grids.
This creates several potential investment opportunities beyond traditional AI stocks.
1. Electricity and power infrastructure
As technology companies expand their AI data centers, electricity demand is likely to increase. However, building new power plants and upgrading electrical grids takes considerably longer than purchasing additional servers.
Companies that provide essential power infrastructure could benefit from this growing demand.
2. Advanced cooling technologies
High-performance AI chips generate substantial heat. As computing capacity increases, efficient cooling becomes increasingly important.
Liquid cooling systems, thermal management equipment, and energy-efficient data center technologies could become essential parts of the AI supply chain.
3. The difference between demand and profitability
Not every company associated with electricity or cooling will automatically become a successful investment.
Investors still need to examine actual contracts, operating margins, capital requirements, and whether future growth is already reflected in stock valuations.
My perspective is that the next stage of AI investment may involve companies solving the physical limitations of computing, rather than only those manufacturing the chips themselves.
The AI revolution needs more than intelligence. It needs the infrastructure that keeps intelligence running.
Which sector would you explore first: semiconductor companies, electricity infrastructure, or advanced cooling technologies?
#AIStocksWhatNext
1
482

·
--
Bullish
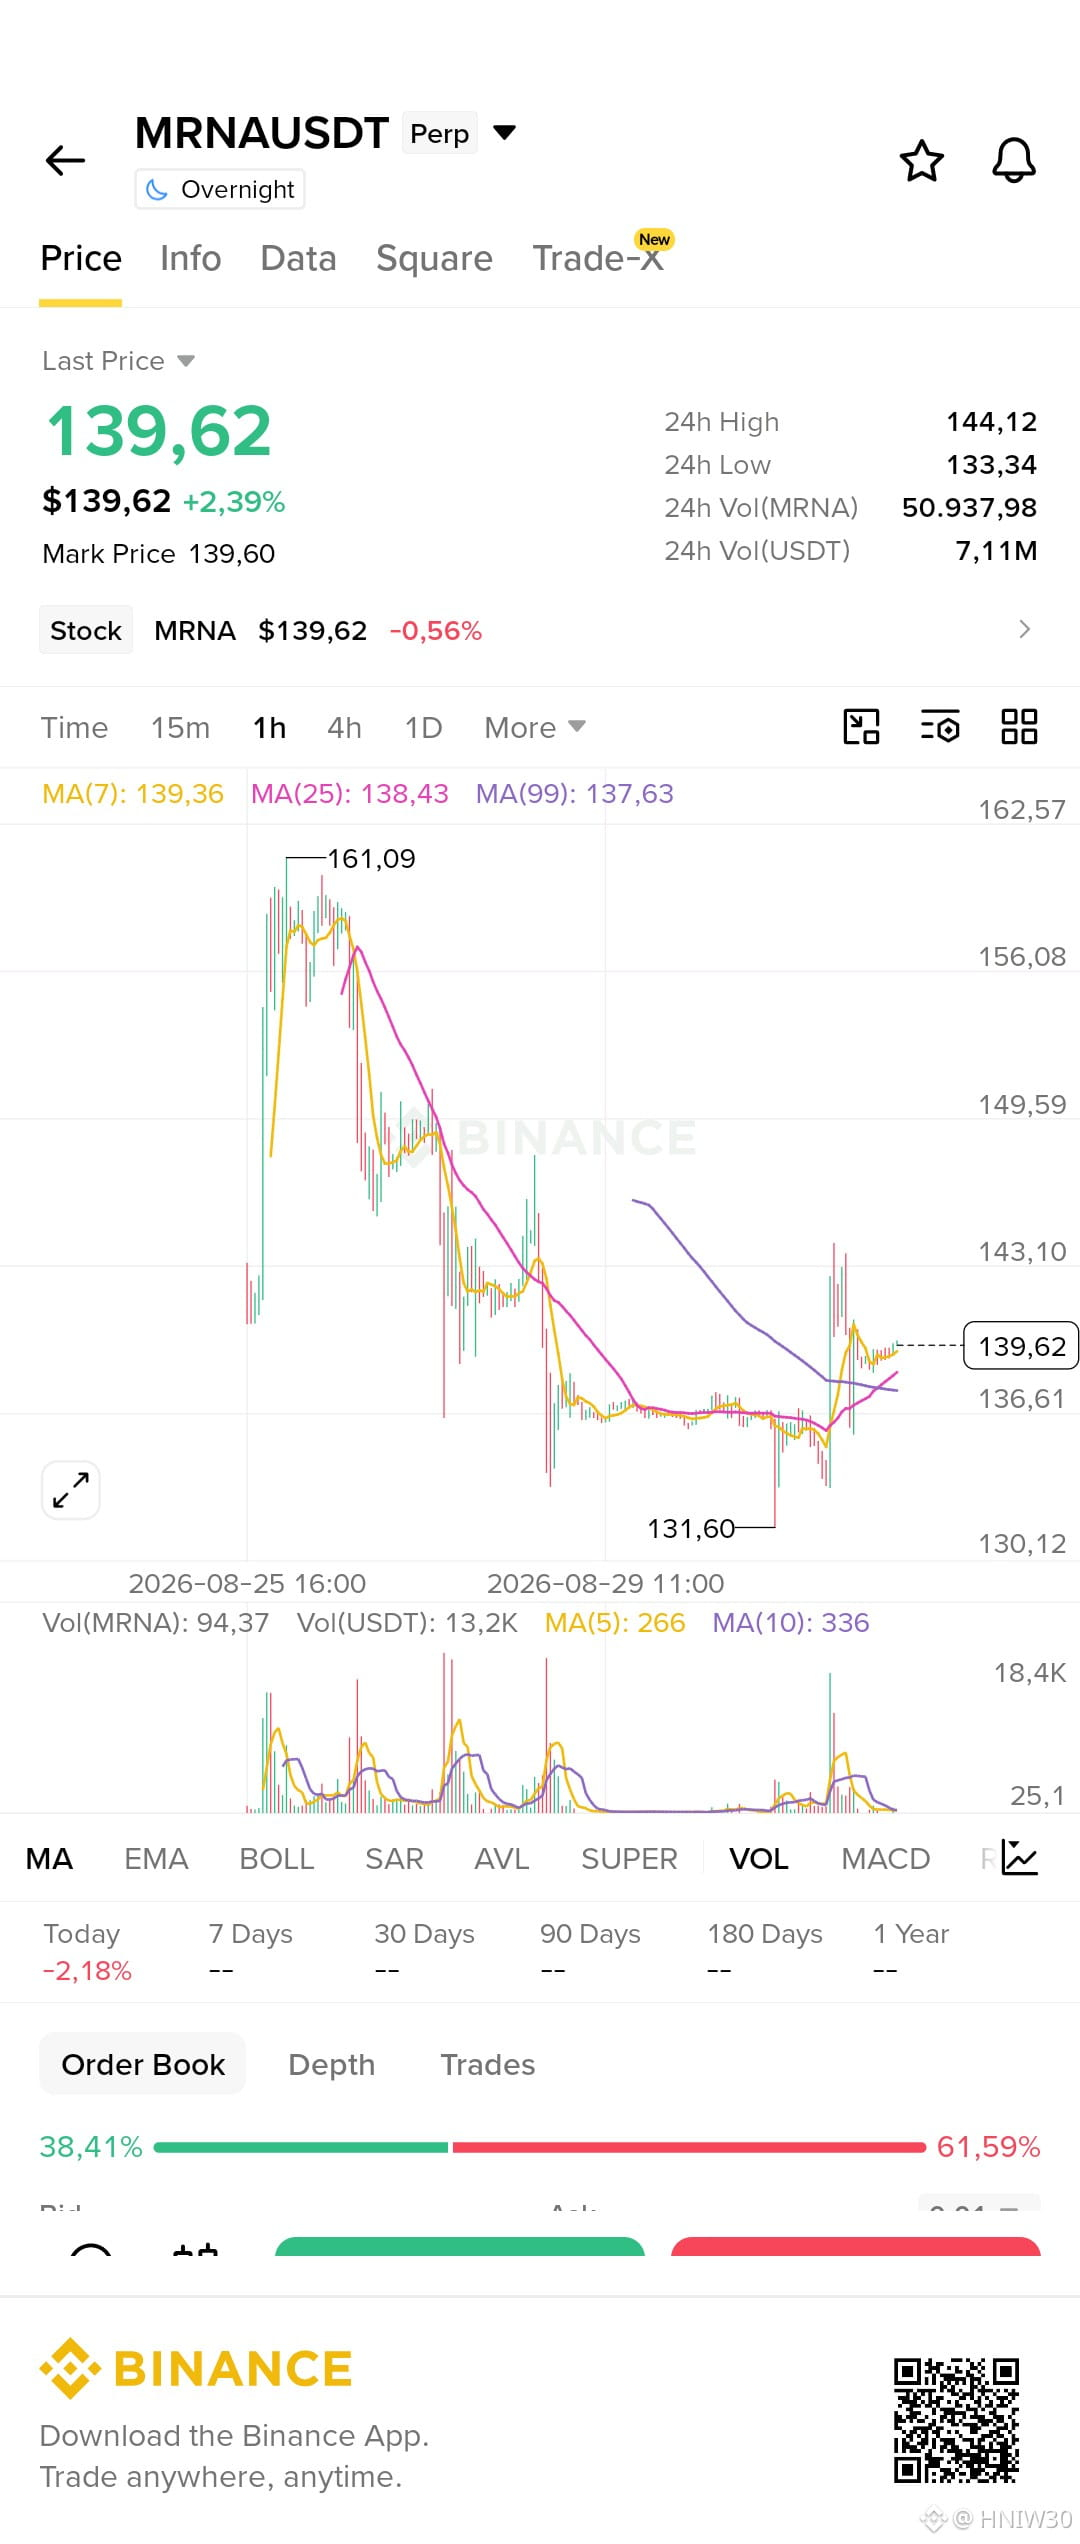
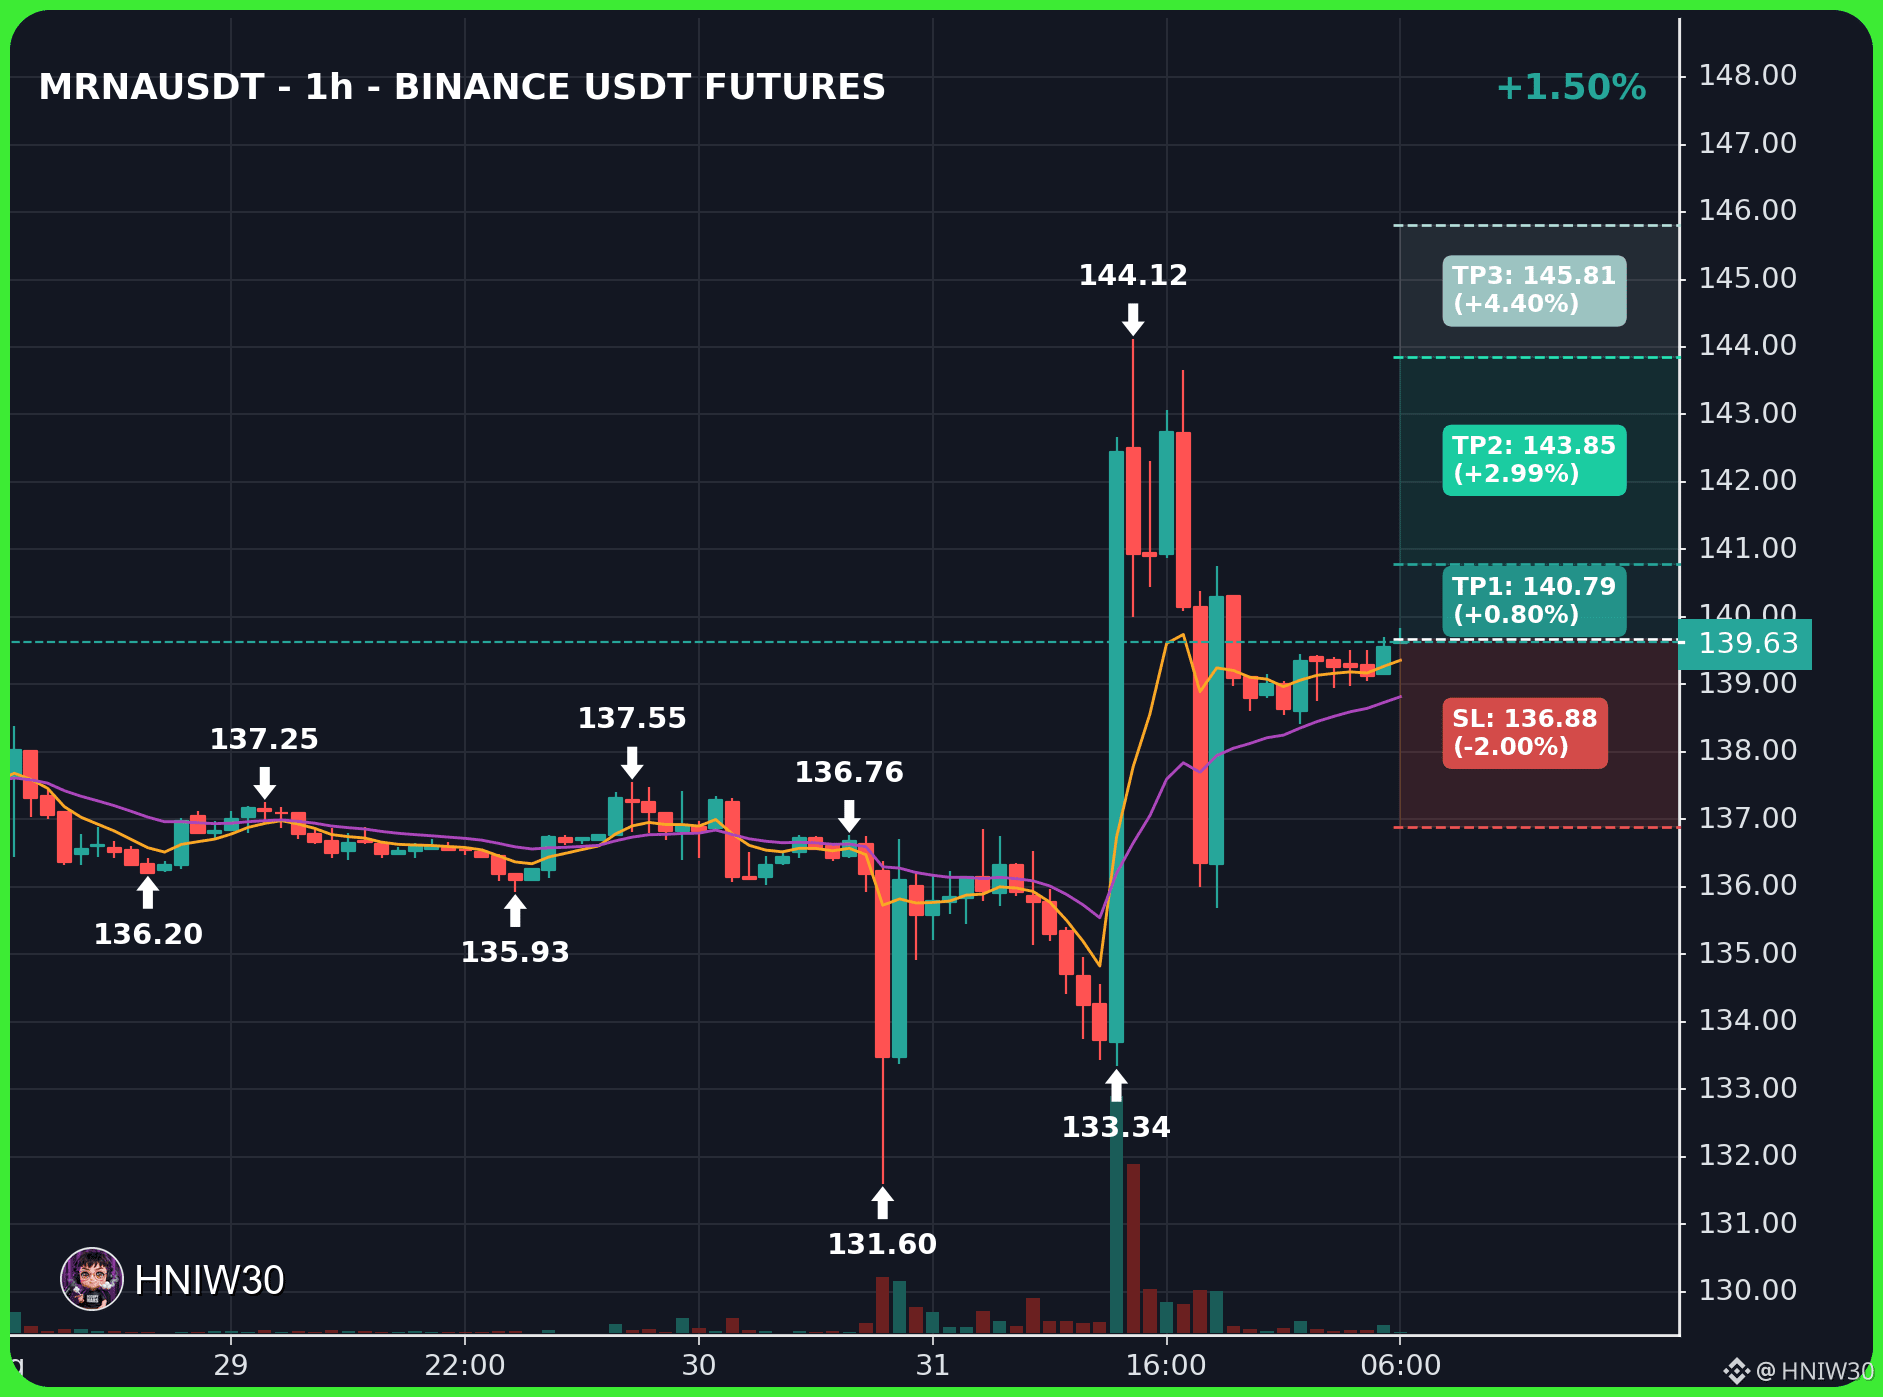
$MRNA – Breaking out in an early‑transition regime
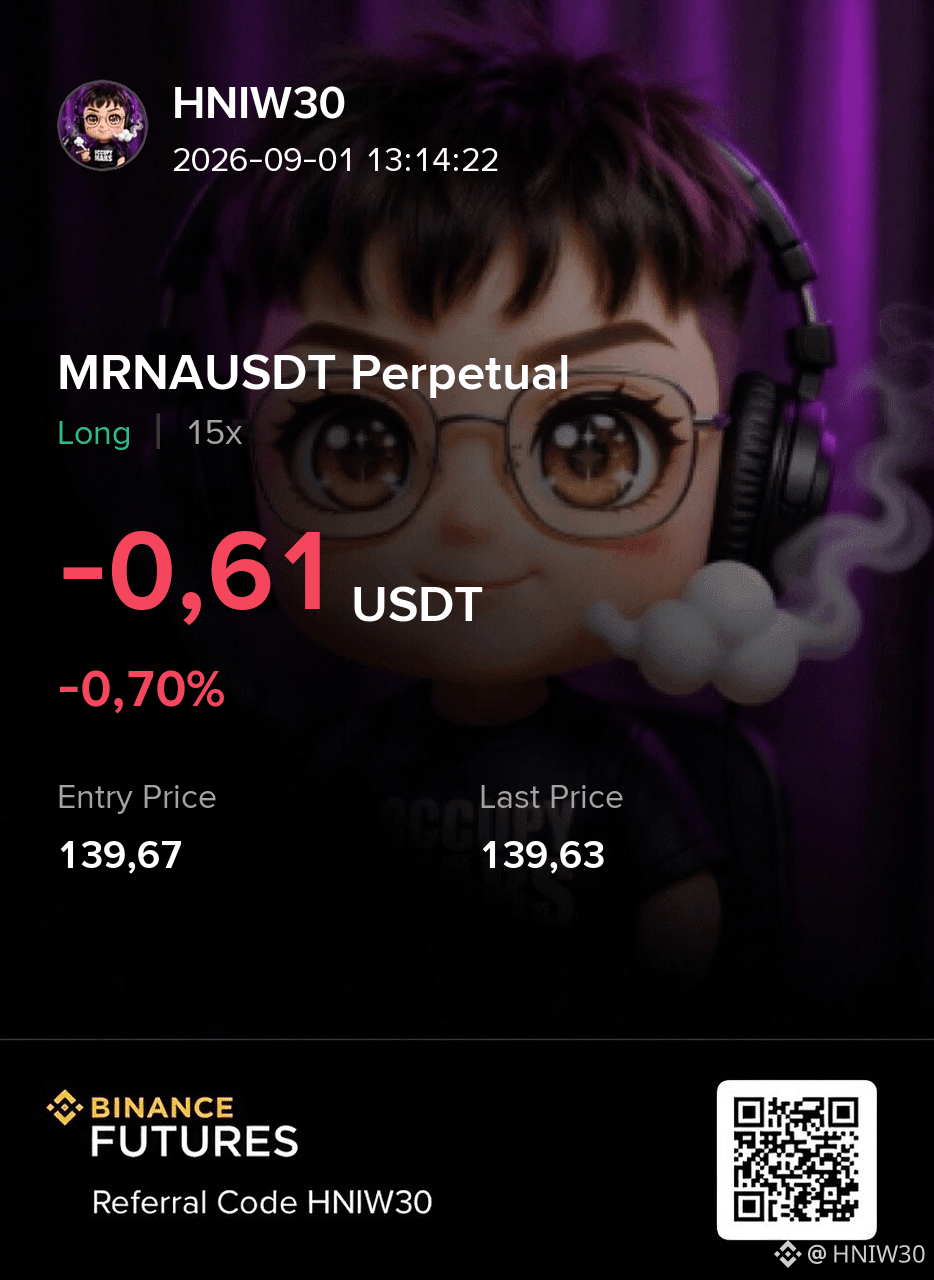
$MRNA LONG
Entry: 139.63 – 139.71
Stop Loss: 136.88
TP: 140.79 - 143.85 - 145.81
Plan & Logic
The daily profile shows a confirmed breakout with a strong volume read on the 5‑minute chart, supporting the upward thrust. Price action is reacting near an important level, so risk management matters here. The setup depends on confirmation around the entry zone and follow-through after the move.
Trade $MRNA here
{future}(MRNAUSDT)
$MRNA – Breaking out in an early‑transition regime
$MRNA LONG
Entry: 139.63 – 139.71
Stop Loss: 136.88
TP: 140.79 - 143.85 - 145.81
Plan & Logic
The daily profile shows a confirmed breakout with a strong volume read on the 5‑minute chart, supporting the upward thrust. Price action is reacting near an important level, so risk management matters here. The setup depends on confirmation around the entry zone and follow-through after the move.
Trade $MRNA here
$MRNA LONG
Entry: 139.63 – 139.71
Stop Loss: 136.88
TP: 140.79 - 143.85 - 145.81
Plan & Logic
The daily profile shows a confirmed breakout with a strong volume read on the 5‑minute chart, supporting the upward thrust. Price action is reacting near an important level, so risk management matters here. The setup depends on confirmation around the entry zone and follow-through after the move.
Trade $MRNA here
1
324
·
--
Bullish
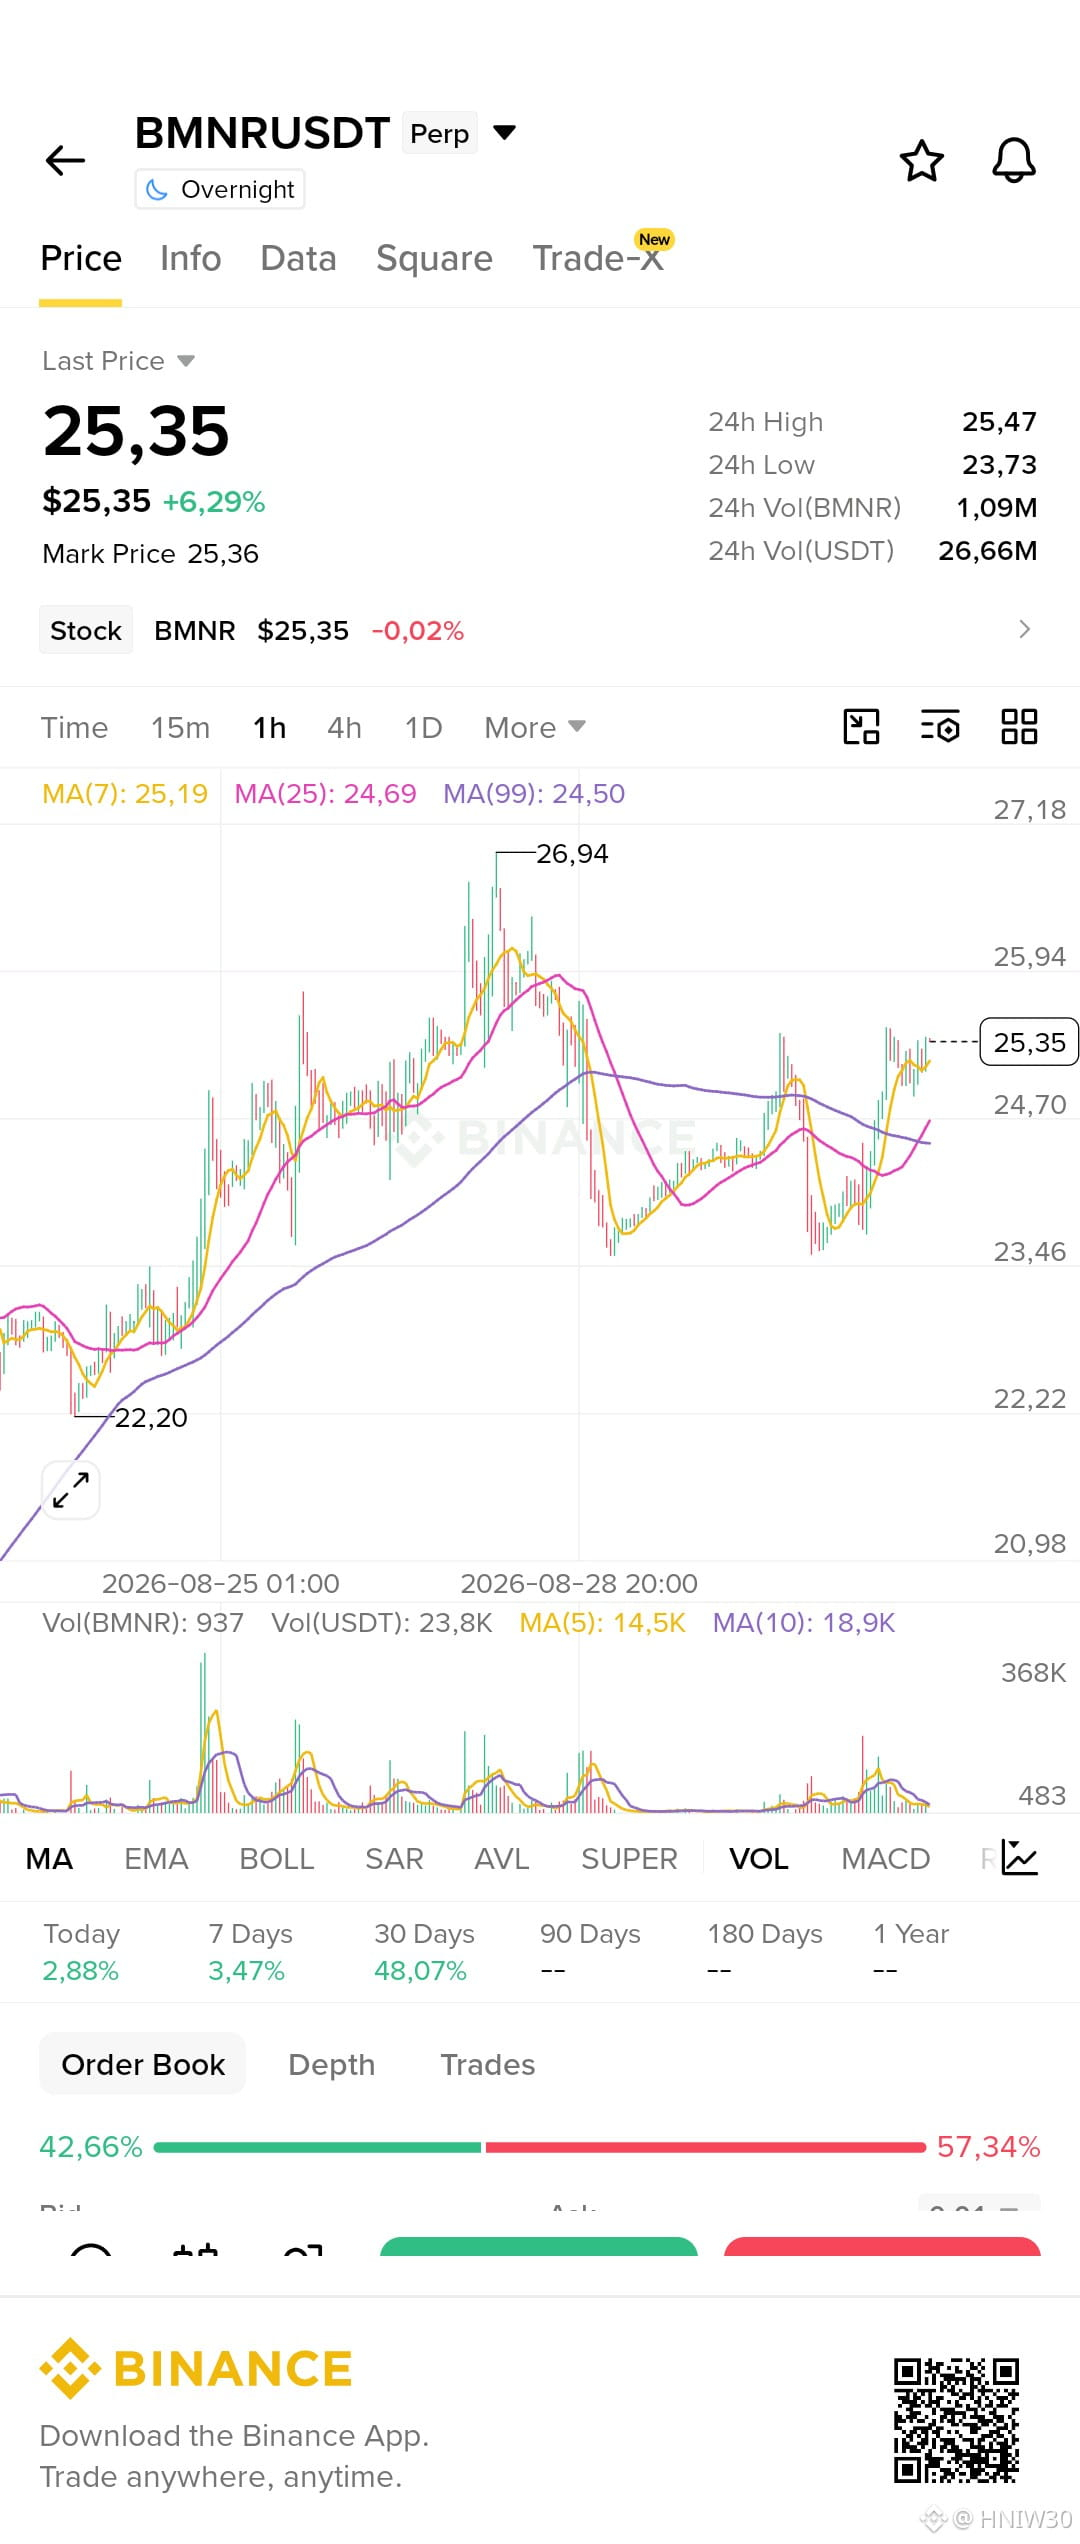
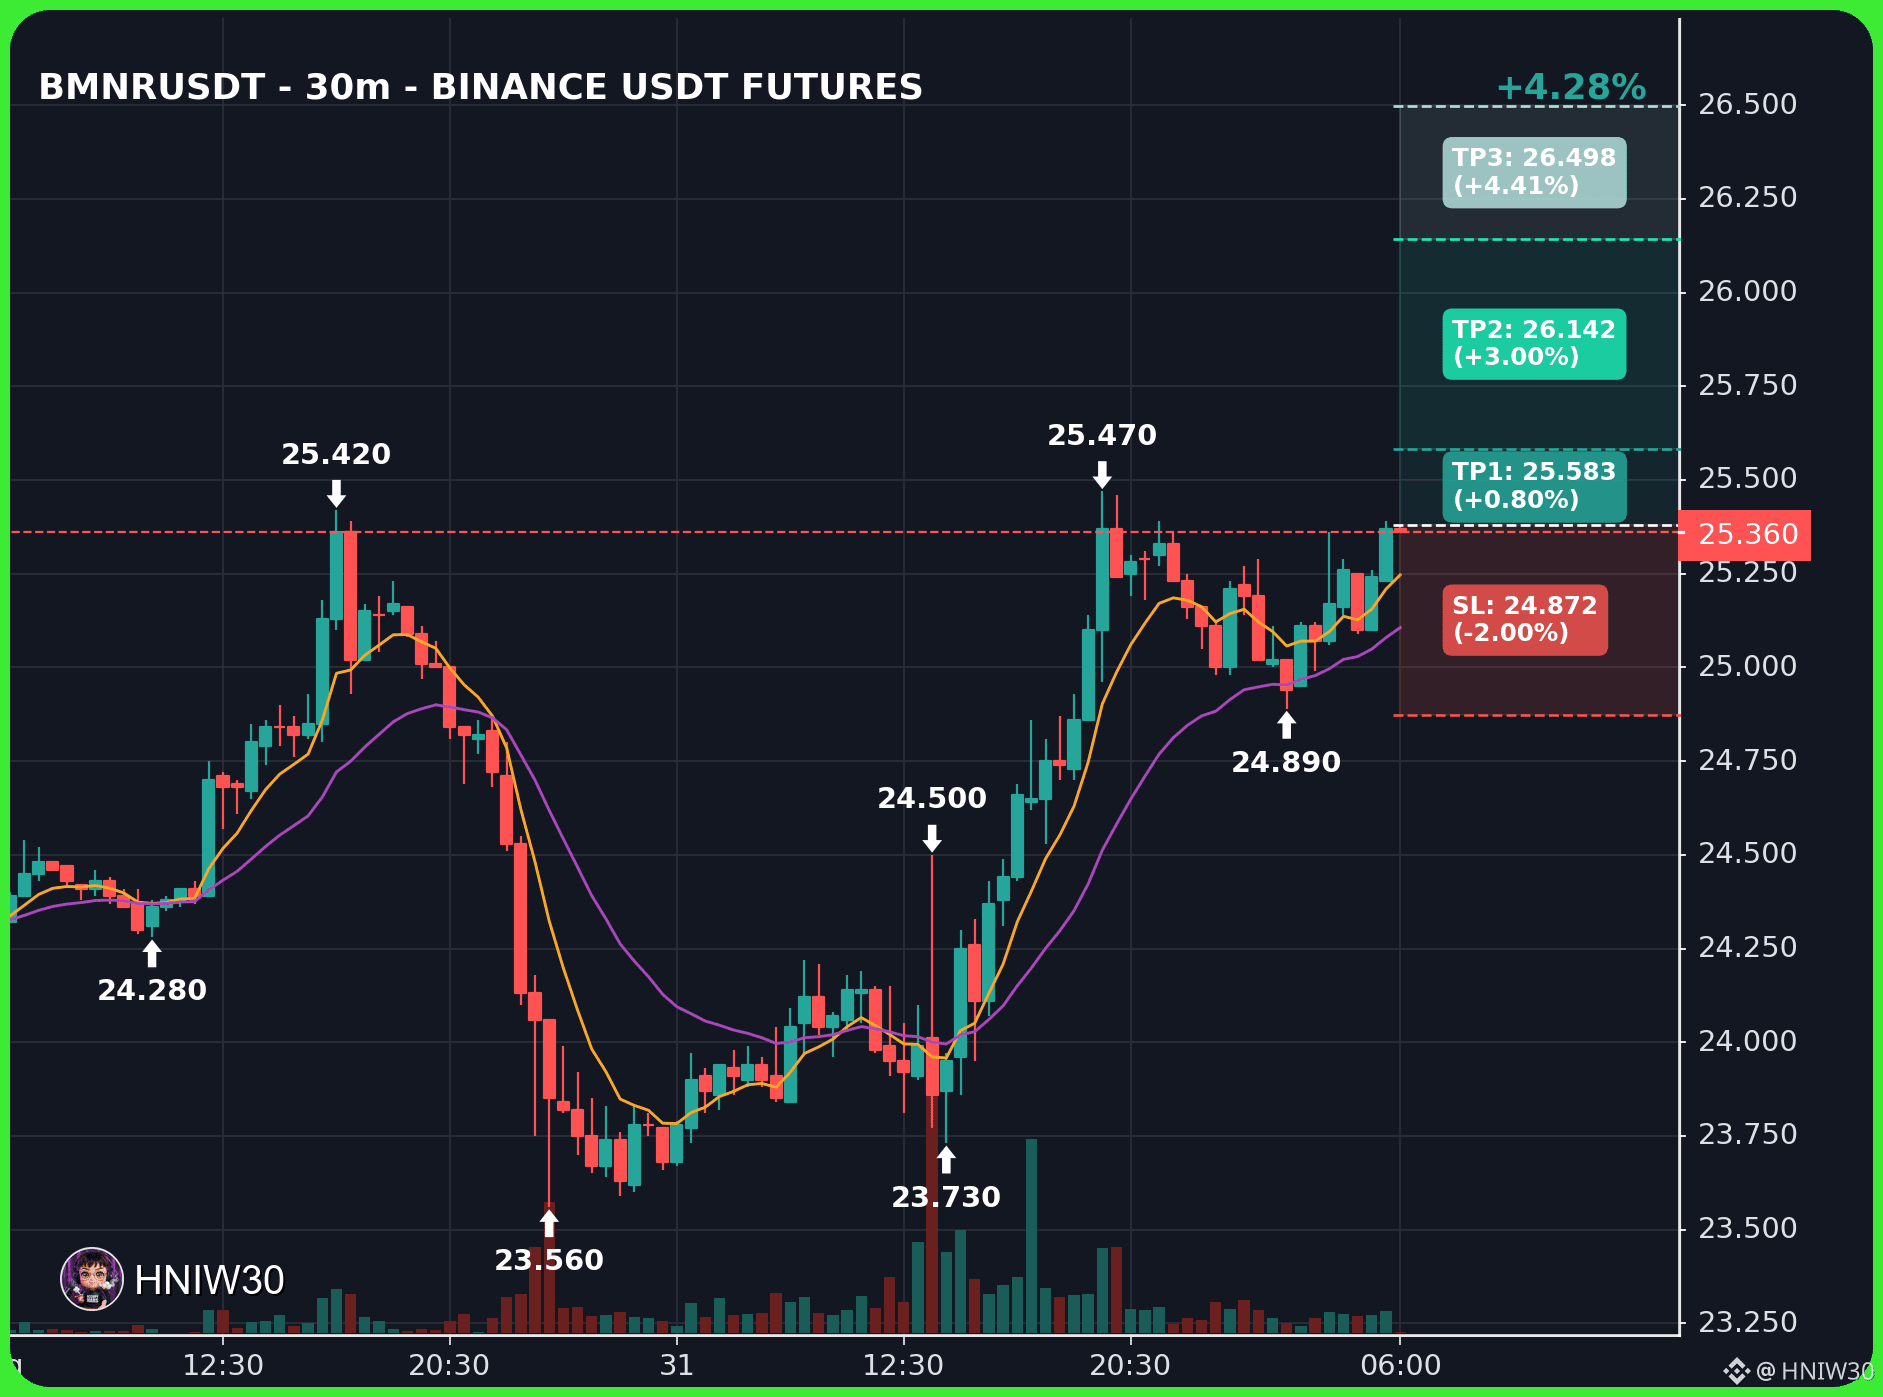
$BMNR – Pullback into a strong uptrend
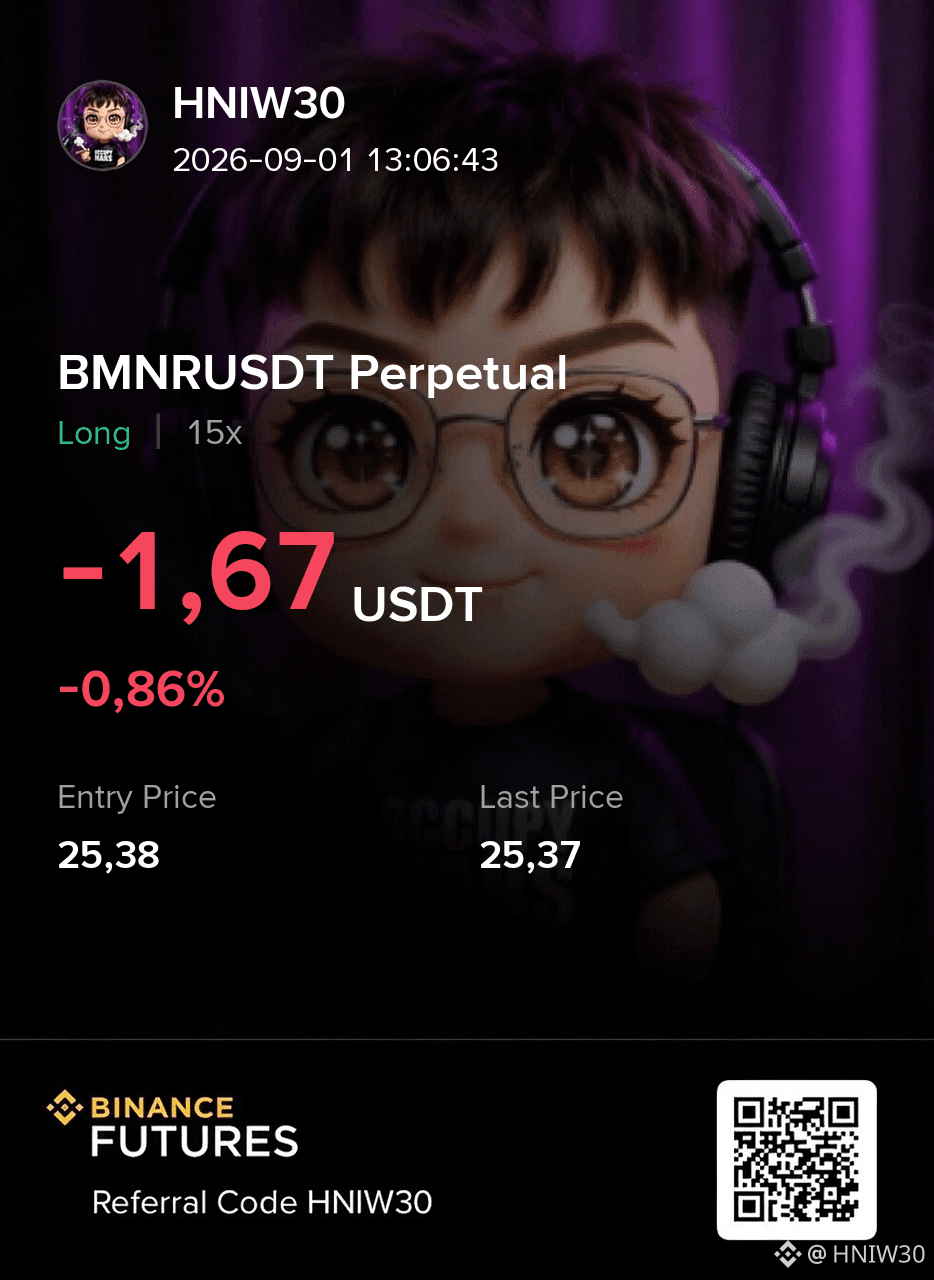
$BMNR LONG
Entry: 25.36 – 25.39
Stop Loss: 24.87
TP: 25.58 - 26.14 - 26.49
{future}(BMNRUSDT)
$BMNR – Pullback into a strong uptrend
$BMNR LONG
Entry: 25.36 – 25.39
Stop Loss: 24.87
TP: 25.58 - 26.14 - 26.49
$BMNR LONG
Entry: 25.36 – 25.39
Stop Loss: 24.87
TP: 25.58 - 26.14 - 26.49
126
·
--
Bullish
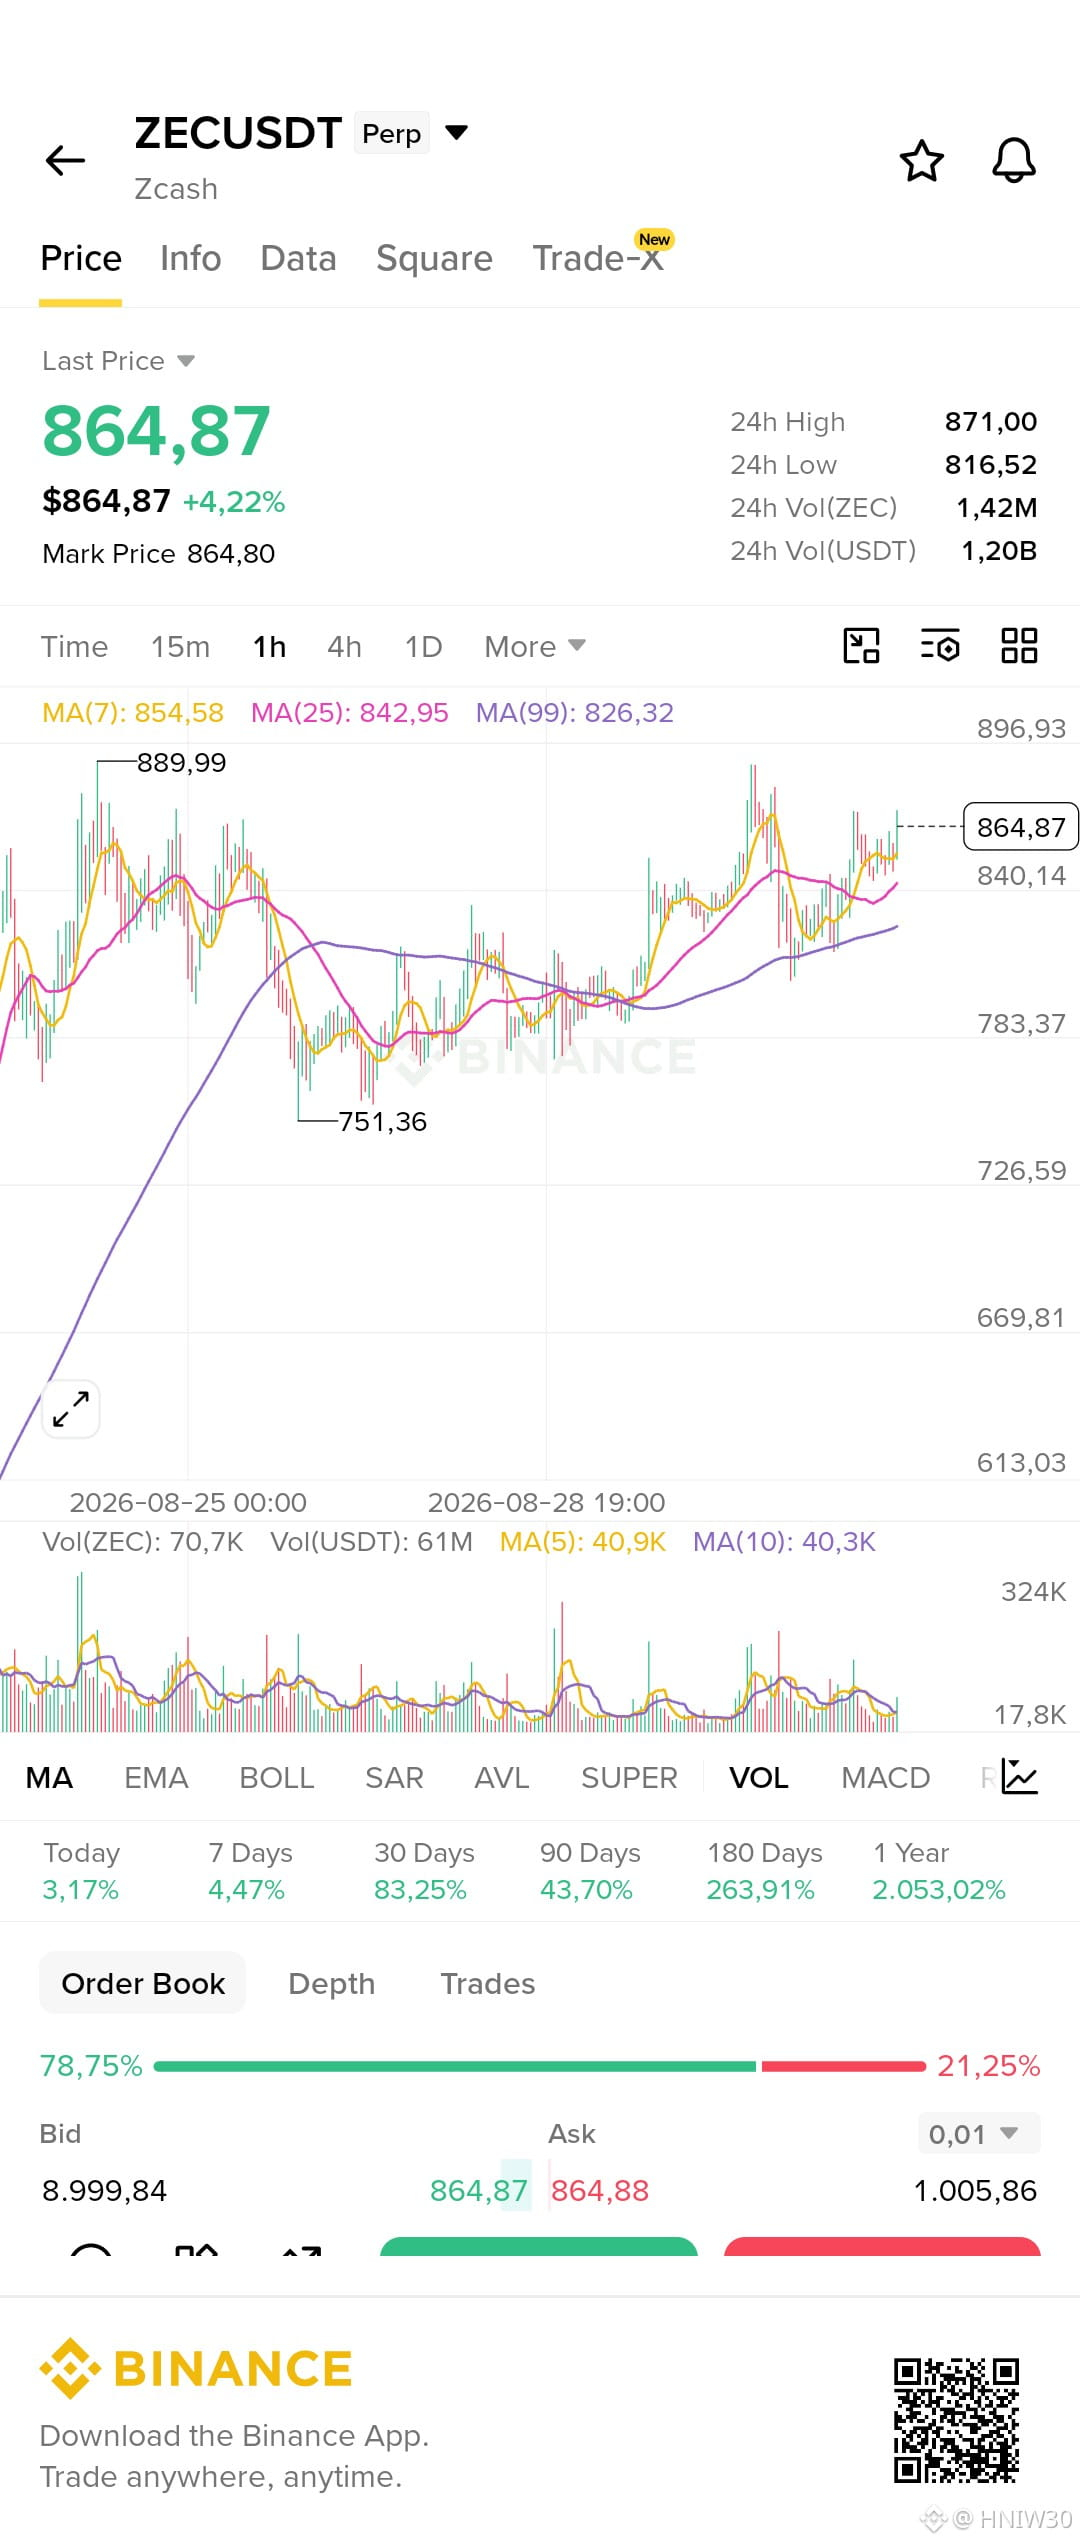
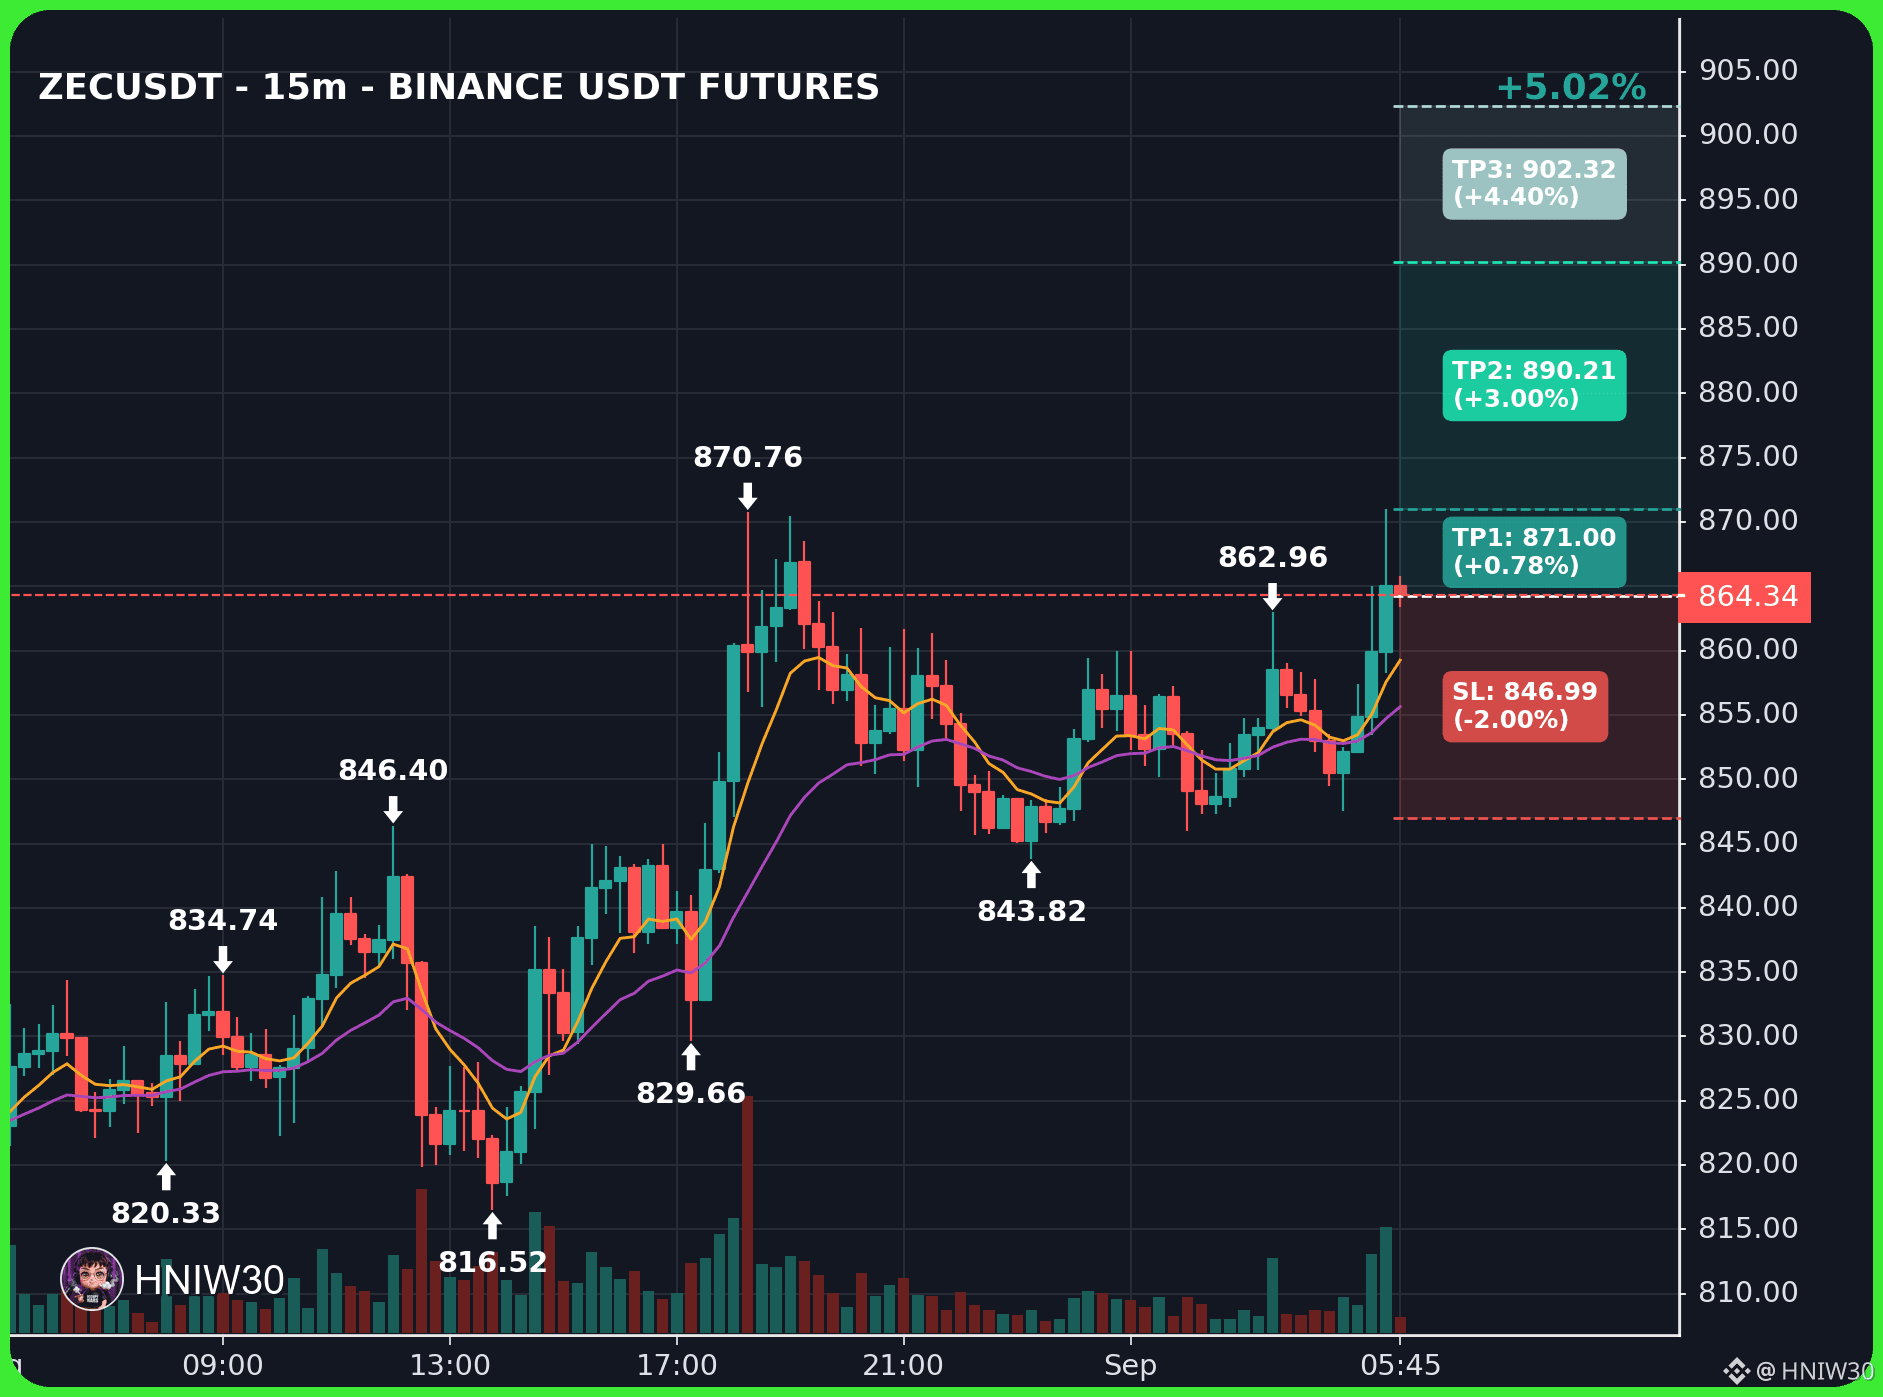
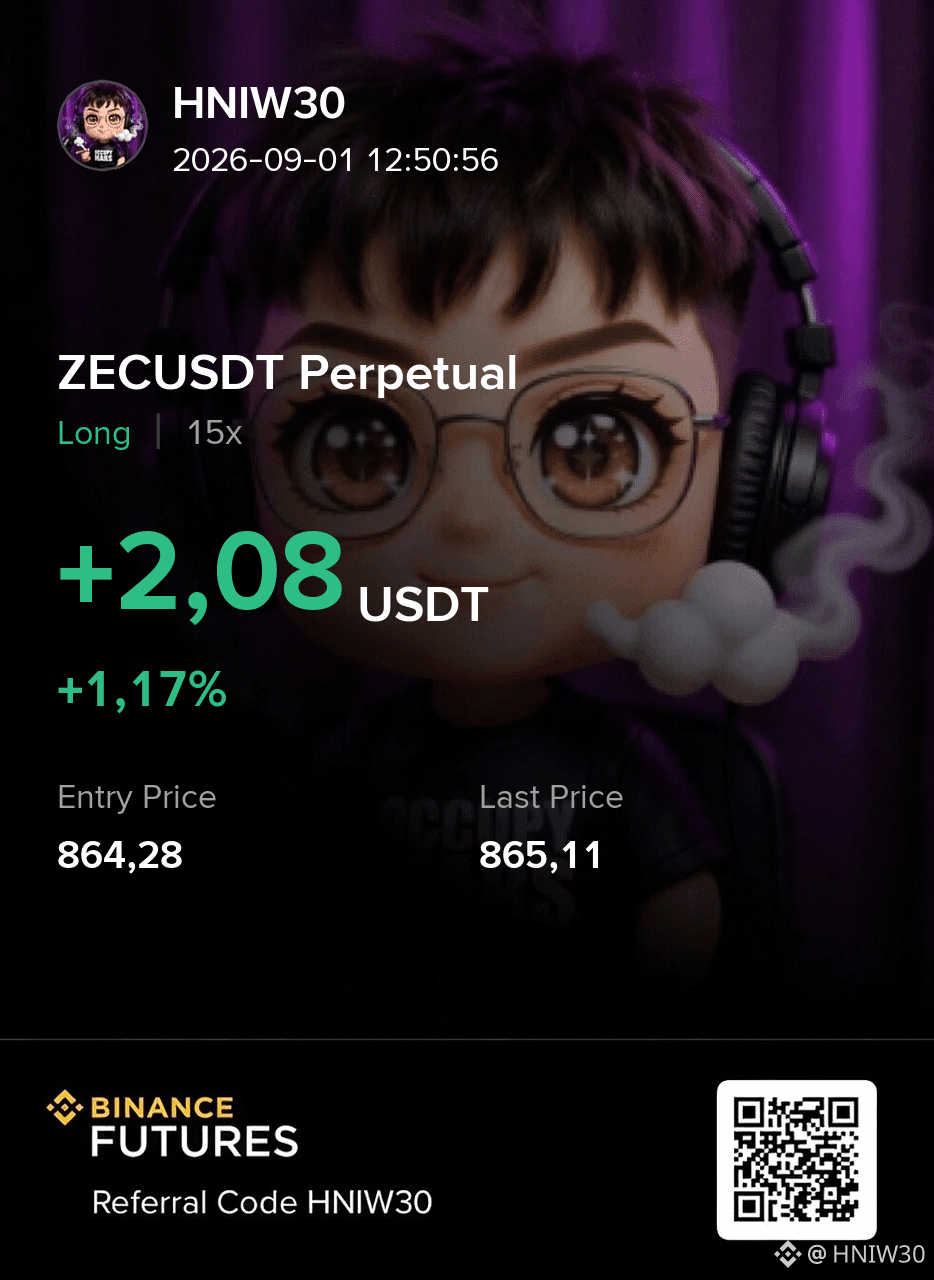
$ZEC LONG
Entry: 863.36 – 865.20
Stop Loss: 846.99
TP: 871.00 - 890.21 - 902.32
{future}(ZECUSDT)
$ZEC LONG
Entry: 863.36 – 865.20
Stop Loss: 846.99
TP: 871.00 - 890.21 - 902.32
Entry: 863.36 – 865.20
Stop Loss: 846.99
TP: 871.00 - 890.21 - 902.32
206
·
--
Bullish
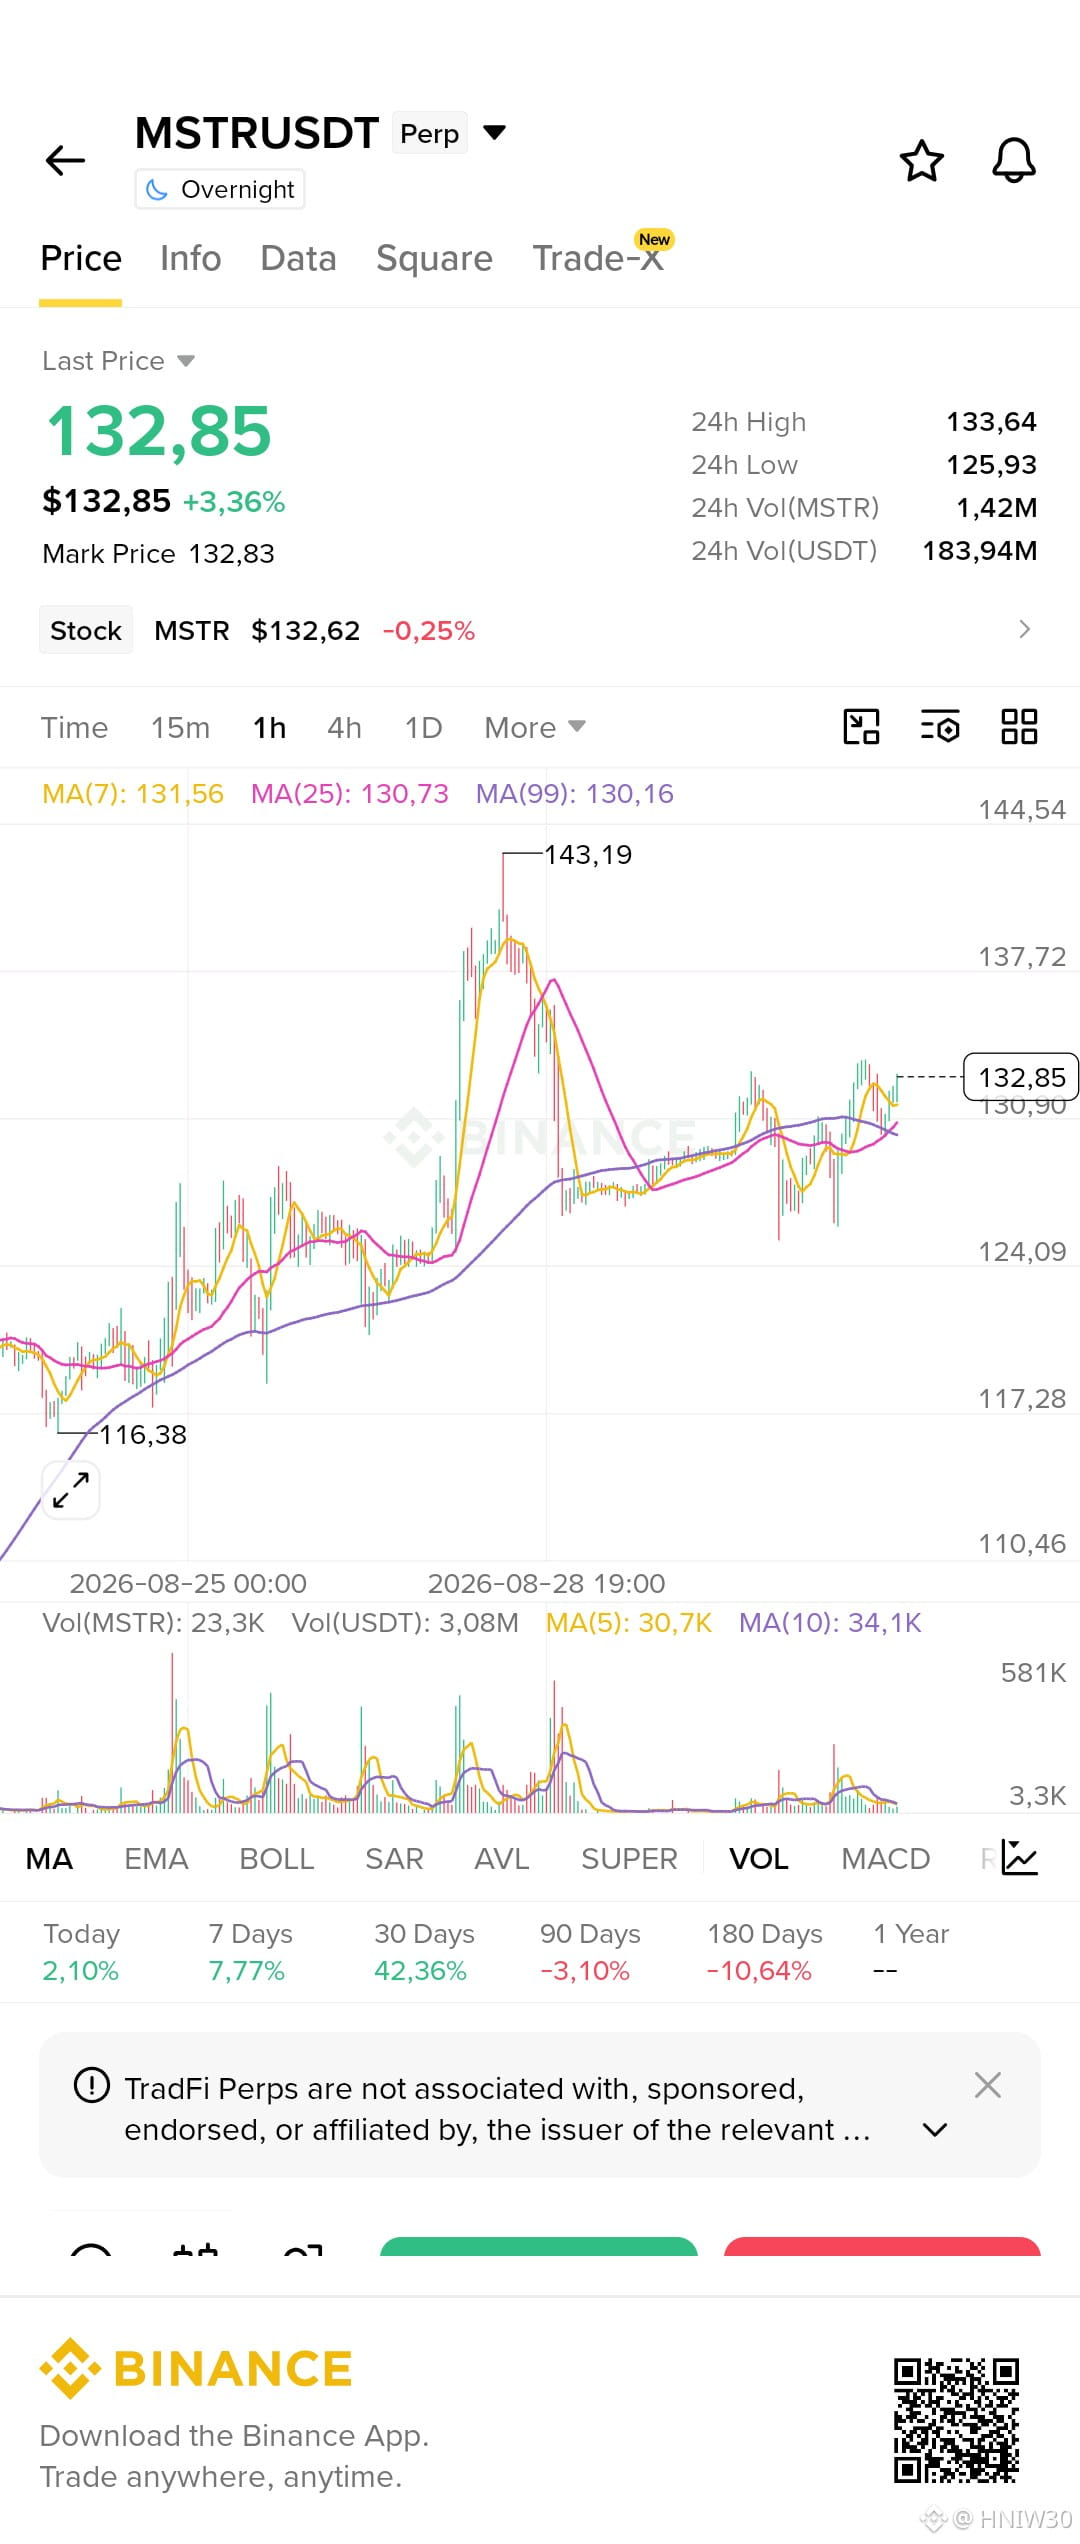
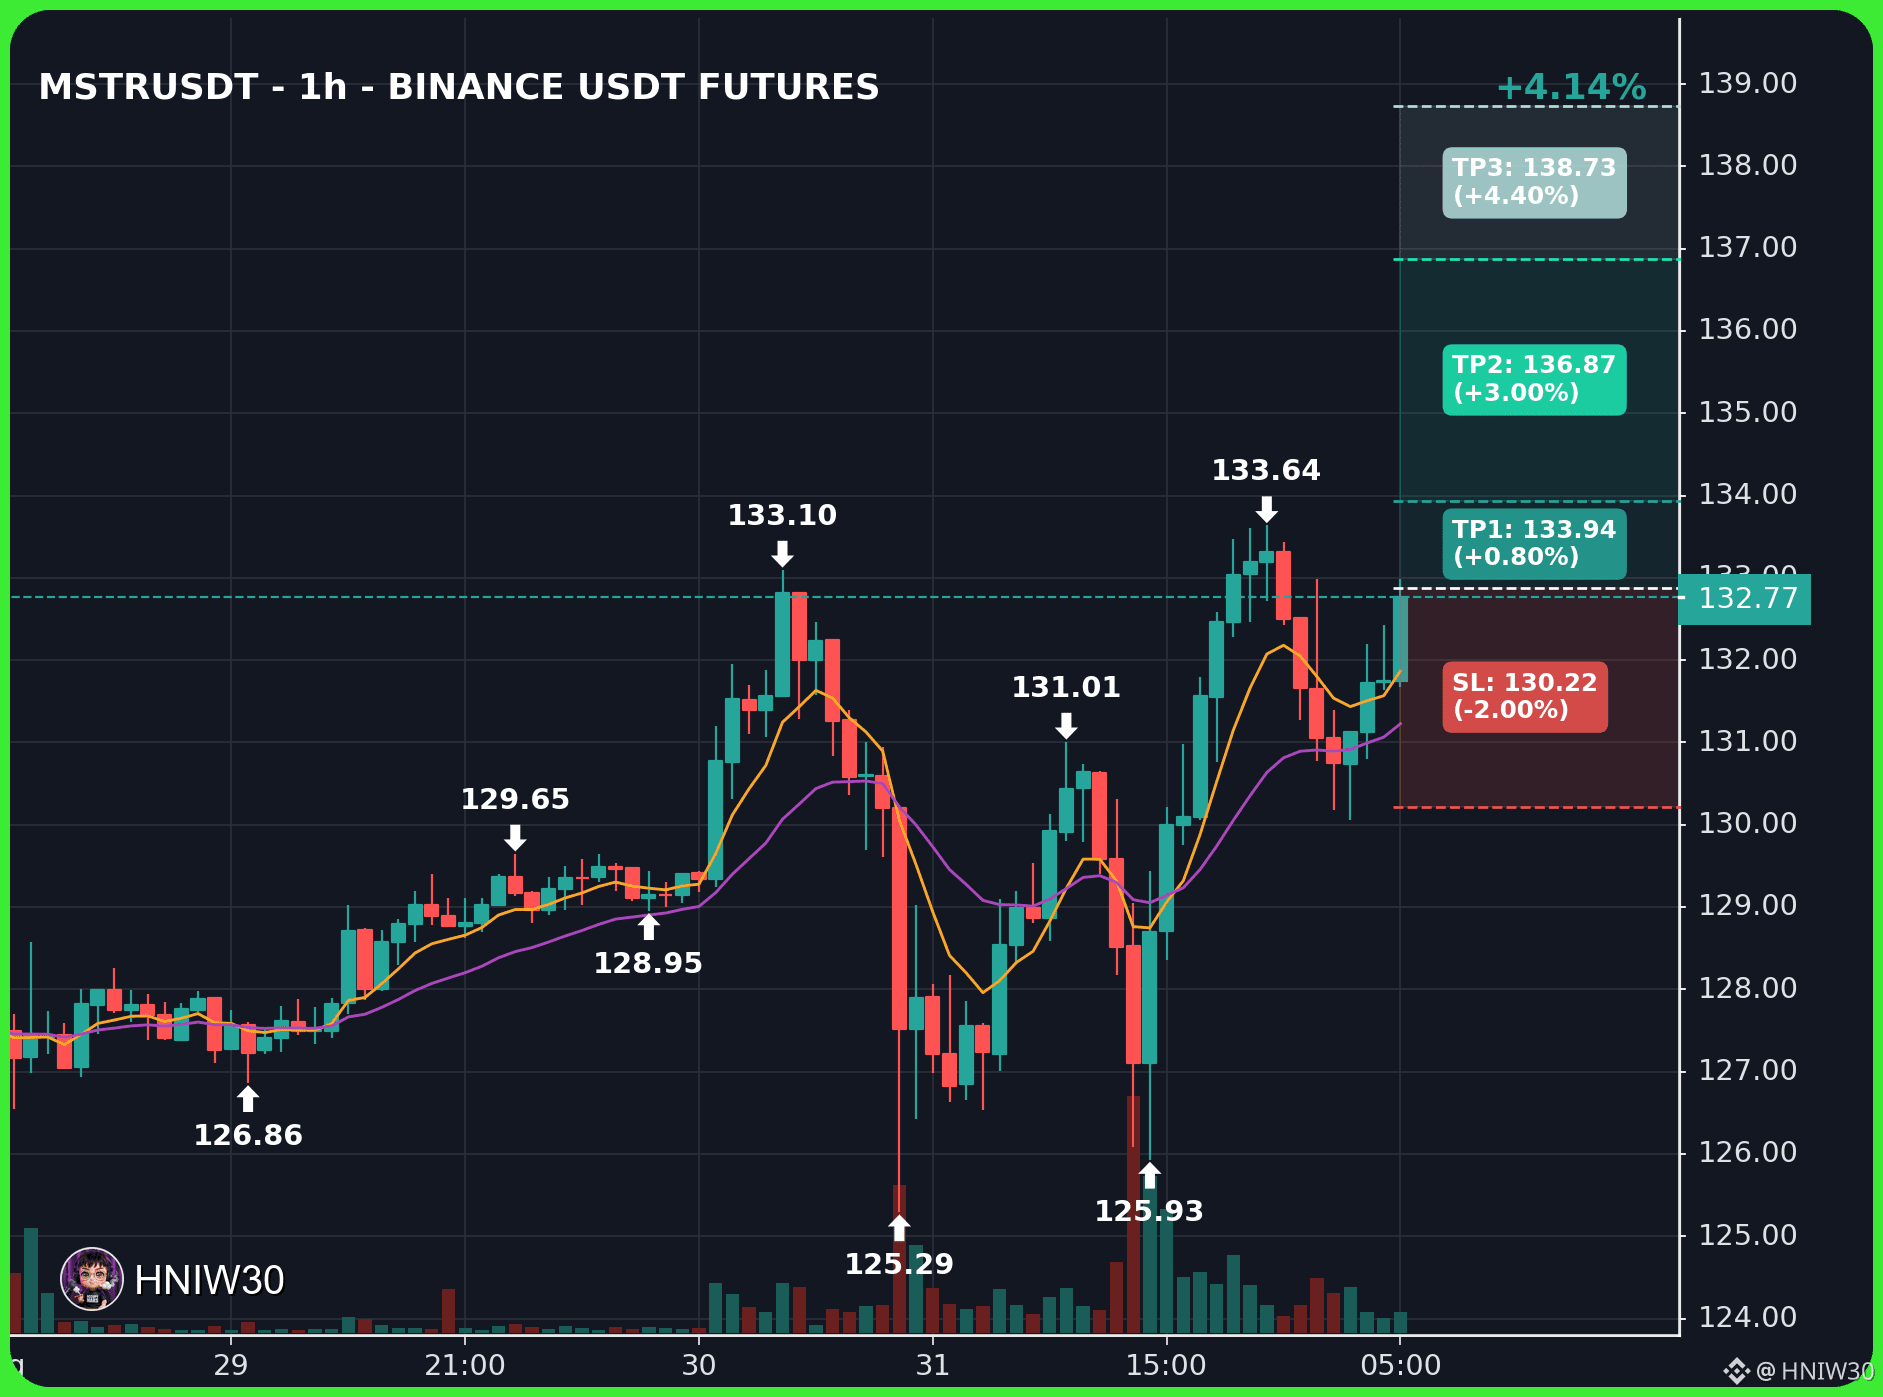
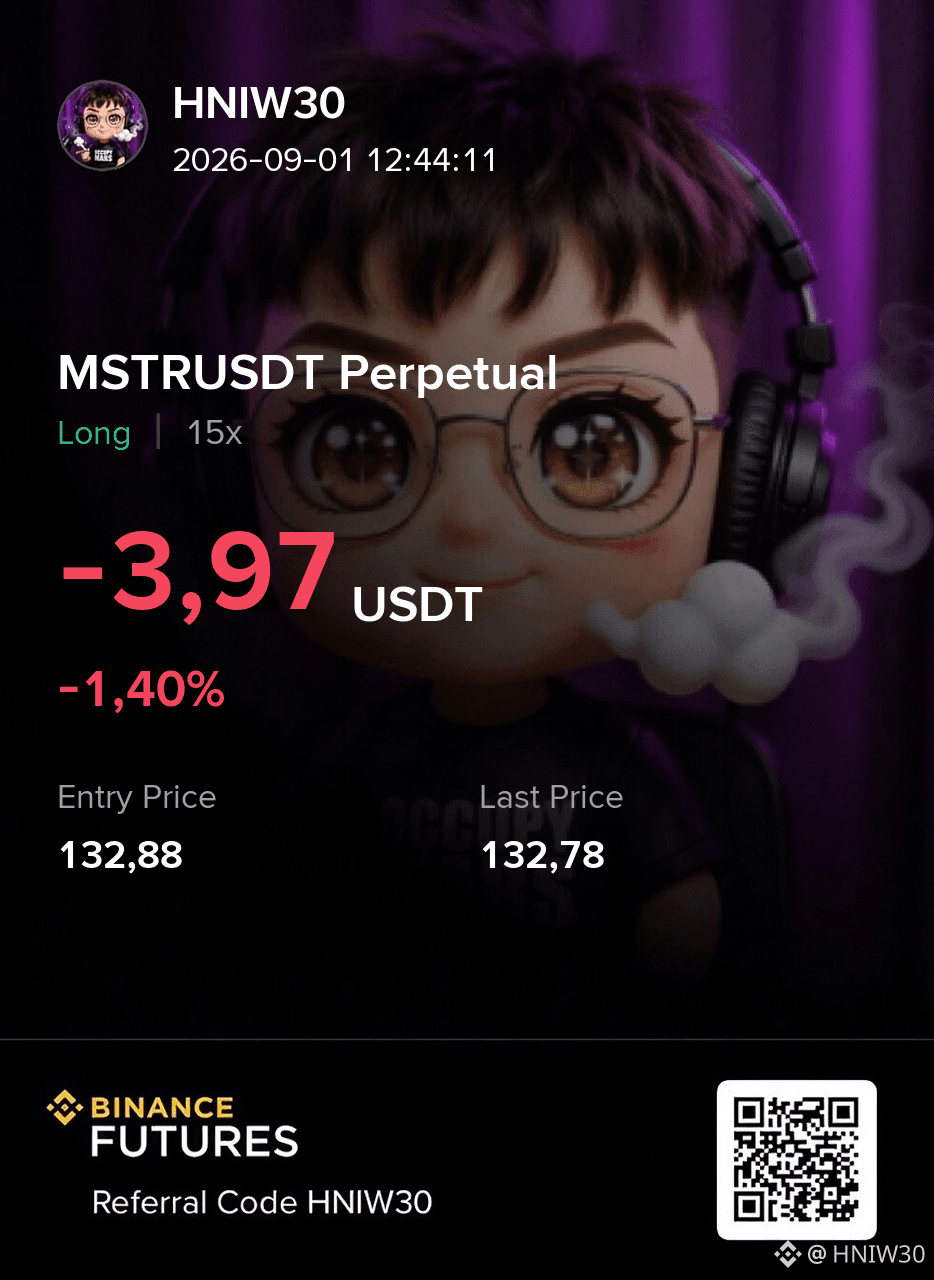
🧲 $MSTR – Pullback to key support in early transition phase
🟢 $MSTR LONG
🎯 Entry: 132.79 – 132.97
🛑 Stop Loss: 130.22
🎯 TP: 133.94 - 136.87 - 138.73
{future}(MSTRUSDT)
🧲 $MSTR – Pullback to key support in early transition phase
🟢 $MSTR LONG
🎯 Entry: 132.79 – 132.97
🛑 Stop Loss: 130.22
🎯 TP: 133.94 - 136.87 - 138.73
🟢 $MSTR LONG
🎯 Entry: 132.79 – 132.97
🛑 Stop Loss: 130.22
🎯 TP: 133.94 - 136.87 - 138.73
184
·
--
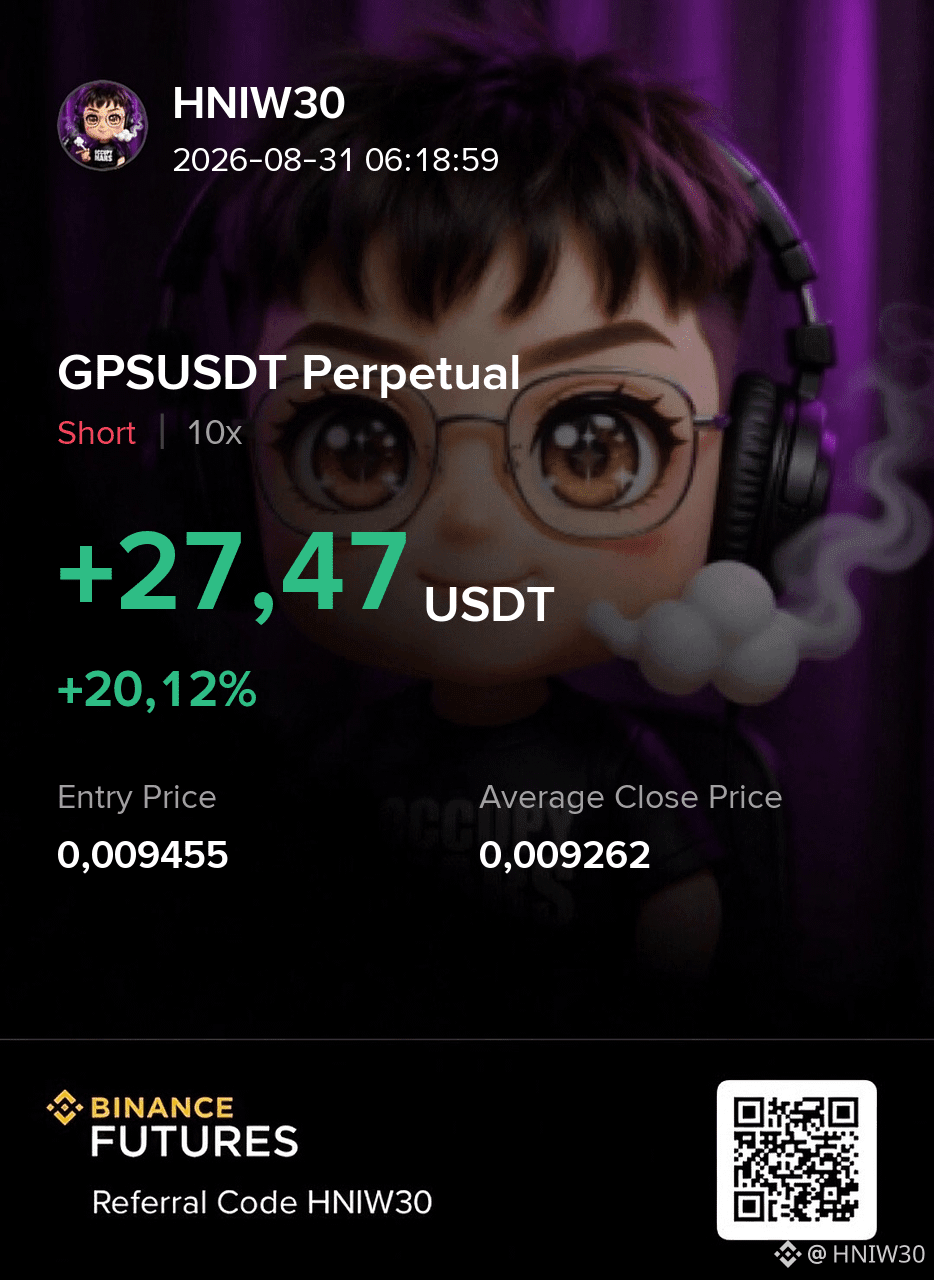
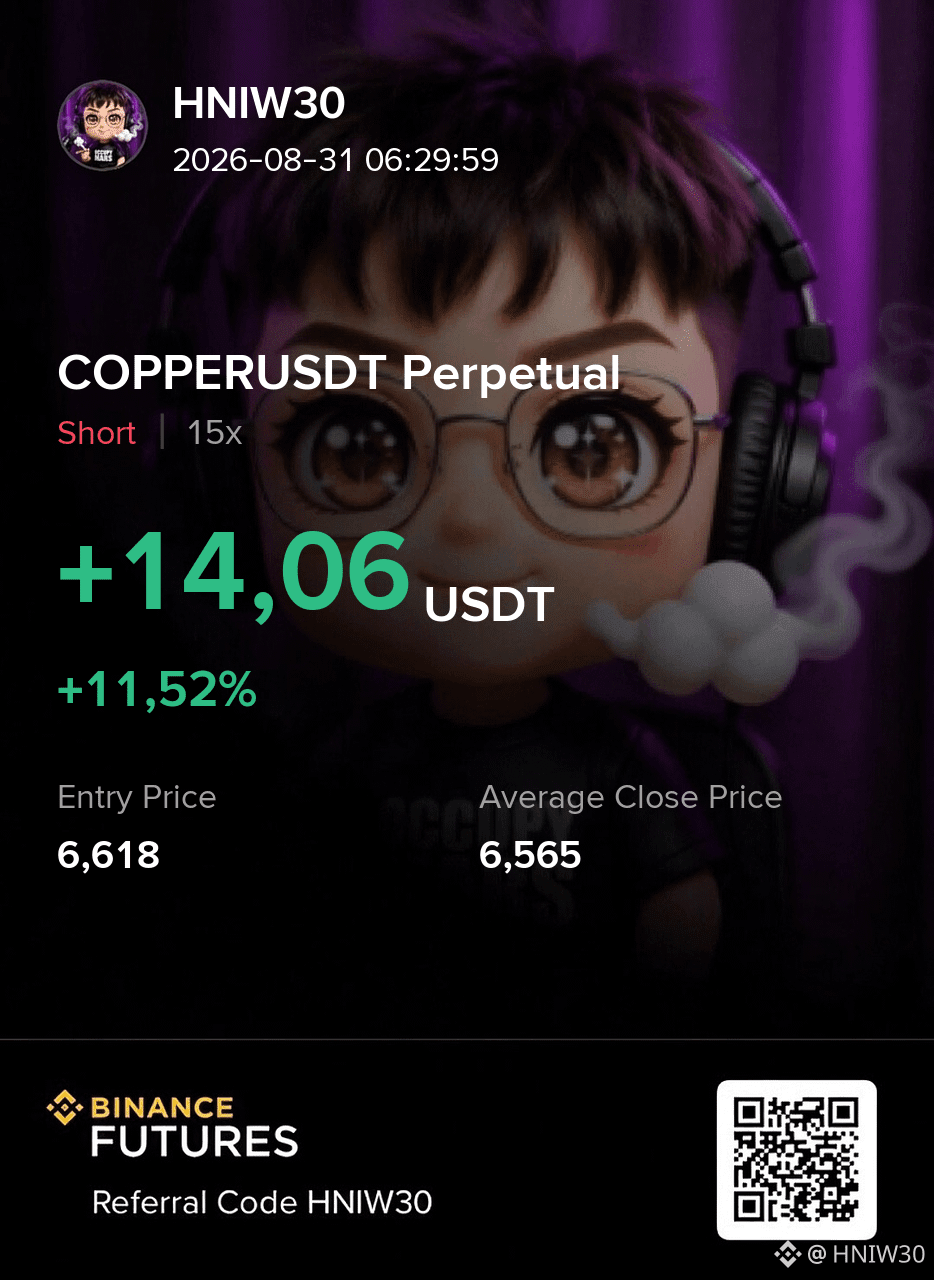
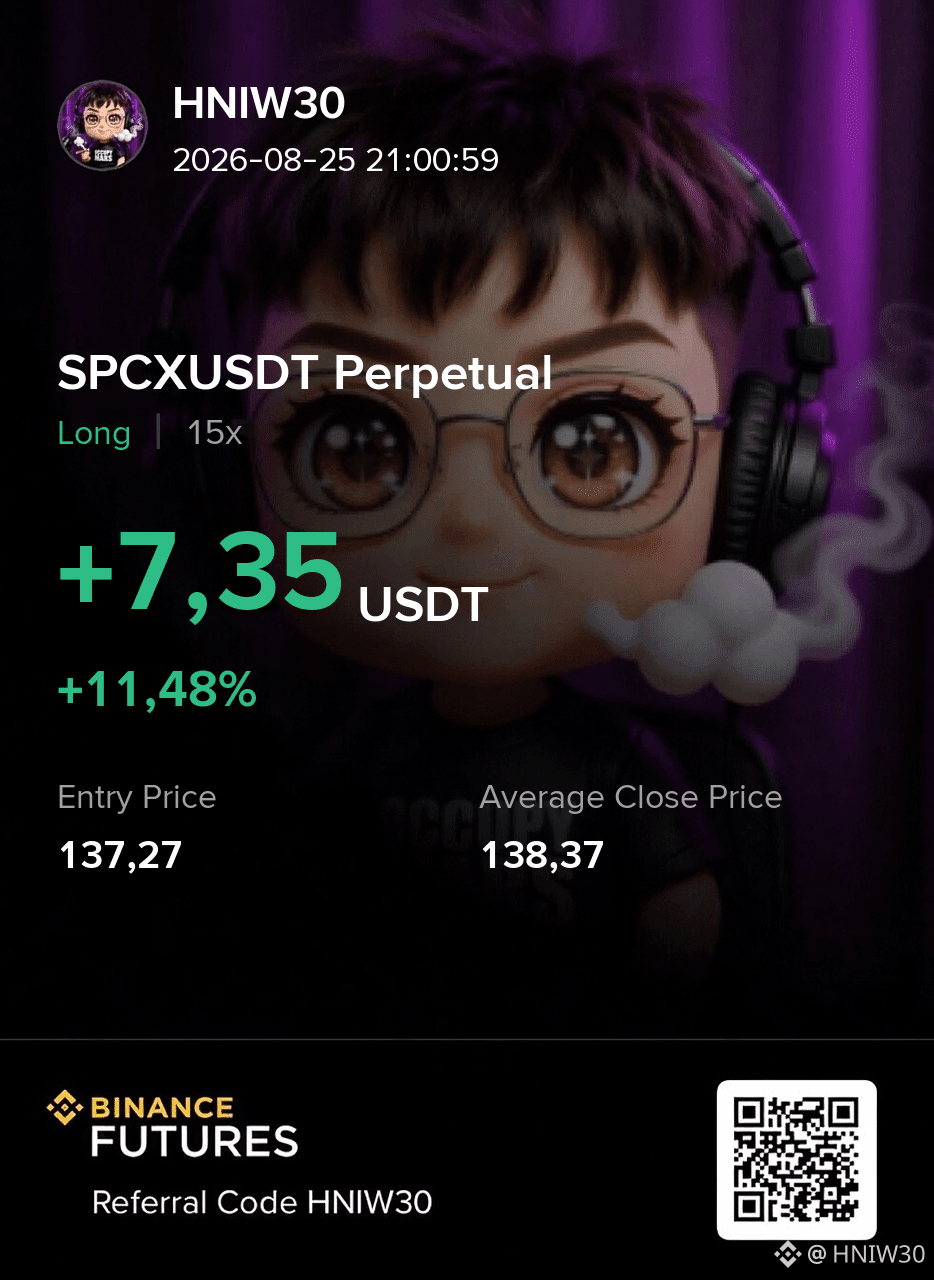
📌 Update on our current trades: $GPS , $COPPER and $SPCX are progressing as planned.
🔴GPS SHORT reached TP2 — trimmed 80% ✅
🔴COPPER SHORT reached TP1 — trimmed 50% ✅
🟢SPCX LONG reached TP1 — trimmed 50% ✅
📌 Trade‑management update:
✅ GPS hit TP3 – we exited 100% as planned, locking in the full move.
🛡️ SPCX and COPPER reached TP2/TP1 – we trimmed half the positions, keeping the rest alive while sharply cutting exposure.
This disciplined scaling out shows we’re actively managing risk, not just posting entry ideas.
{future}(SPCXUSDT)
{future}(COPPERUSDT)
{future}(GPSUSDT)
📌 Update on our current trades: $GPS , $COPPER and $SPCX are progressing as planned.
🔴GPS SHORT reached TP2 — trimmed 80% ✅
🔴COPPER SHORT reached TP1 — trimmed 50% ✅
🟢SPCX LONG reached TP1 — trimmed 50% ✅
📌 Trade‑management update:
✅ GPS hit TP3 – we exited 100% as planned, locking in the full move.
🛡️ SPCX and COPPER reached TP2/TP1 – we trimmed half the positions, keeping the rest alive while sharply cutting exposure.
This disciplined scaling out shows we’re actively managing risk, not just posting entry ideas.
🔴GPS SHORT reached TP2 — trimmed 80% ✅
🔴COPPER SHORT reached TP1 — trimmed 50% ✅
🟢SPCX LONG reached TP1 — trimmed 50% ✅
📌 Trade‑management update:
✅ GPS hit TP3 – we exited 100% as planned, locking in the full move.
🛡️ SPCX and COPPER reached TP2/TP1 – we trimmed half the positions, keeping the rest alive while sharply cutting exposure.
This disciplined scaling out shows we’re actively managing risk, not just posting entry ideas.
HNIW30
·
--
Bearish$GPS SHORT
Entry: 0.009448 – 0.009461
Stop Loss: 0.009691
TP: 0.009360 - 0.009100 - 0.008934
Entry: 0.009448 – 0.009461
Stop Loss: 0.009691
TP: 0.009360 - 0.009100 - 0.008934
361
·
--
Bullish
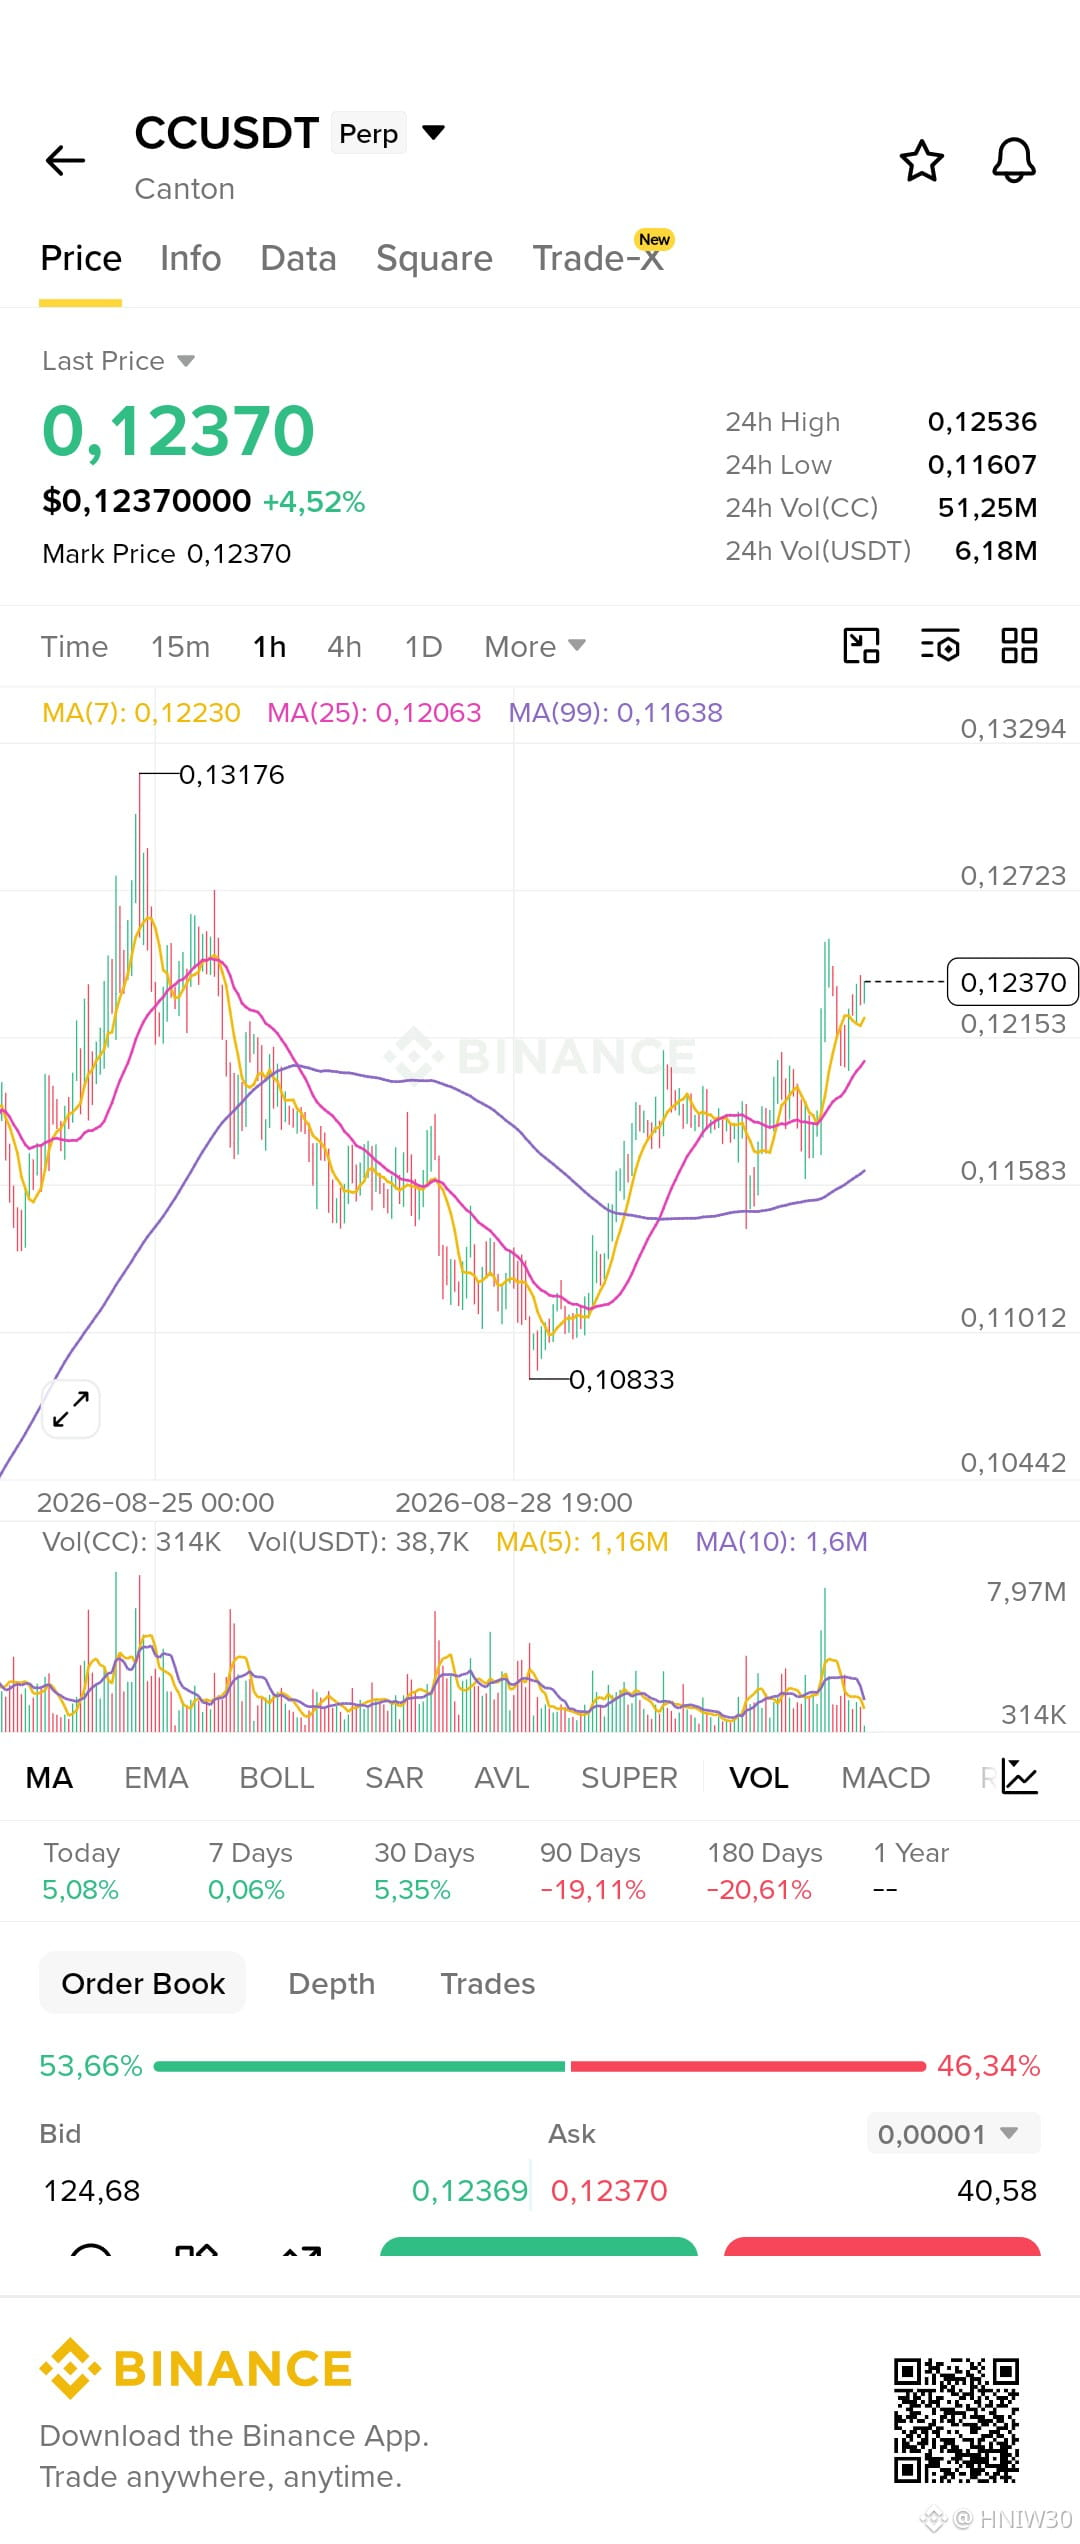
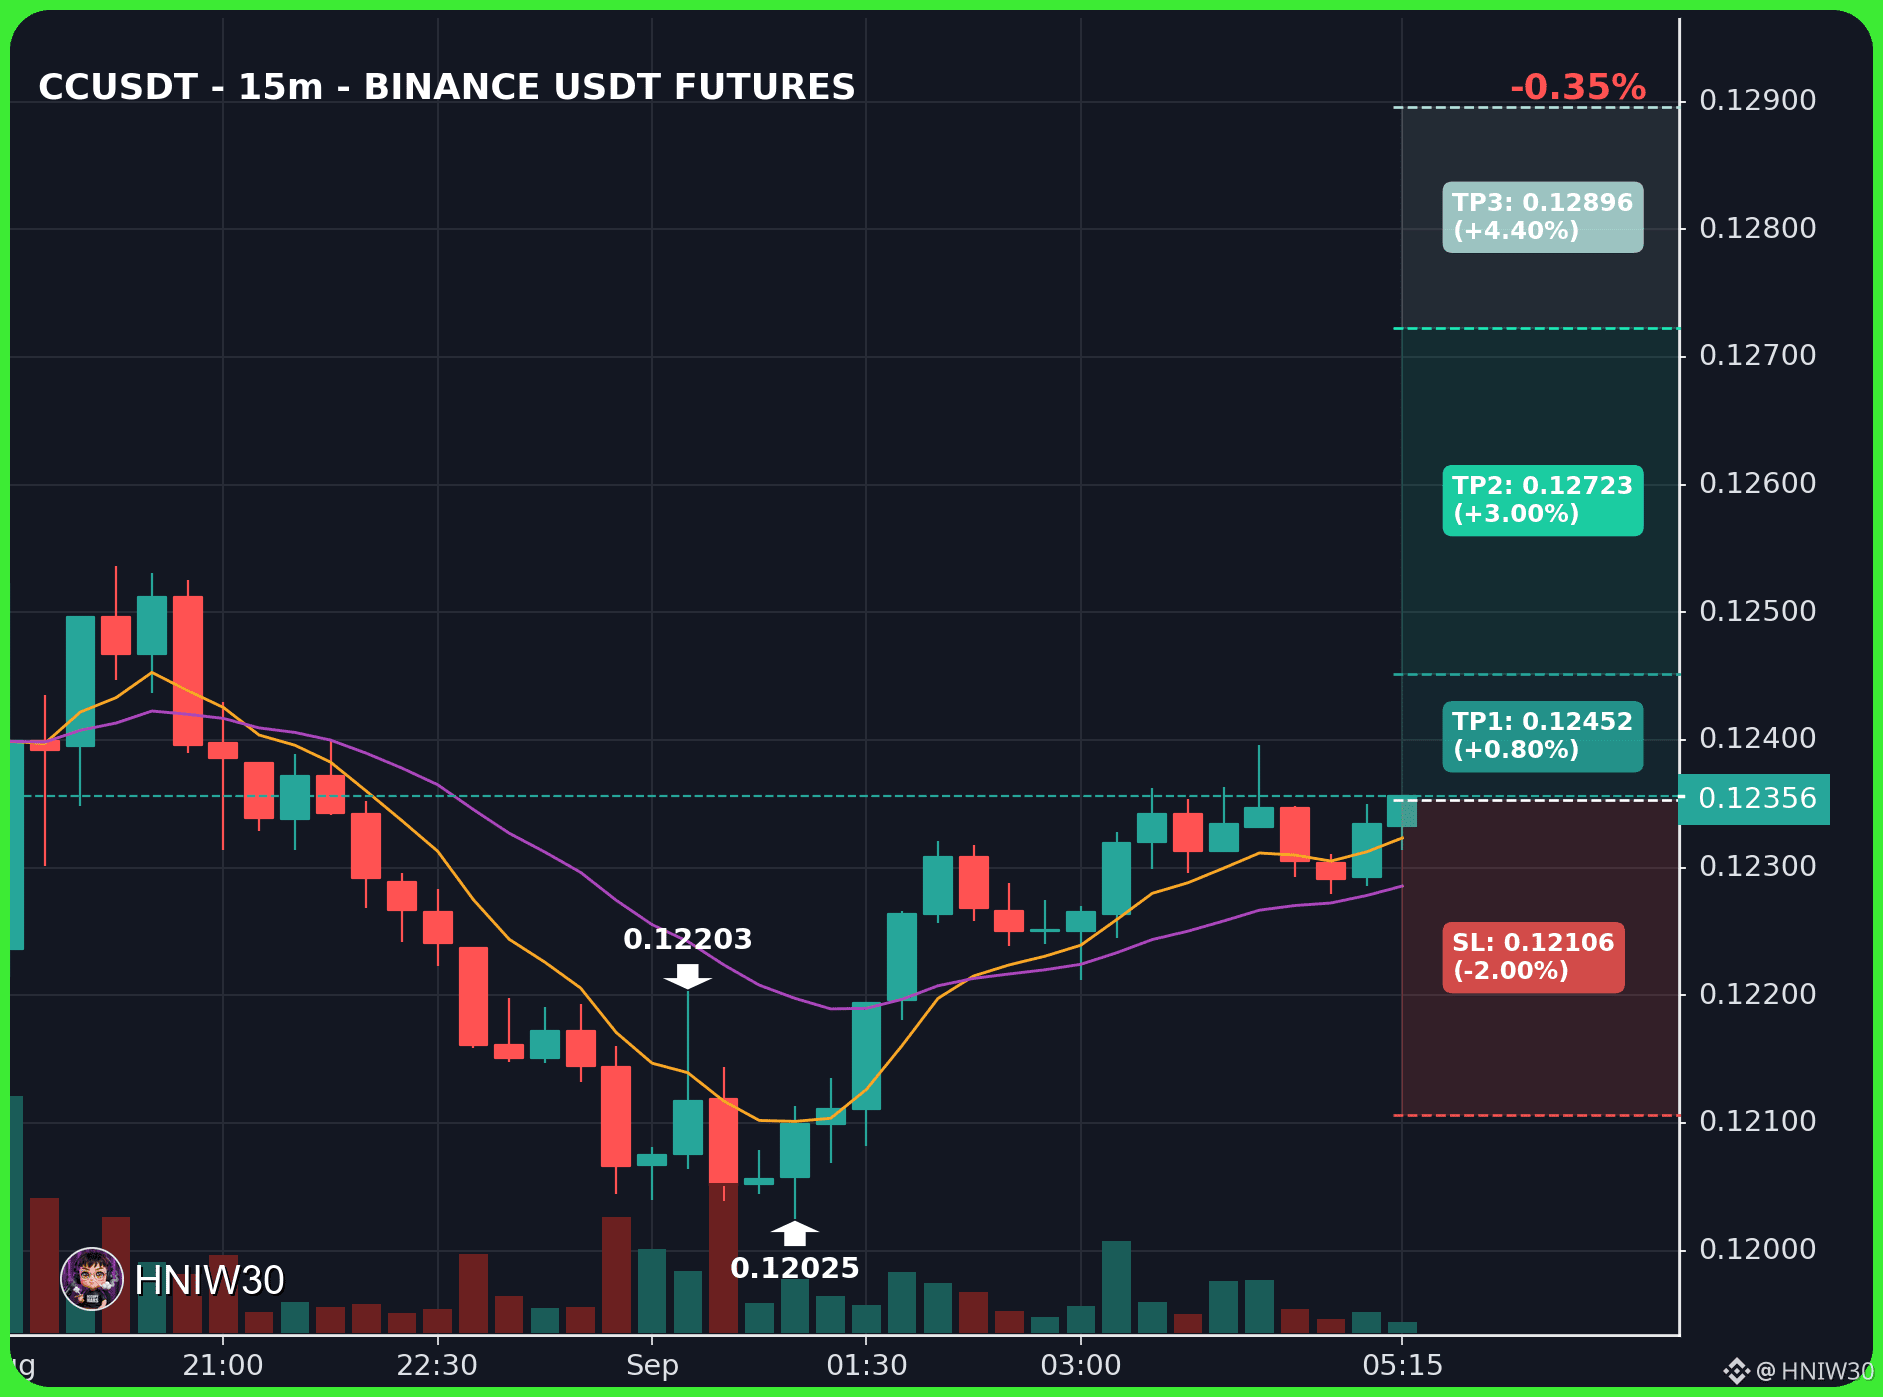
$CC – Pullback to key support amid early transition
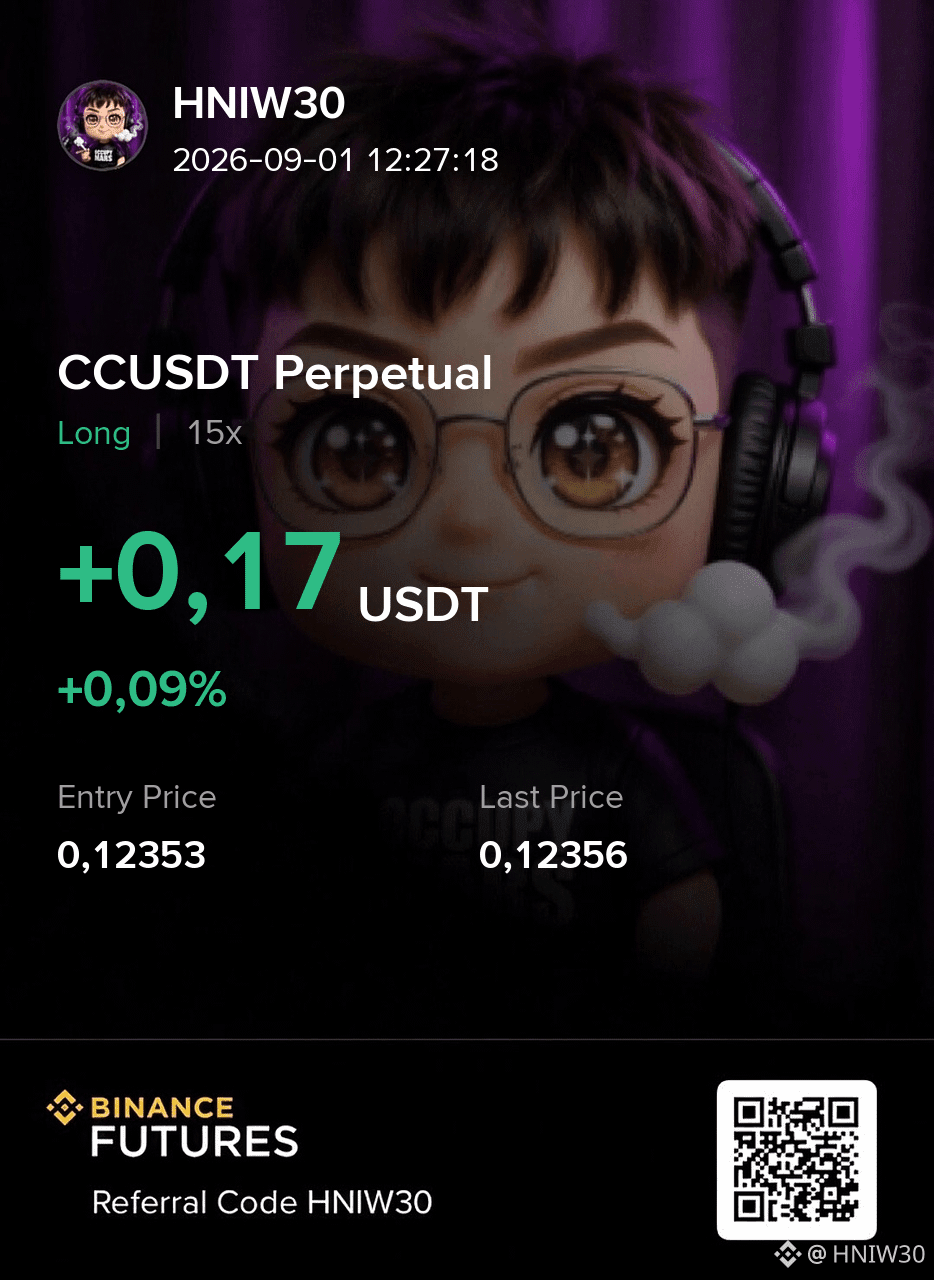
$CC LONG
Entry: 0.12345 – 0.12361
Stop Loss: 0.12106
TP: 0.12452 - 0.12723 - 0.12896
{future}(CCUSDT)
$CC – Pullback to key support amid early transition
$CC LONG
Entry: 0.12345 – 0.12361
Stop Loss: 0.12106
TP: 0.12452 - 0.12723 - 0.12896
$CC LONG
Entry: 0.12345 – 0.12361
Stop Loss: 0.12106
TP: 0.12452 - 0.12723 - 0.12896
127
·
--
Bullish
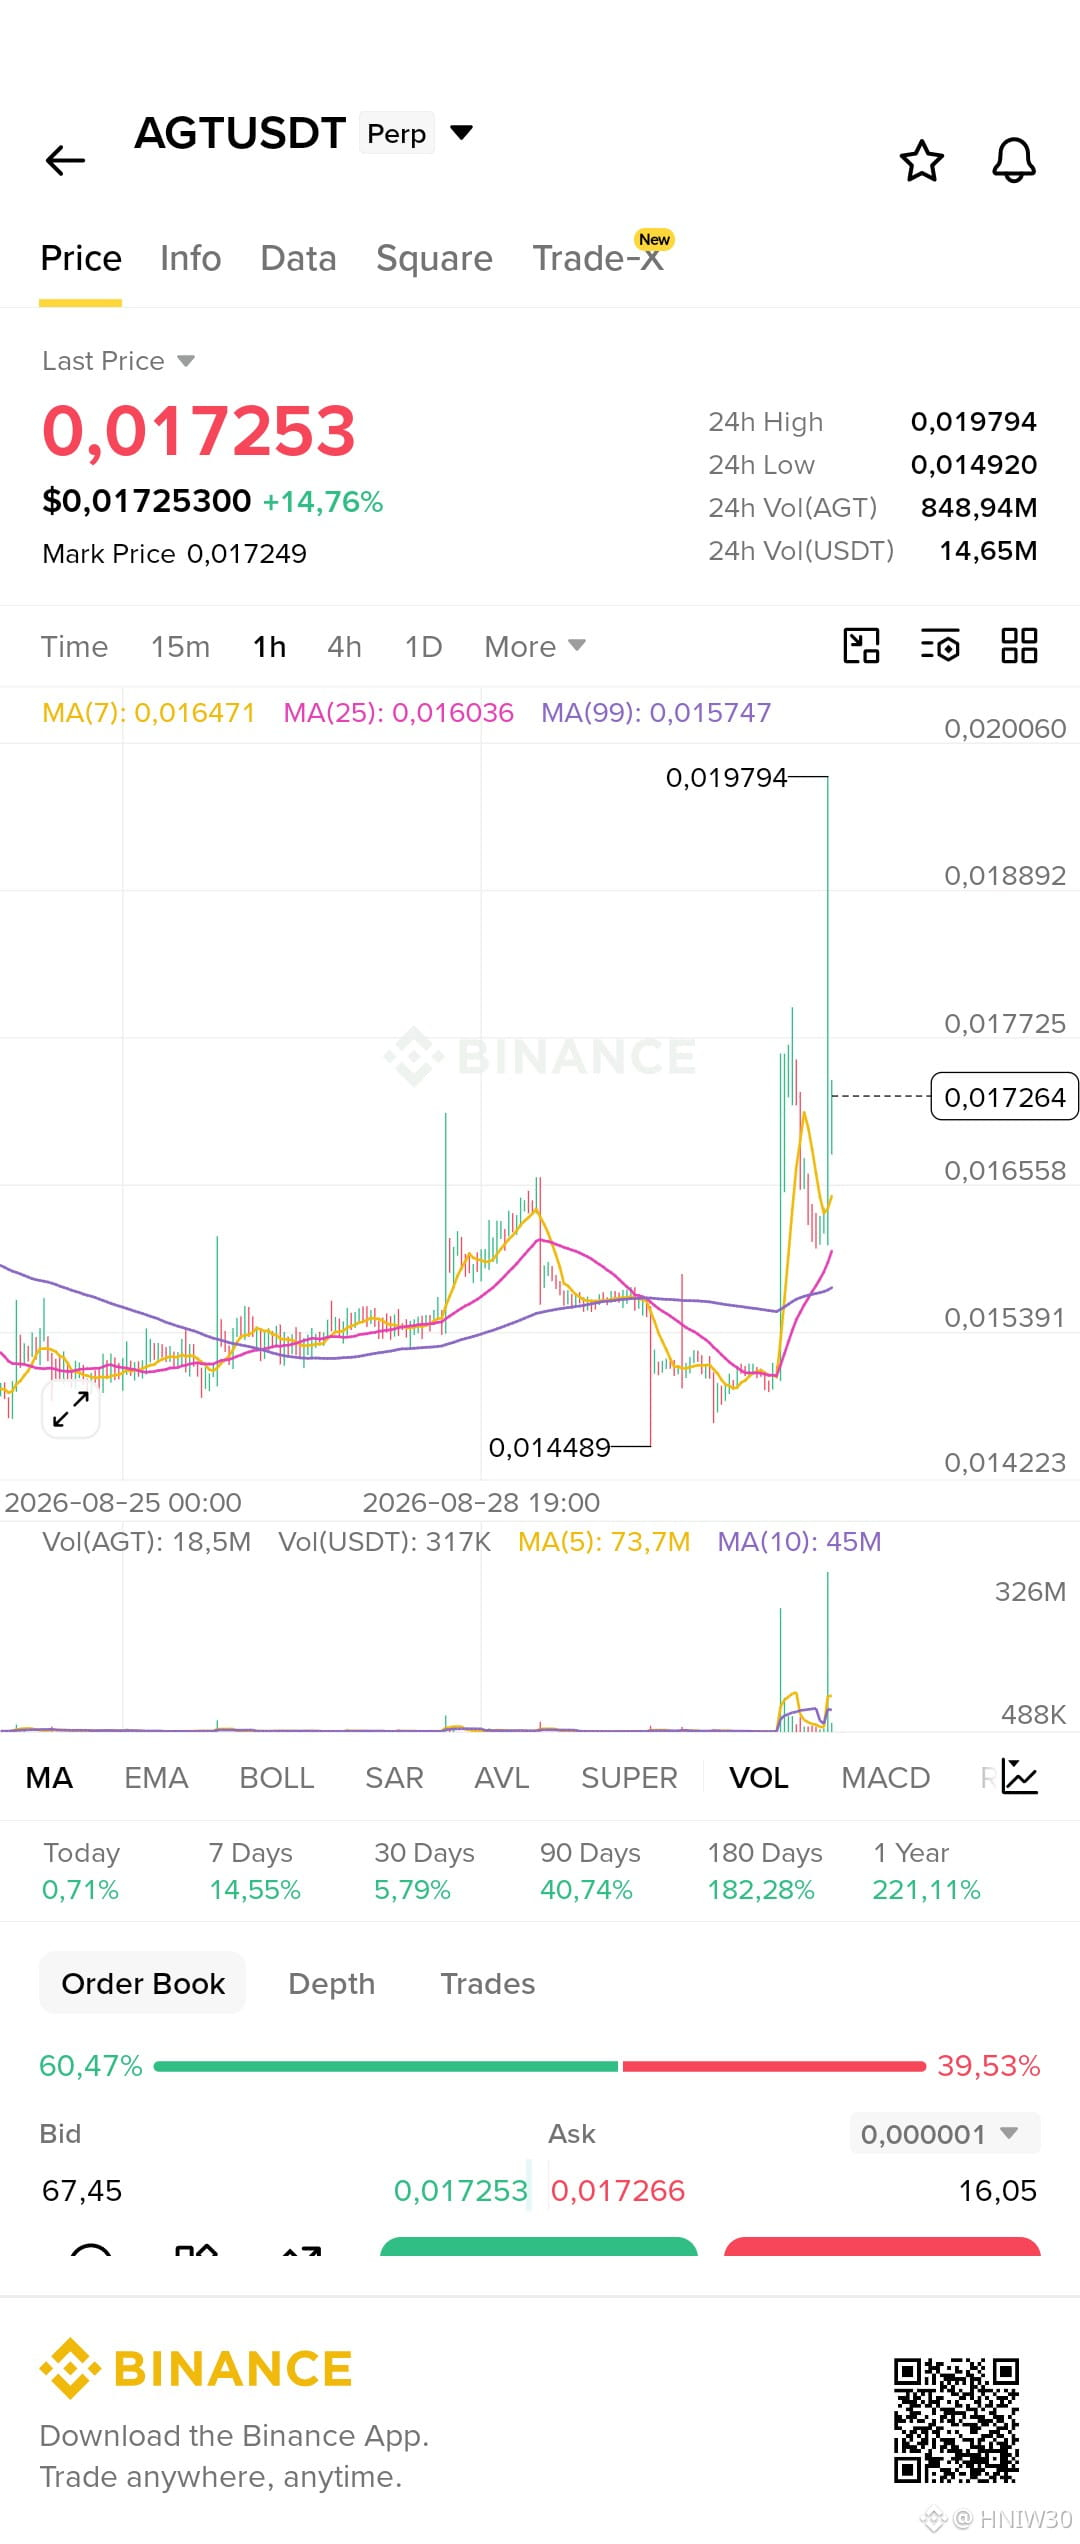
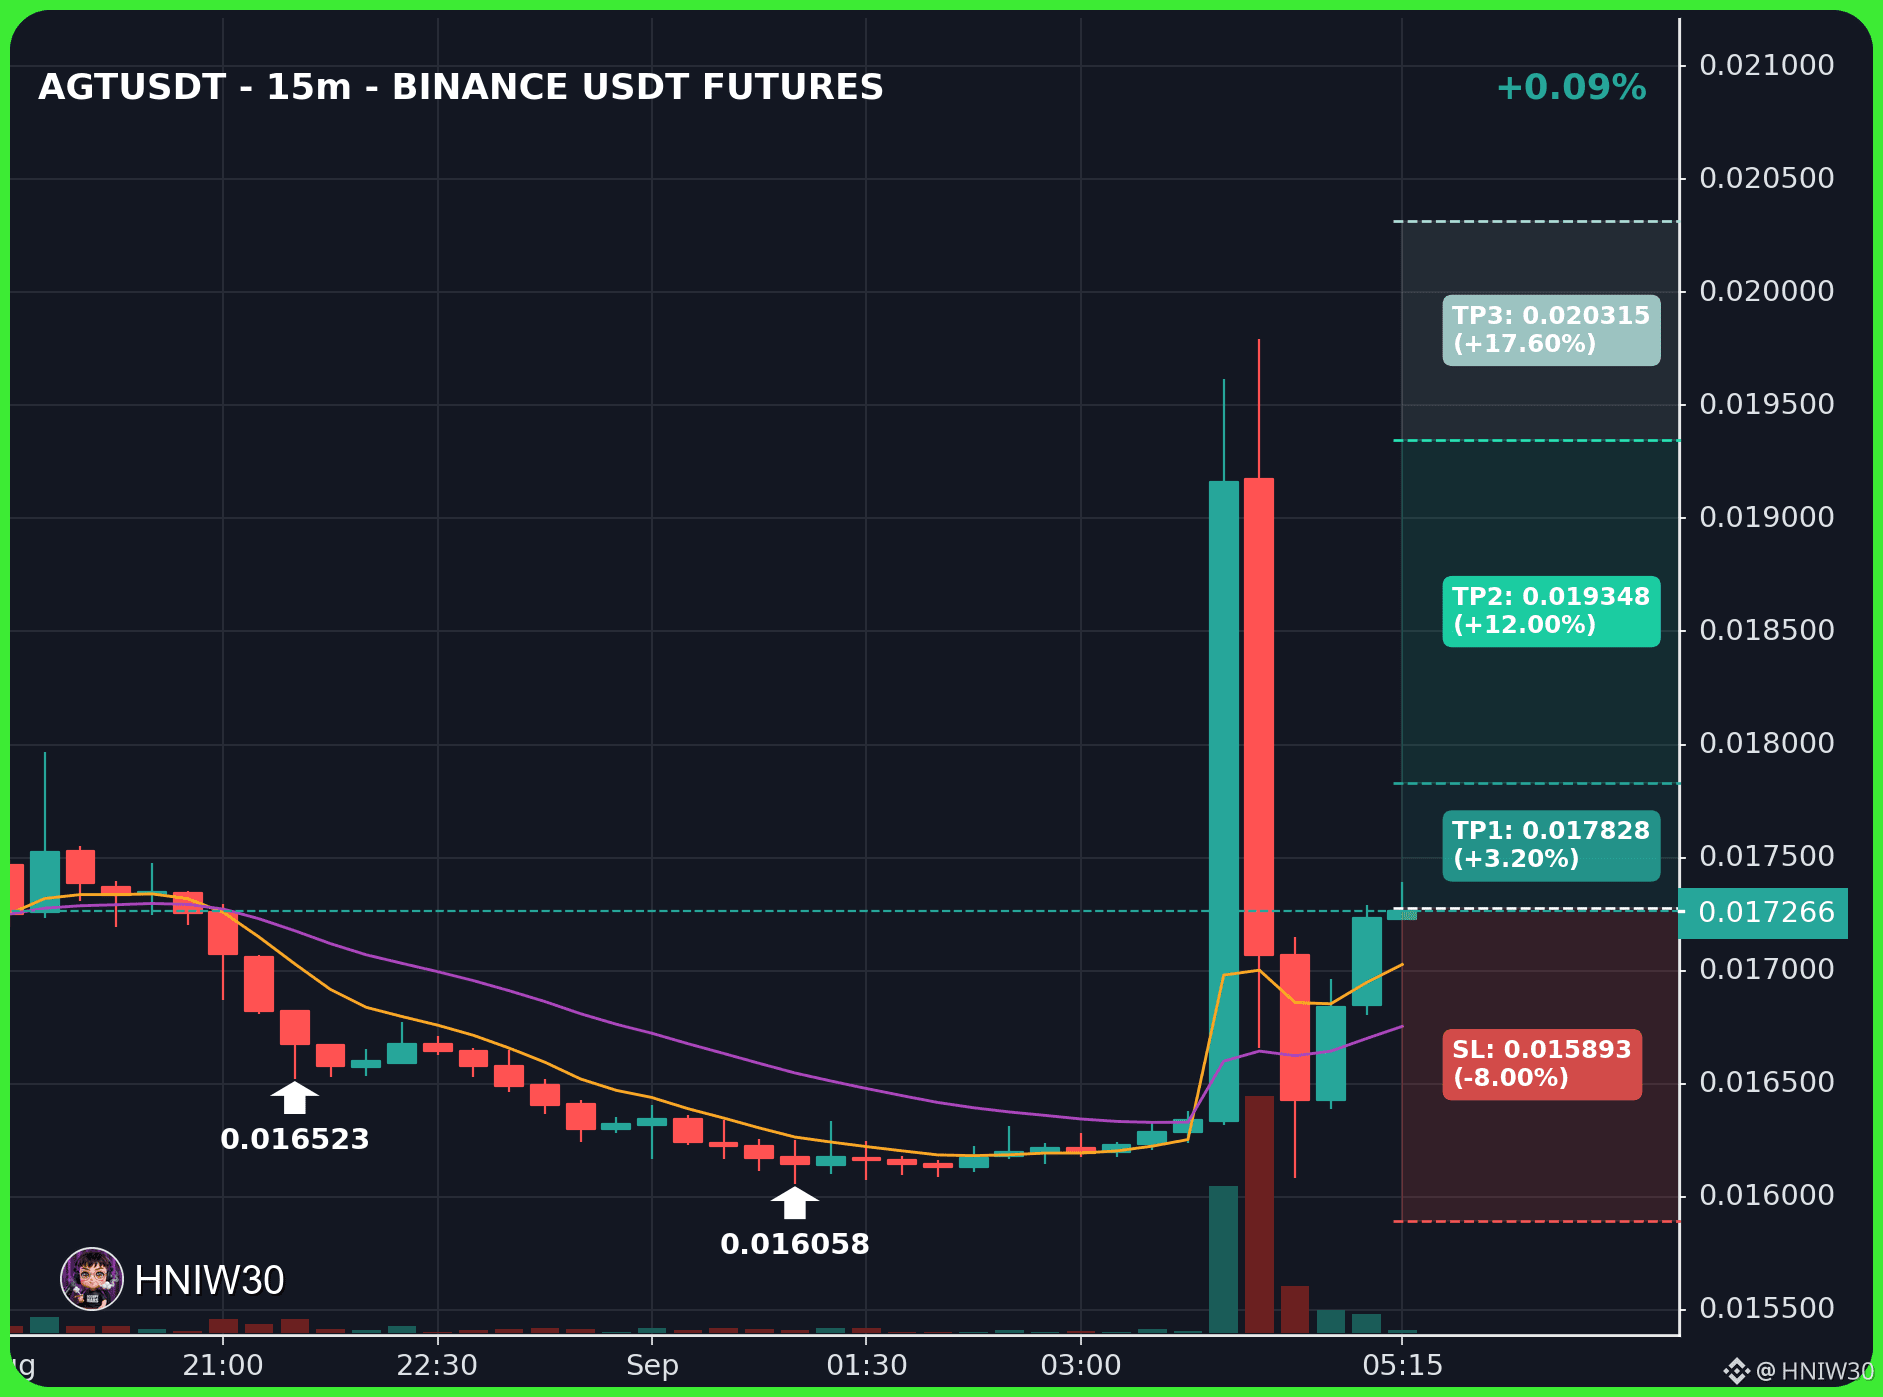
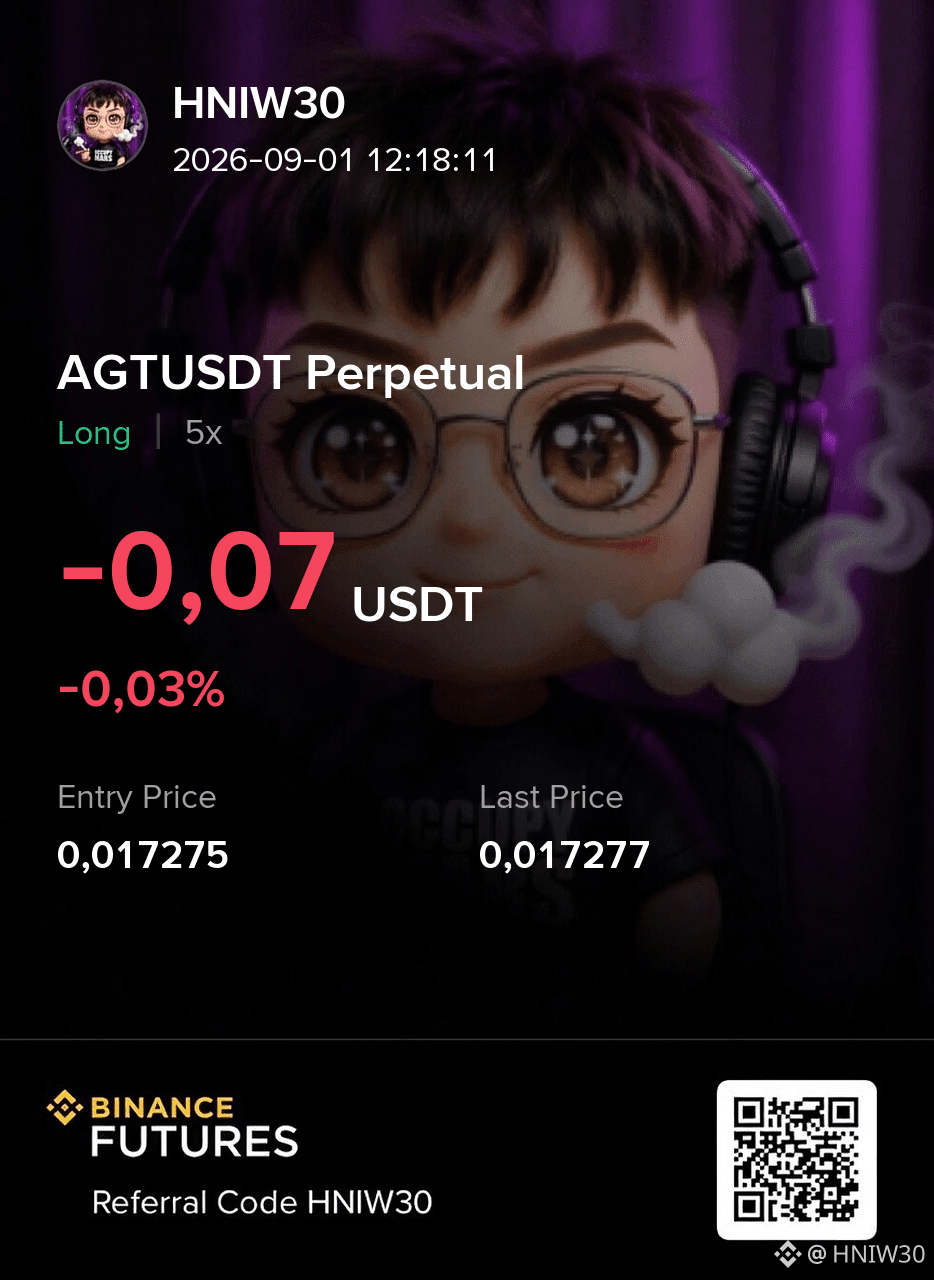
$AGT LONG
Entry: 0.017249 – 0.017301
Stop Loss: 0.015893
TP: 0.017828 - 0.019348 - 0.020315
{future}(AGTUSDT)
$AGT LONG
Entry: 0.017249 – 0.017301
Stop Loss: 0.015893
TP: 0.017828 - 0.019348 - 0.020315
Entry: 0.017249 – 0.017301
Stop Loss: 0.015893
TP: 0.017828 - 0.019348 - 0.020315
149
·
--
Bullish
$NATGAS – Bullish alignment across daily and higher timeframes
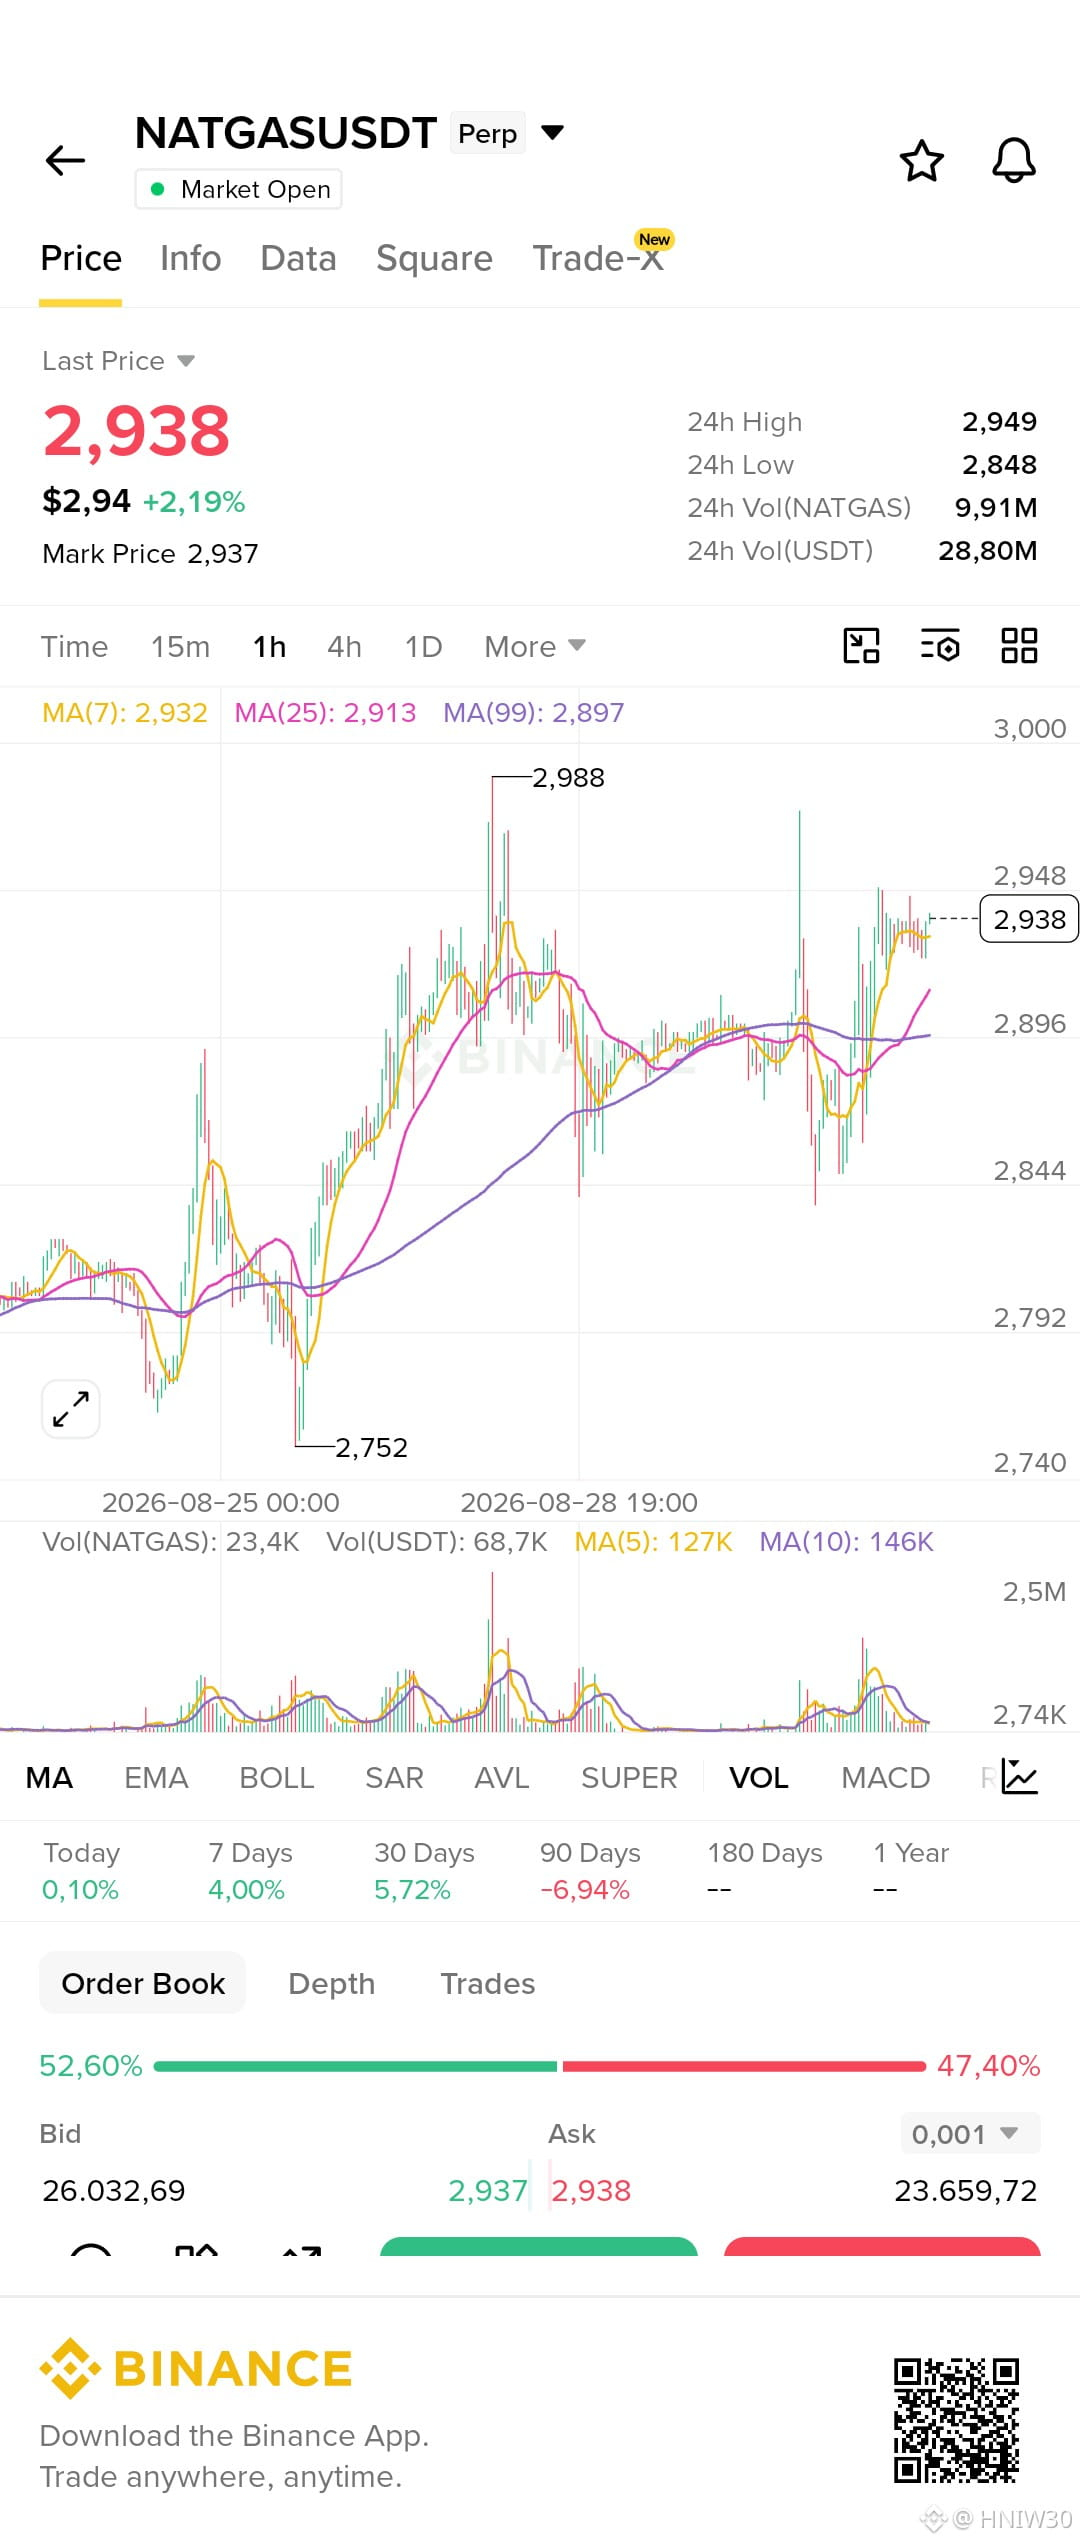
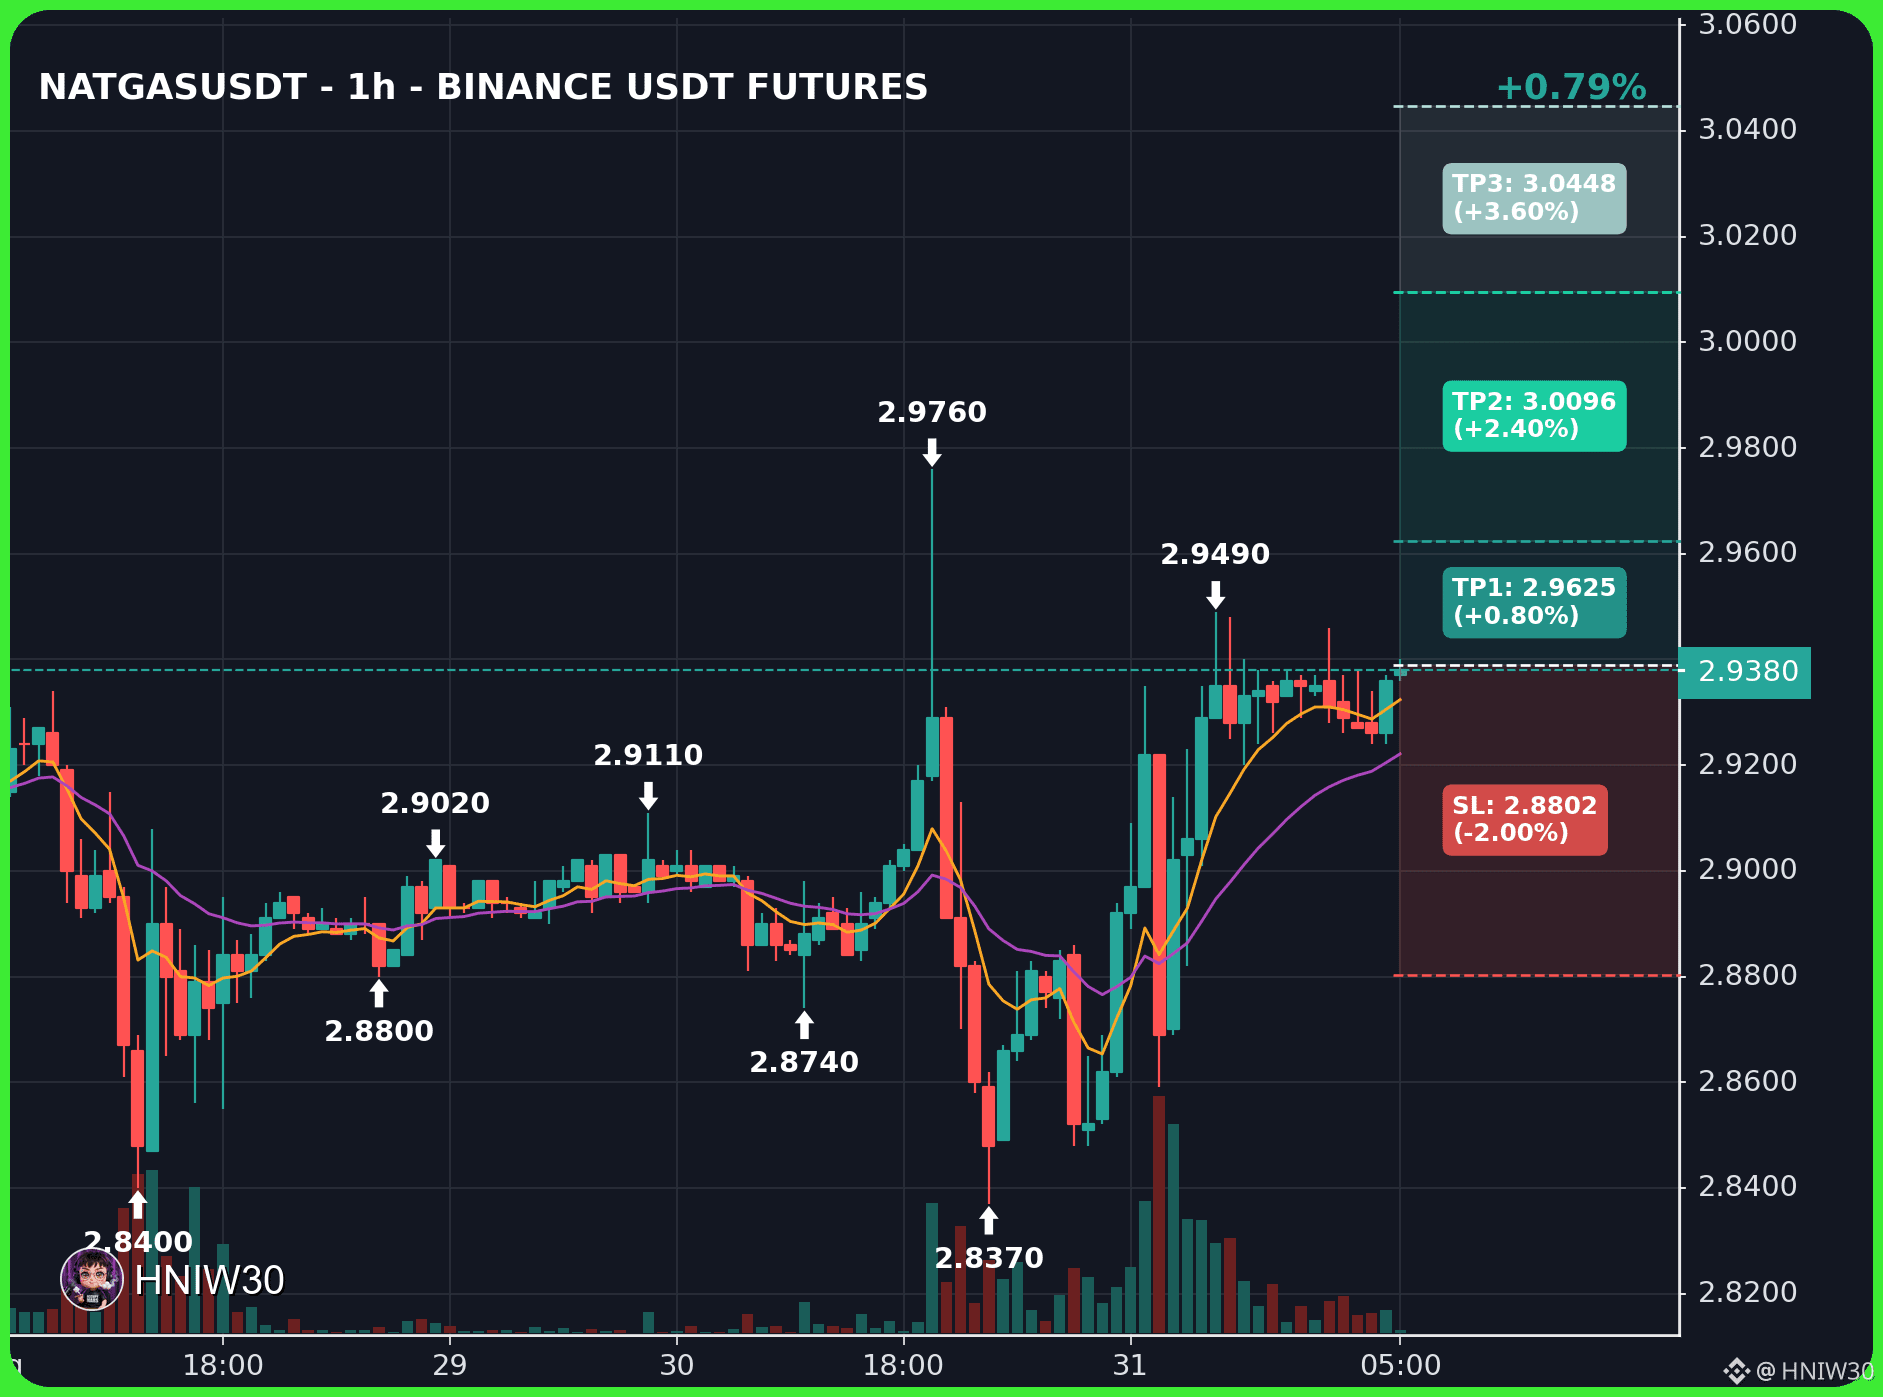
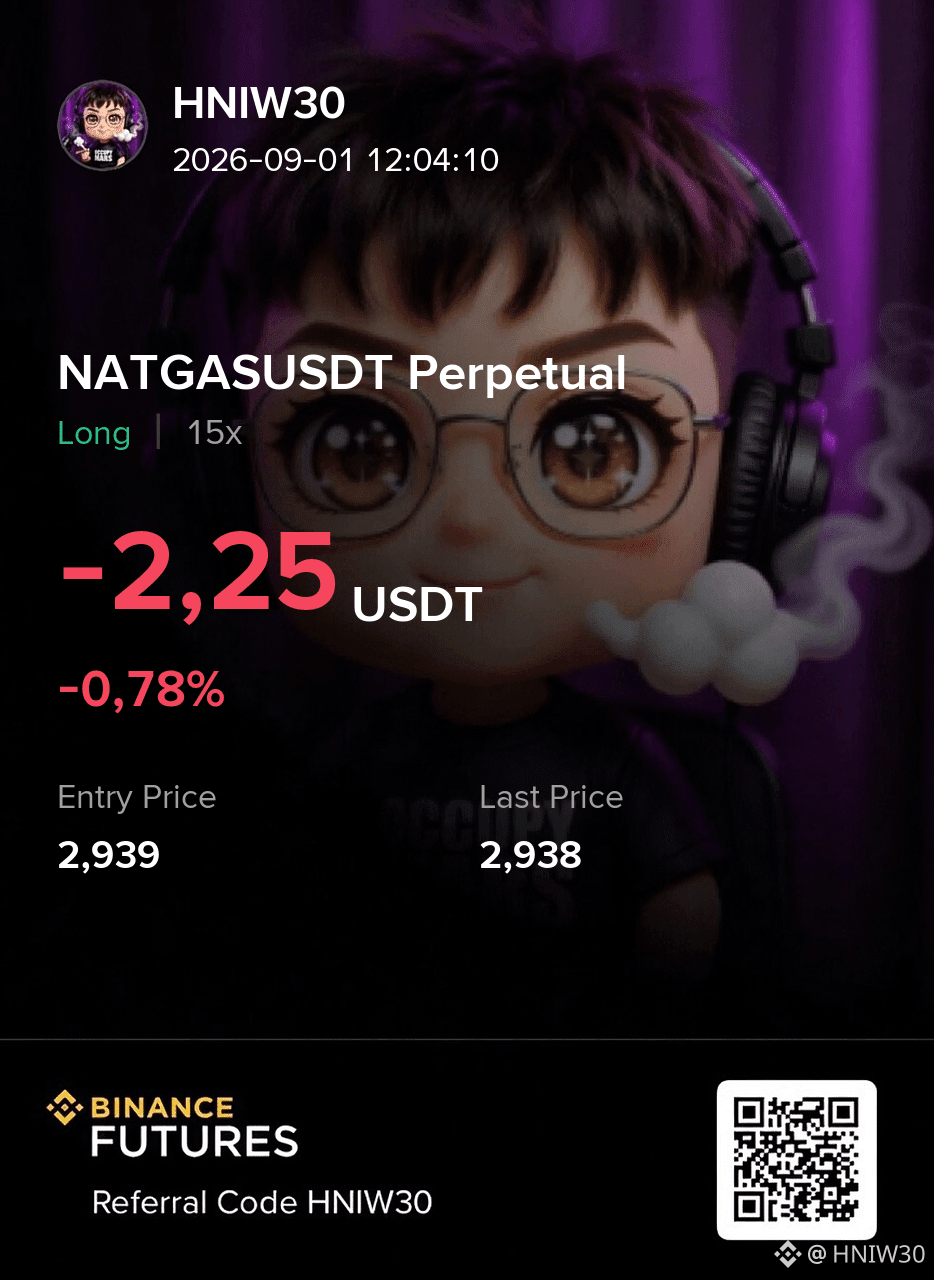
$NATGAS LONG
Entry: 2.938 – 2.939
Stop Loss: 2.880
TP: 2.962 - 3.009 - 3.044
{future}(NATGASUSDT)
$NATGAS – Bullish alignment across daily and higher timeframes
$NATGAS LONG
Entry: 2.938 – 2.939
Stop Loss: 2.880
TP: 2.962 - 3.009 - 3.044
$NATGAS LONG
Entry: 2.938 – 2.939
Stop Loss: 2.880
TP: 2.962 - 3.009 - 3.044
148
·
--
Bullish
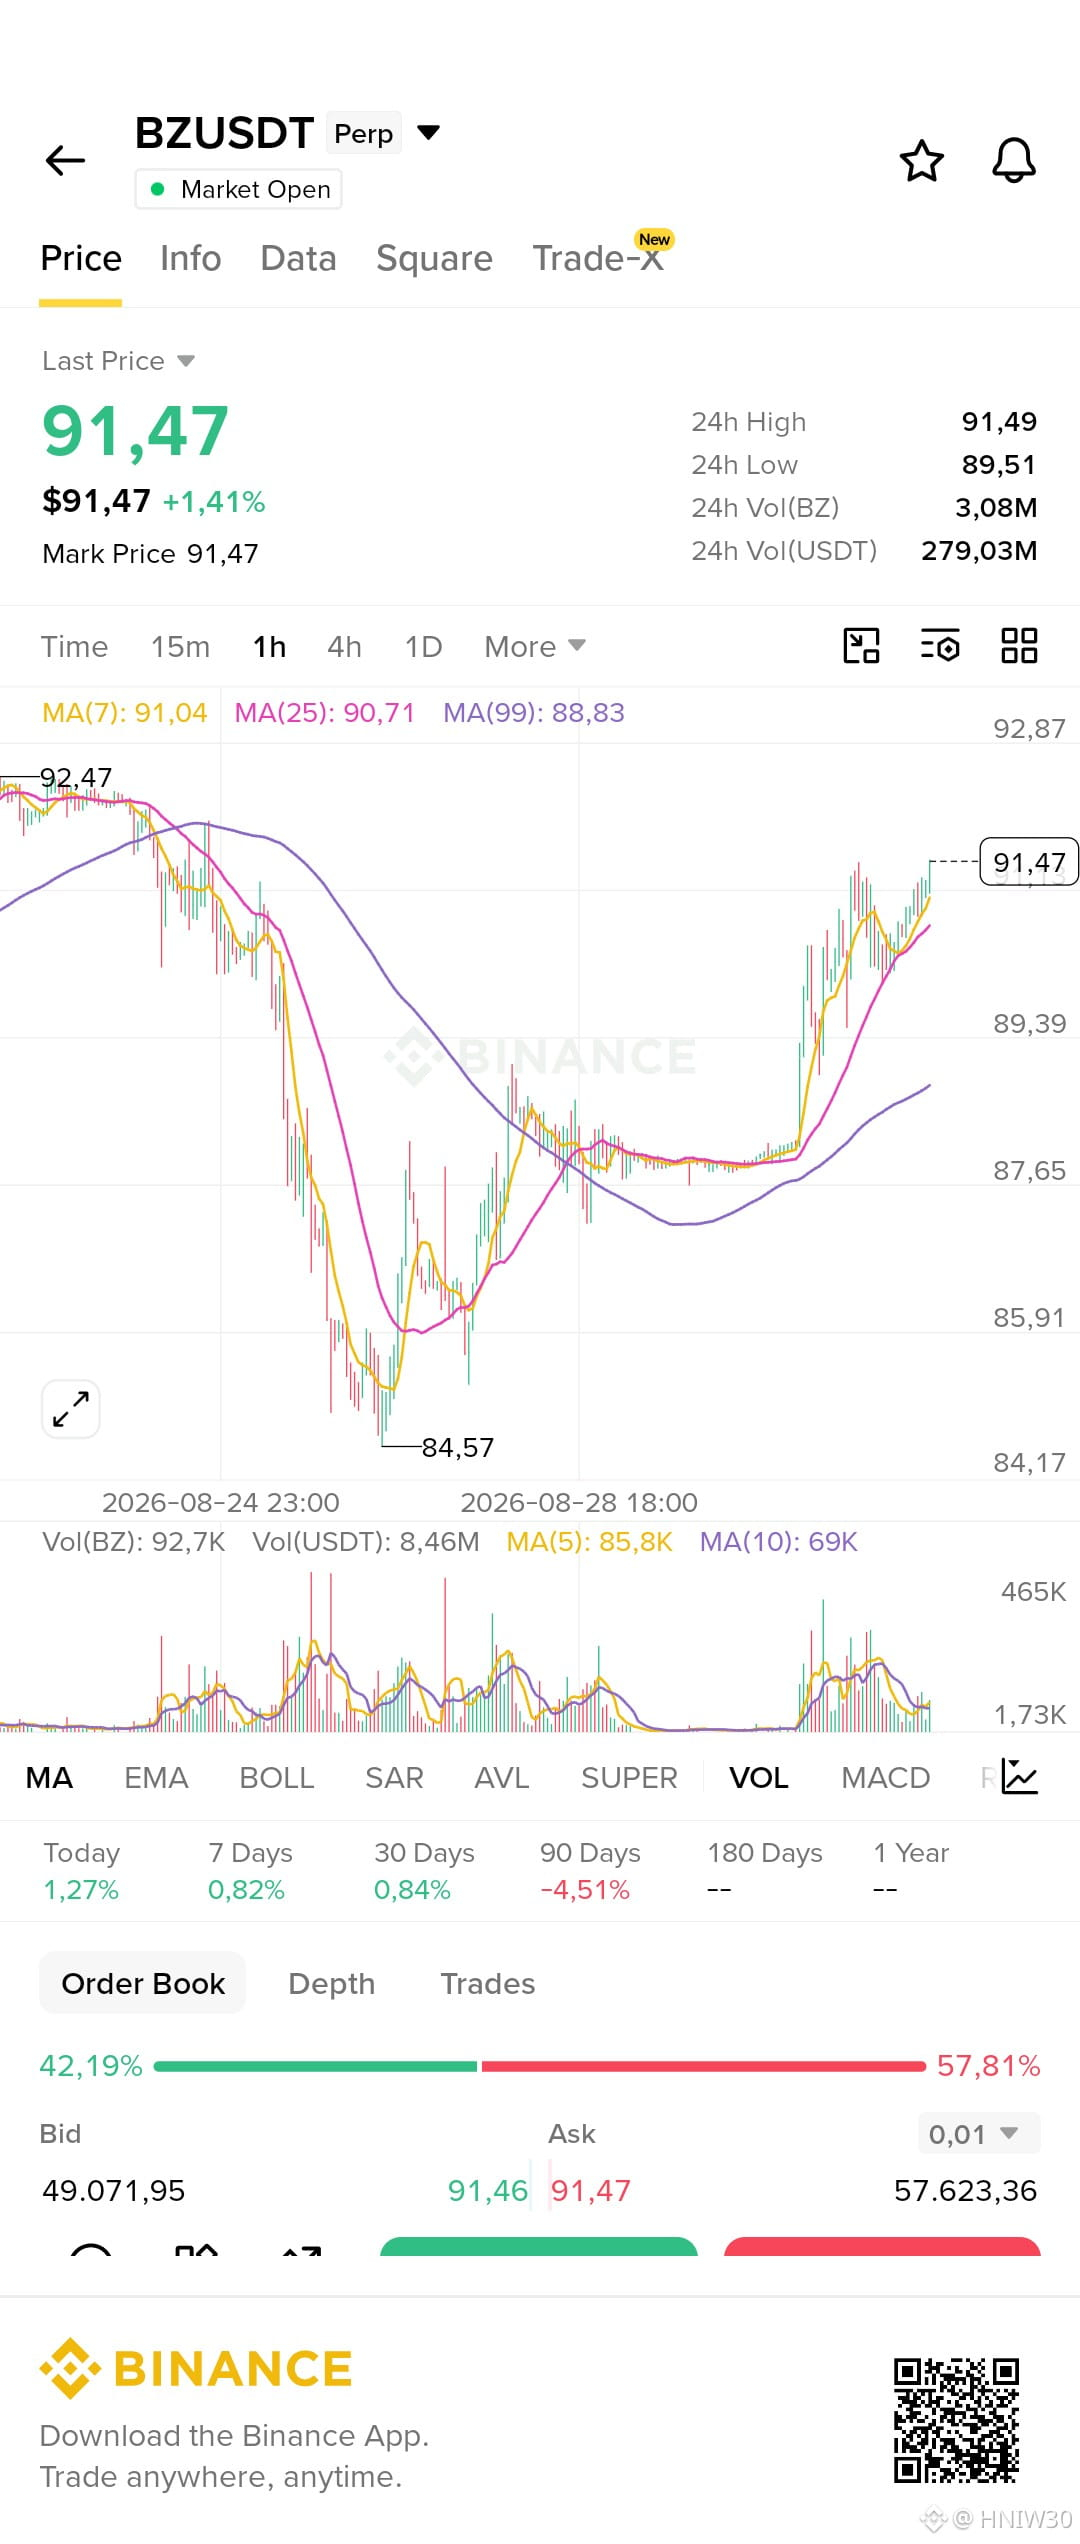
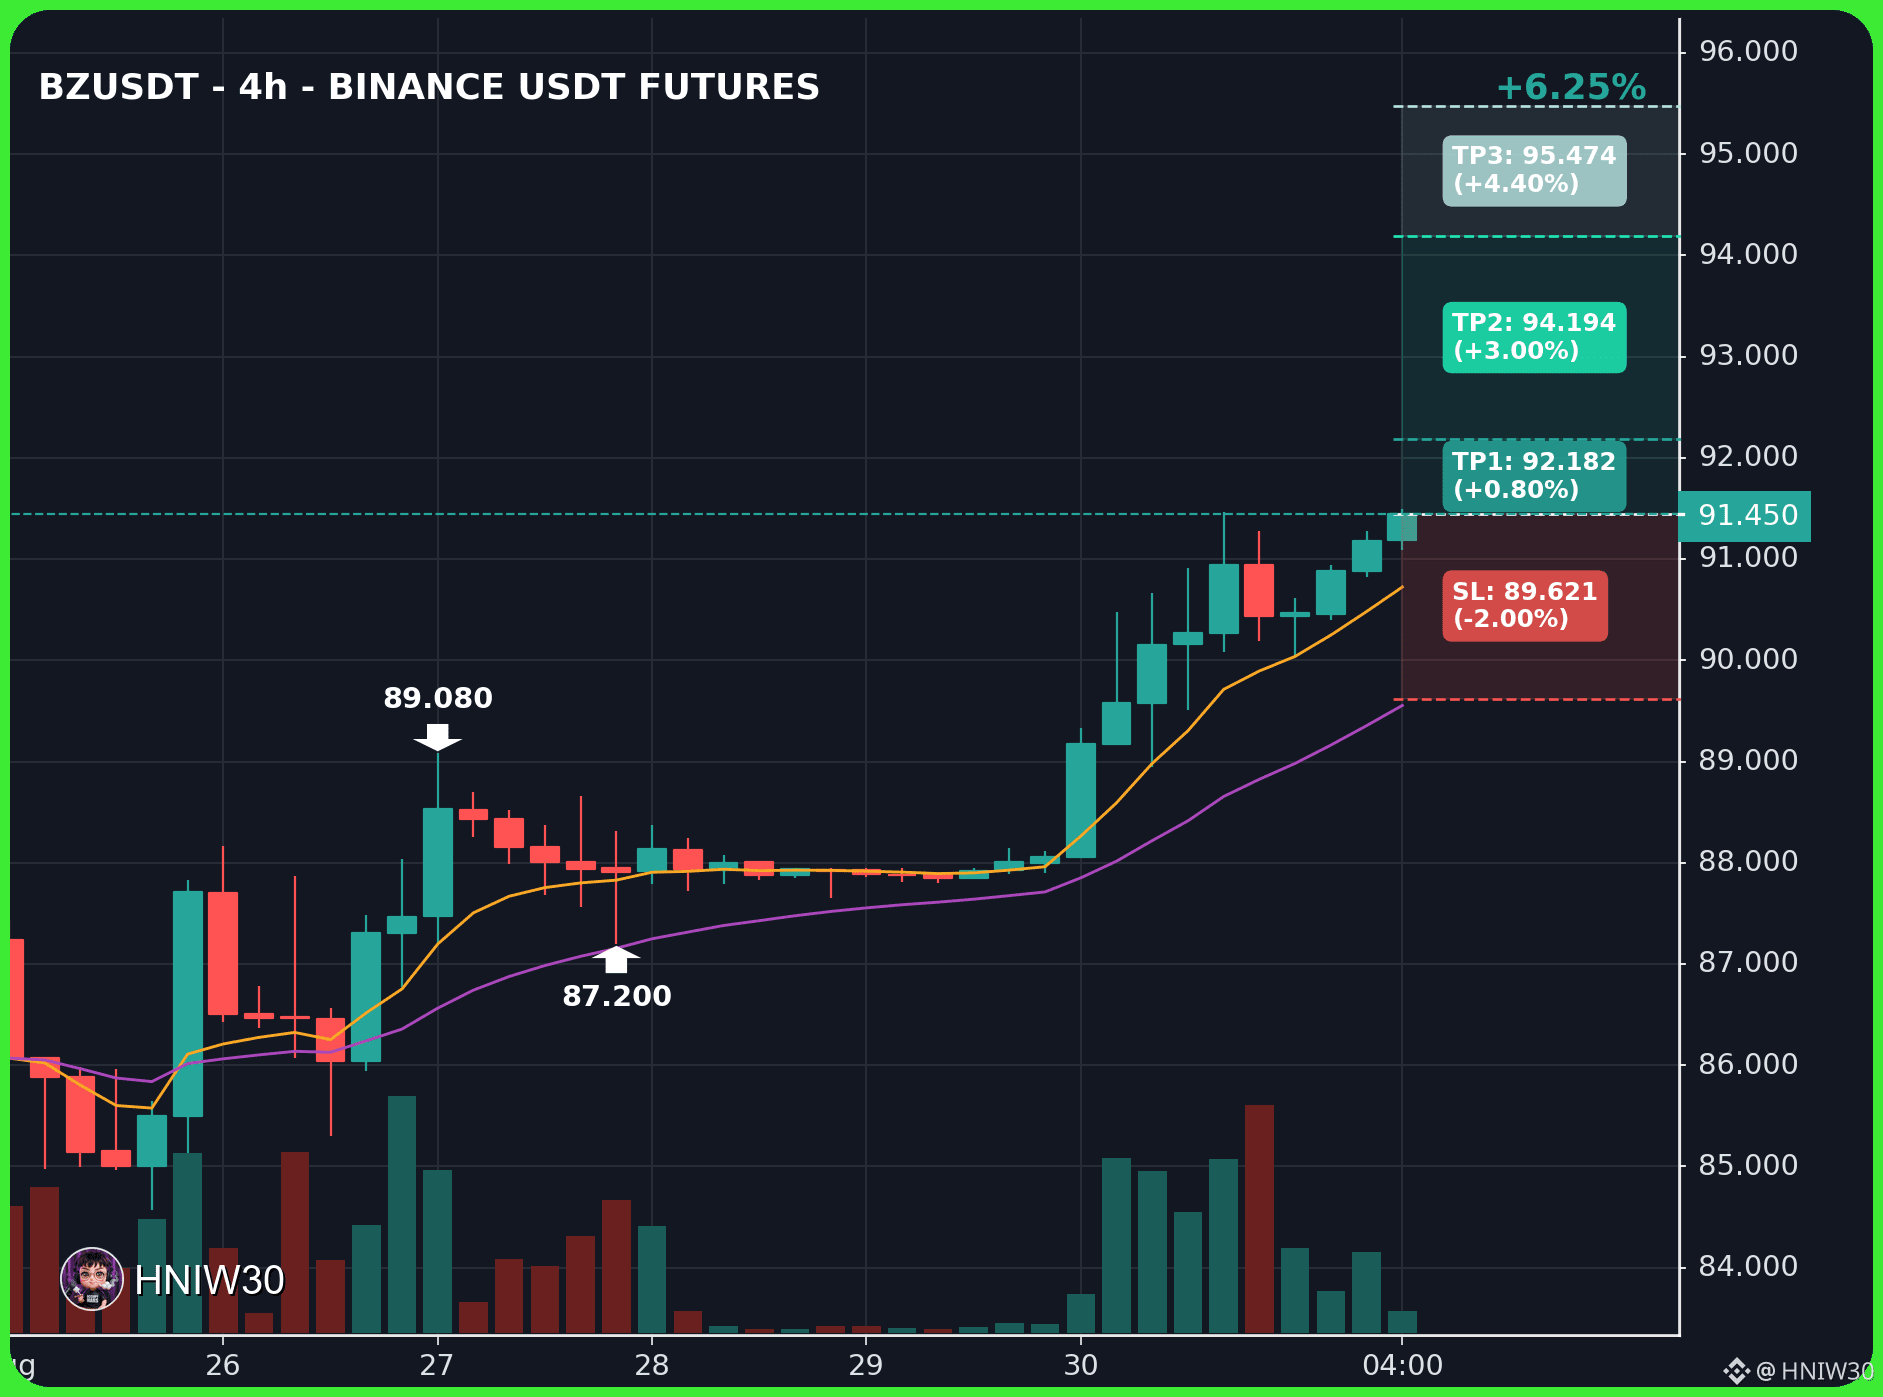
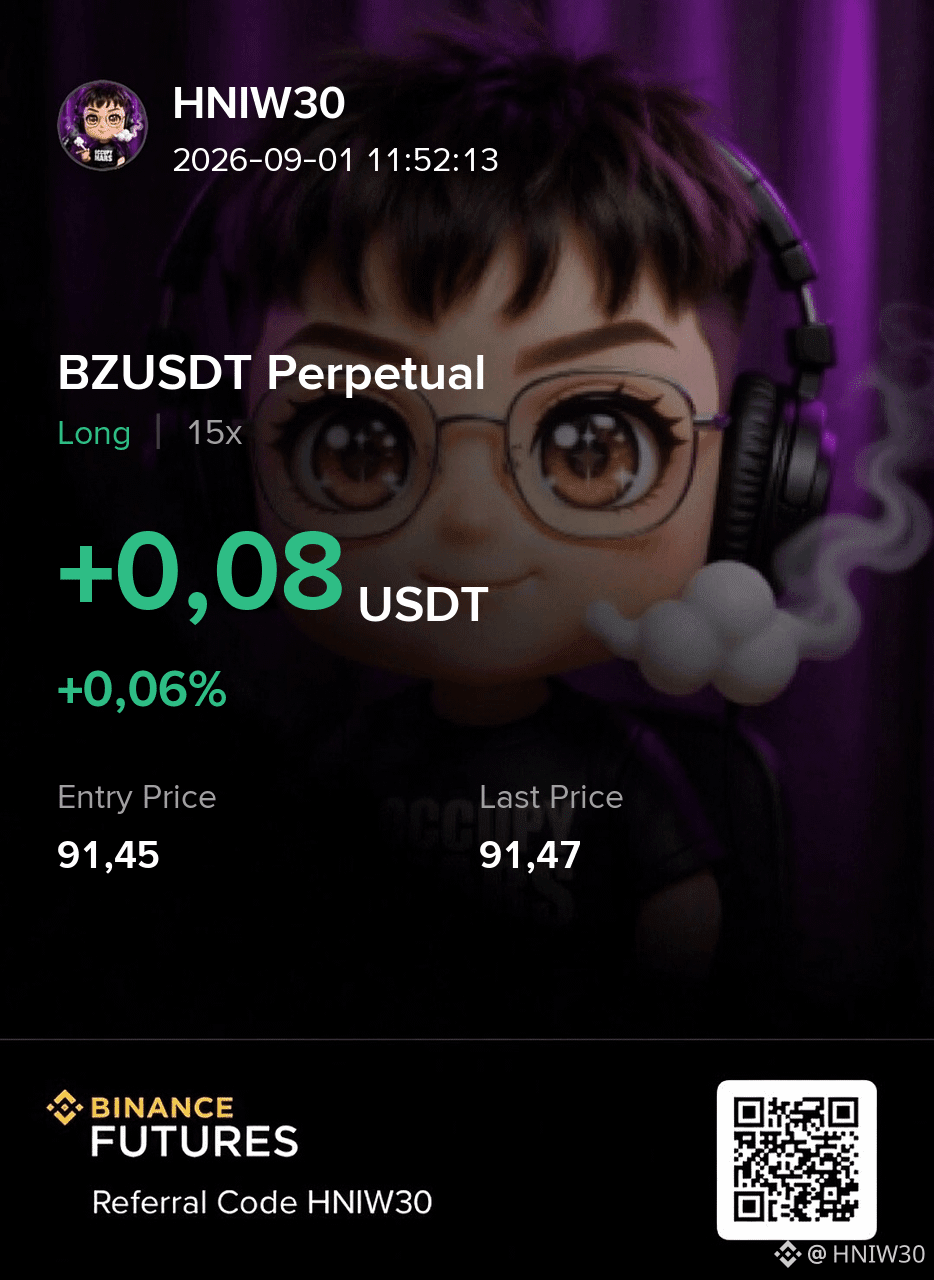
$BZ LONG
Entry: 91.42 – 91.47
Stop Loss: 89.62
TP: 92.18 - 94.19 - 95.47
{future}(BZUSDT)
$BZ LONG
Entry: 91.42 – 91.47
Stop Loss: 89.62
TP: 92.18 - 94.19 - 95.47
Entry: 91.42 – 91.47
Stop Loss: 89.62
TP: 92.18 - 94.19 - 95.47
85
·
--
Bullish
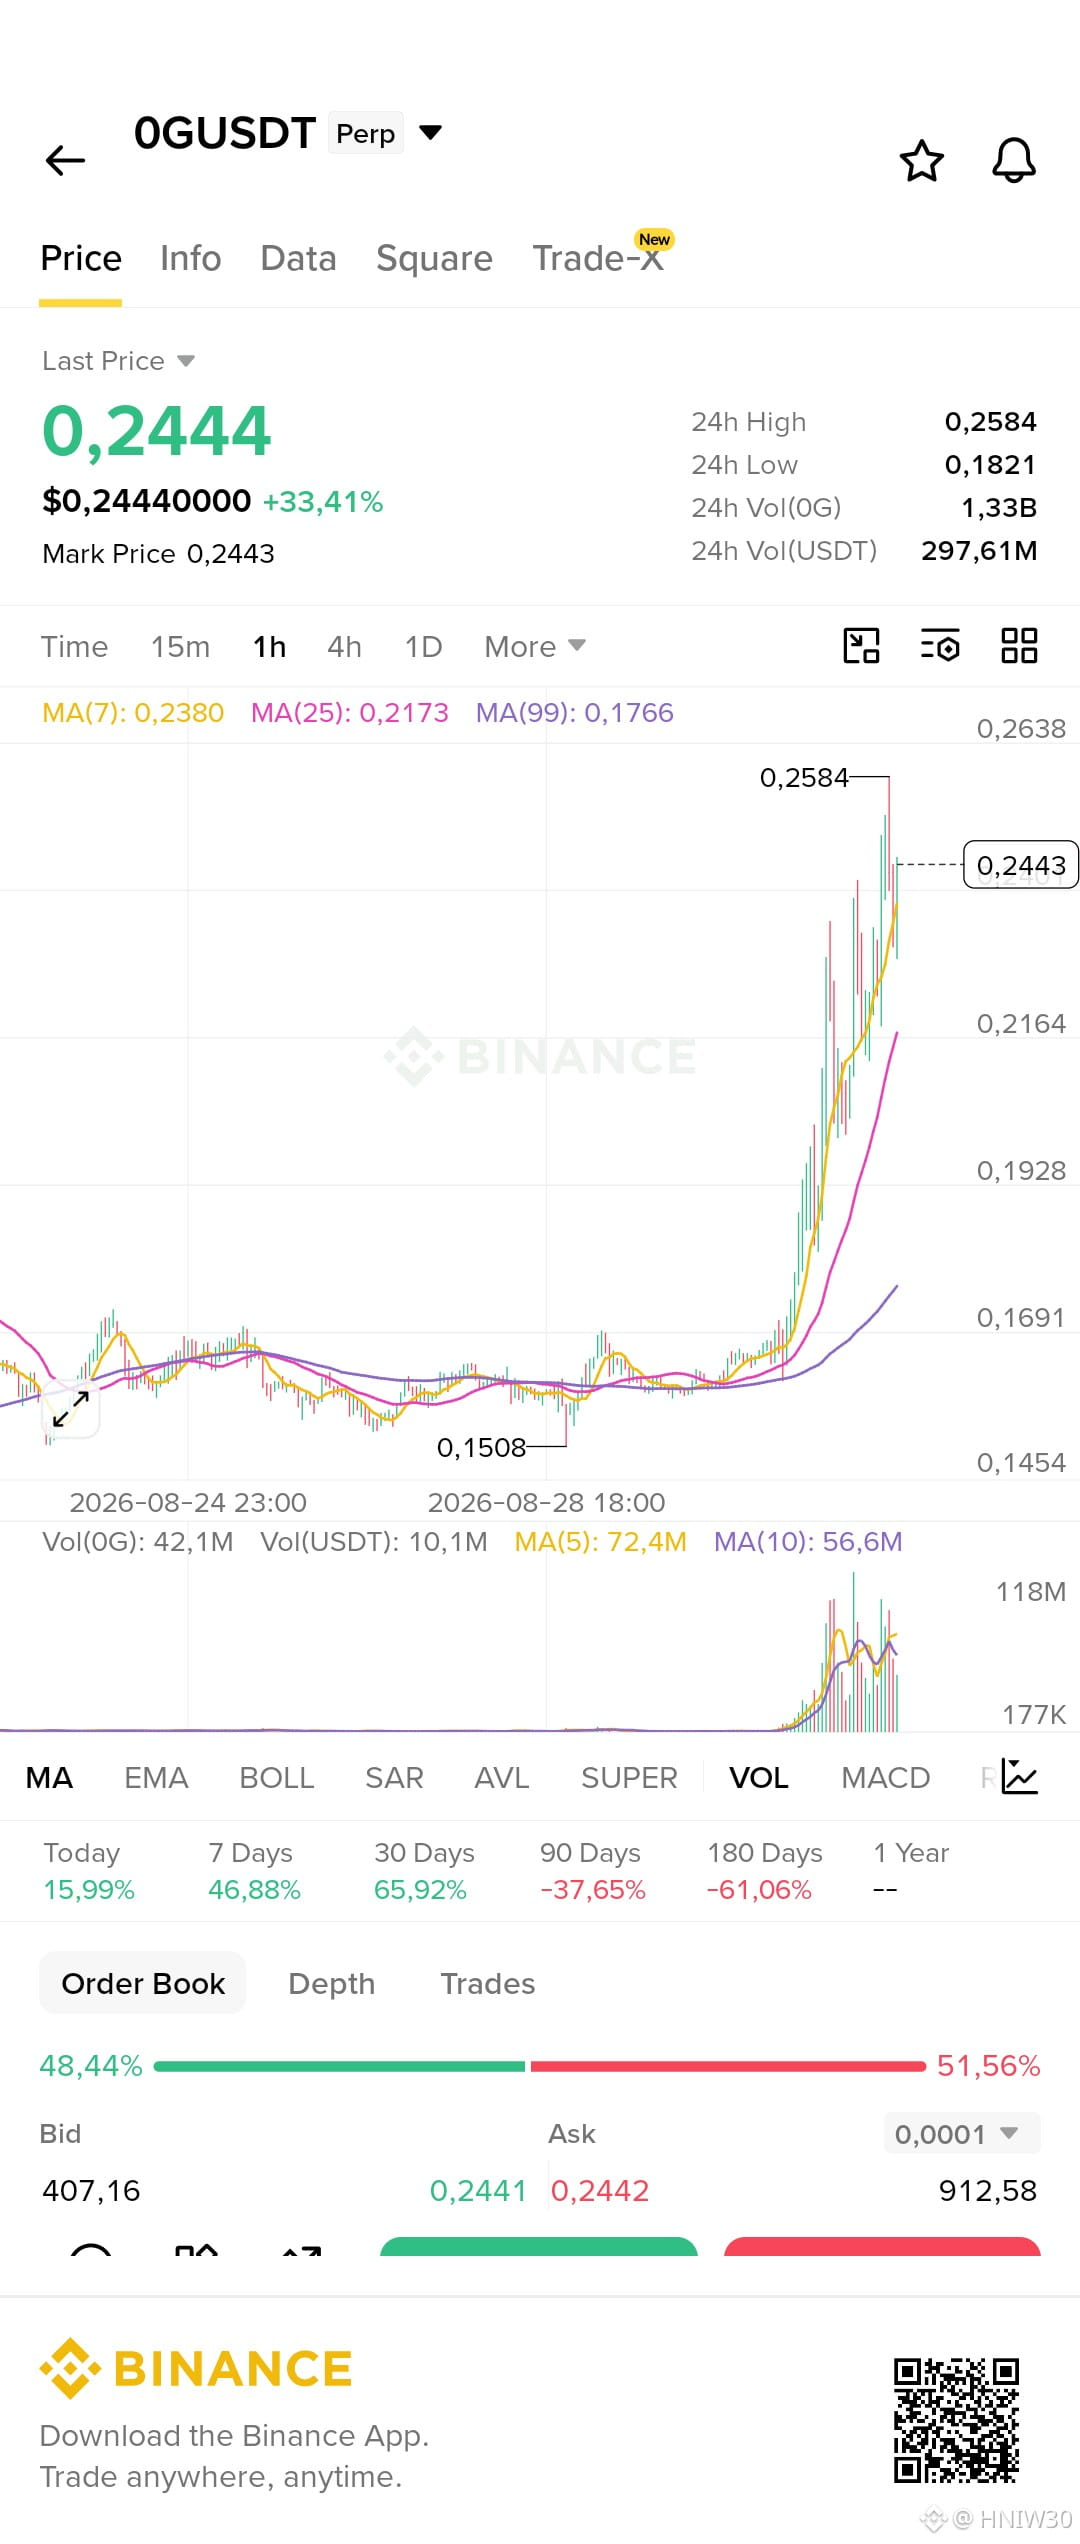
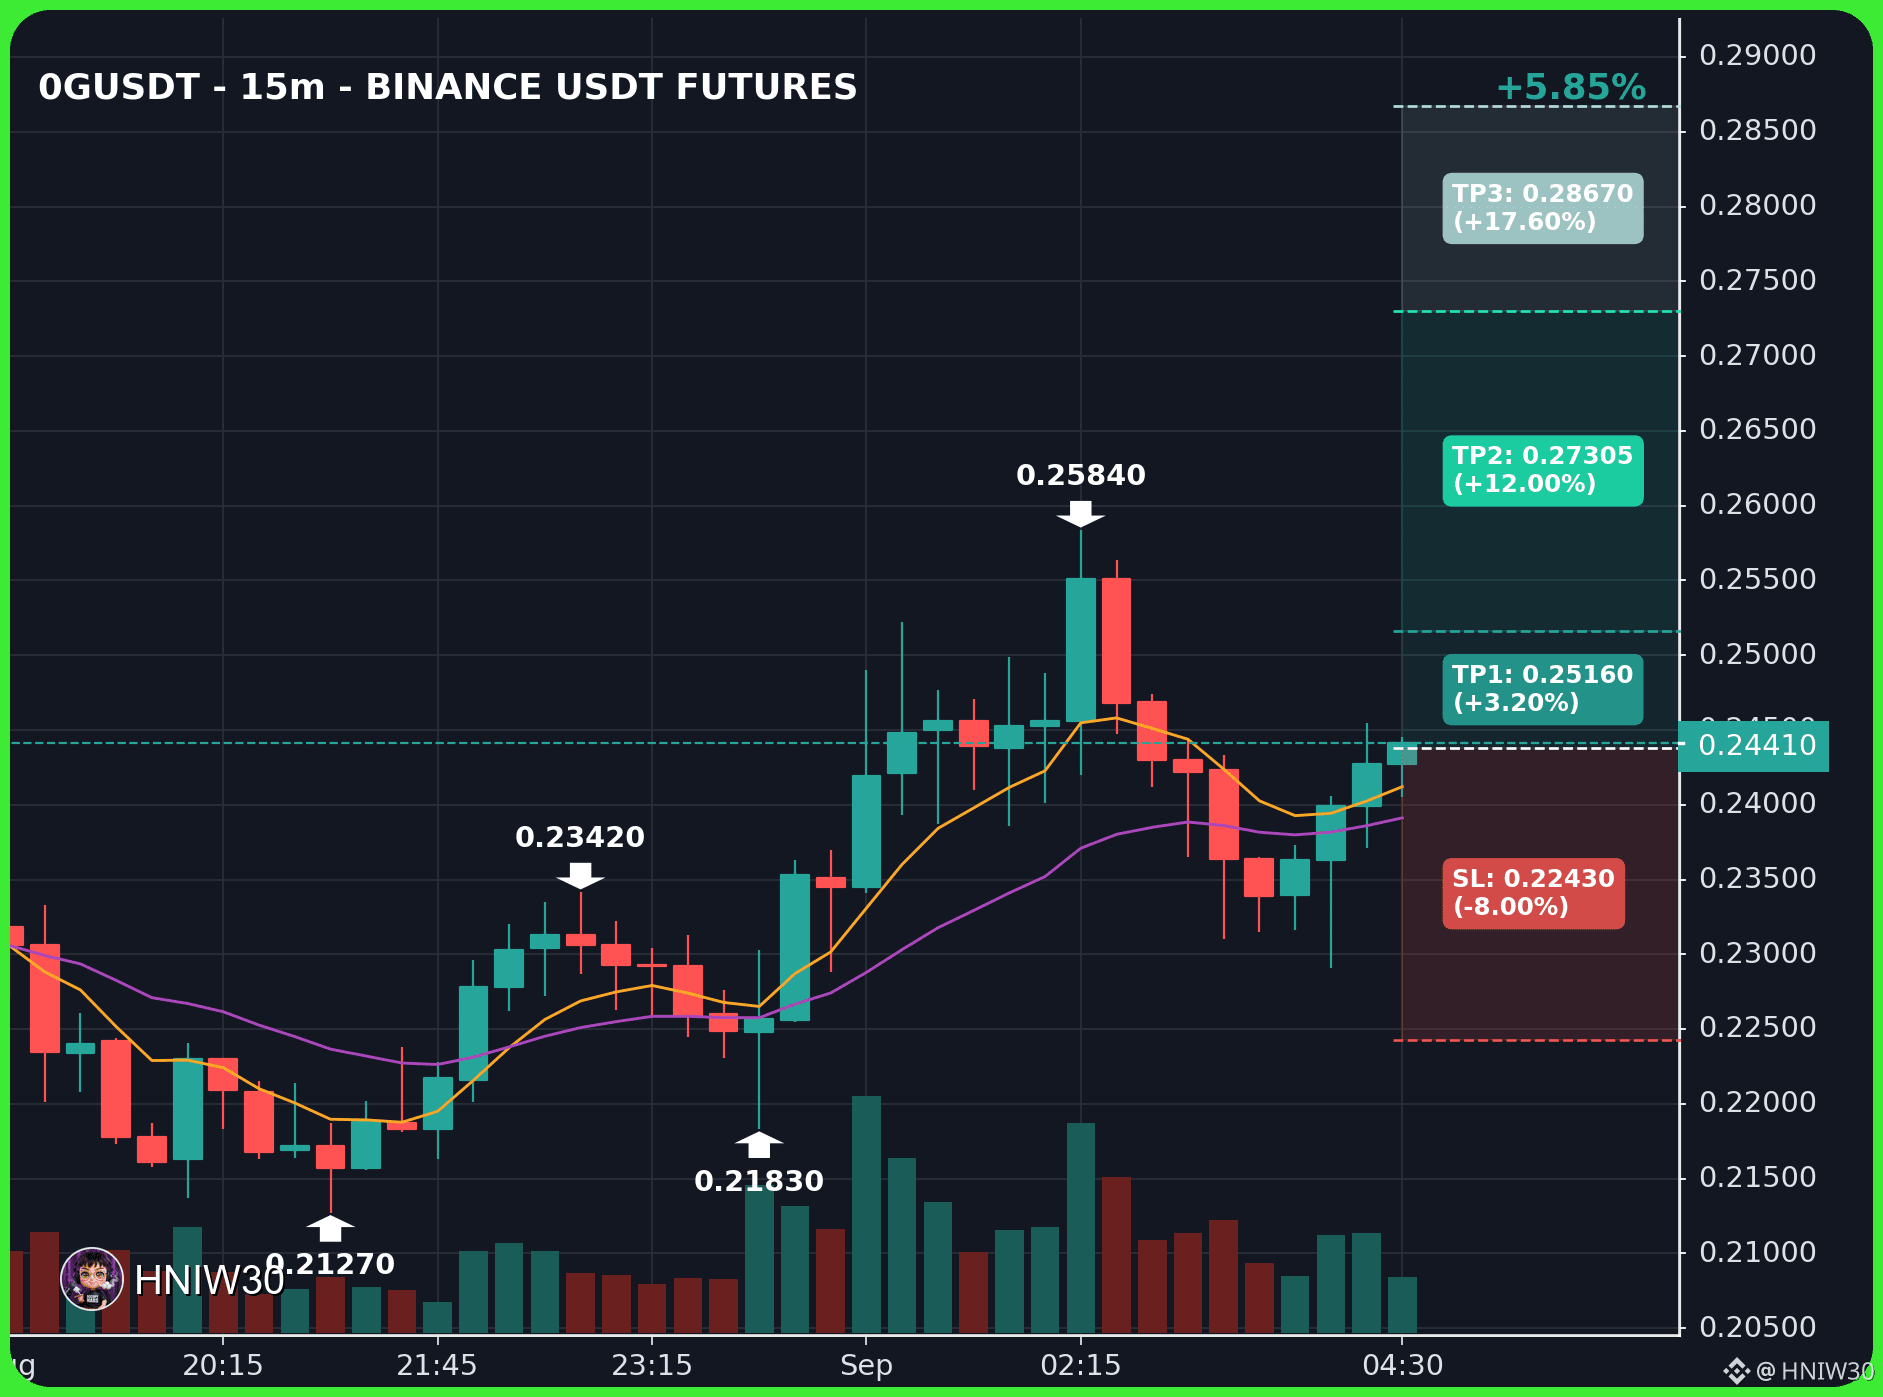
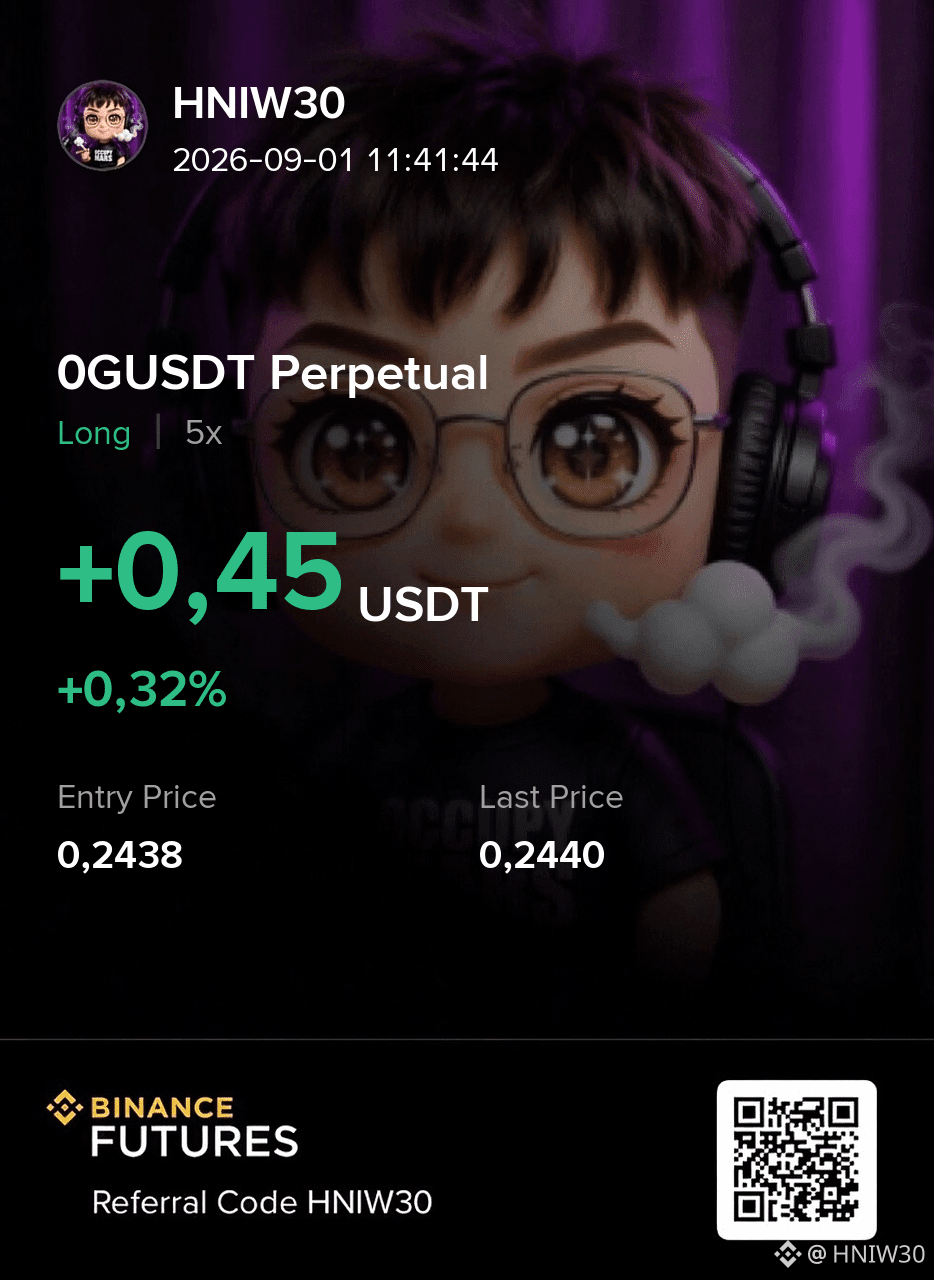
$0G LONG
Entry: 0.2434 – 0.2441
Stop Loss: 0.2243
TP: 0.2516 - 0.2730 - 0.2867
{future}(0GUSDT)
$0G LONG
Entry: 0.2434 – 0.2441
Stop Loss: 0.2243
TP: 0.2516 - 0.2730 - 0.2867
Entry: 0.2434 – 0.2441
Stop Loss: 0.2243
TP: 0.2516 - 0.2730 - 0.2867
140
·
--
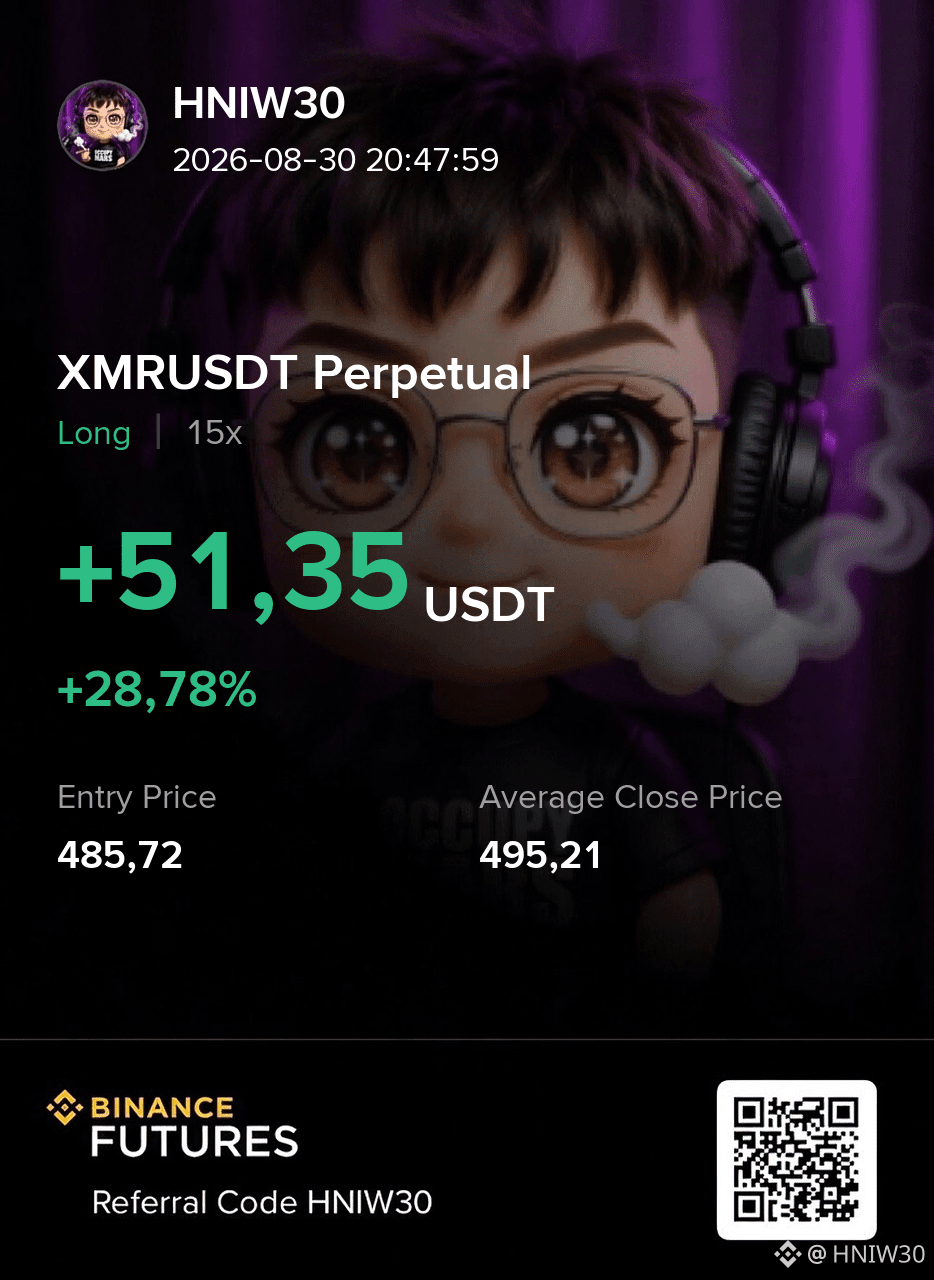
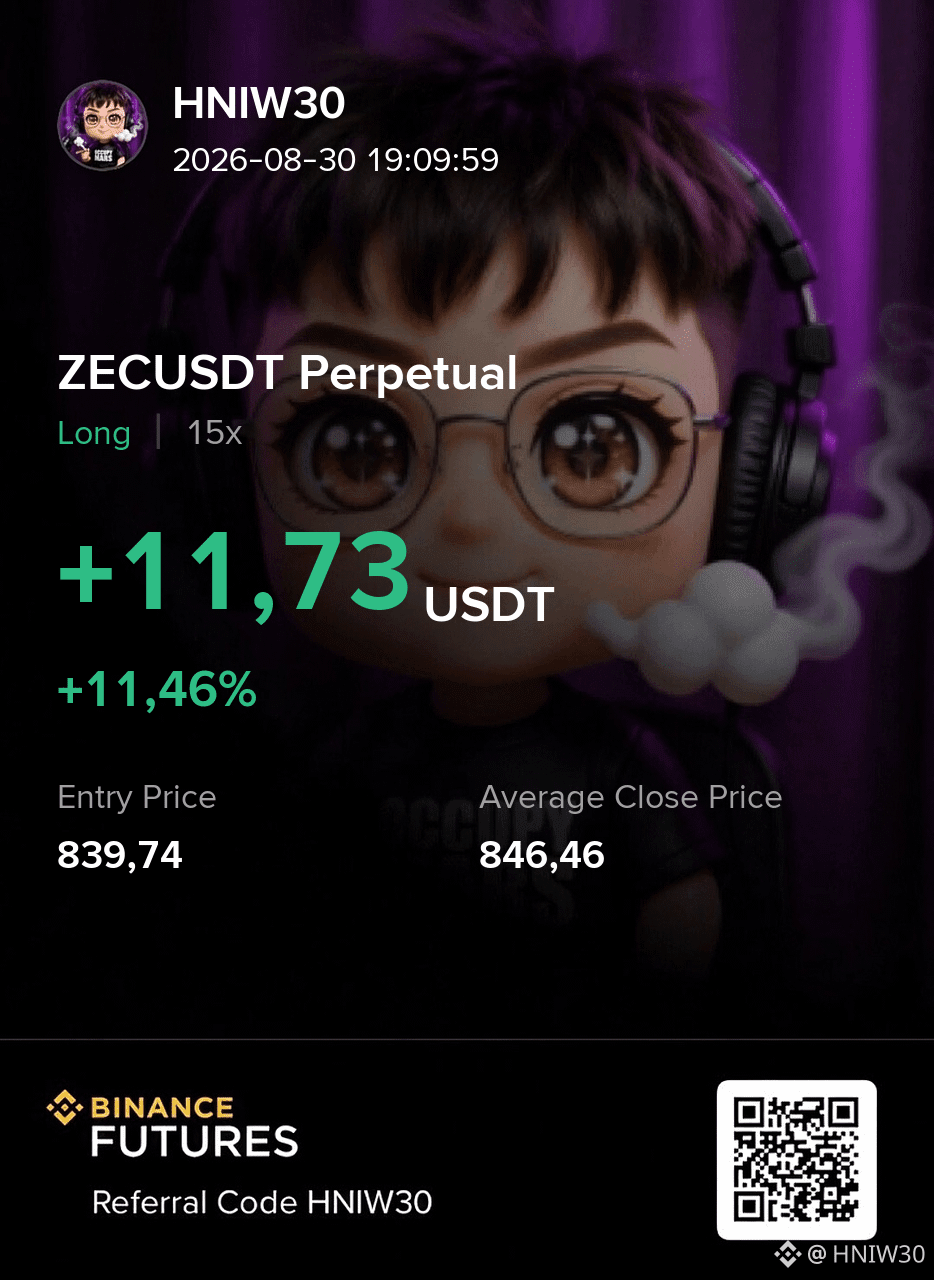
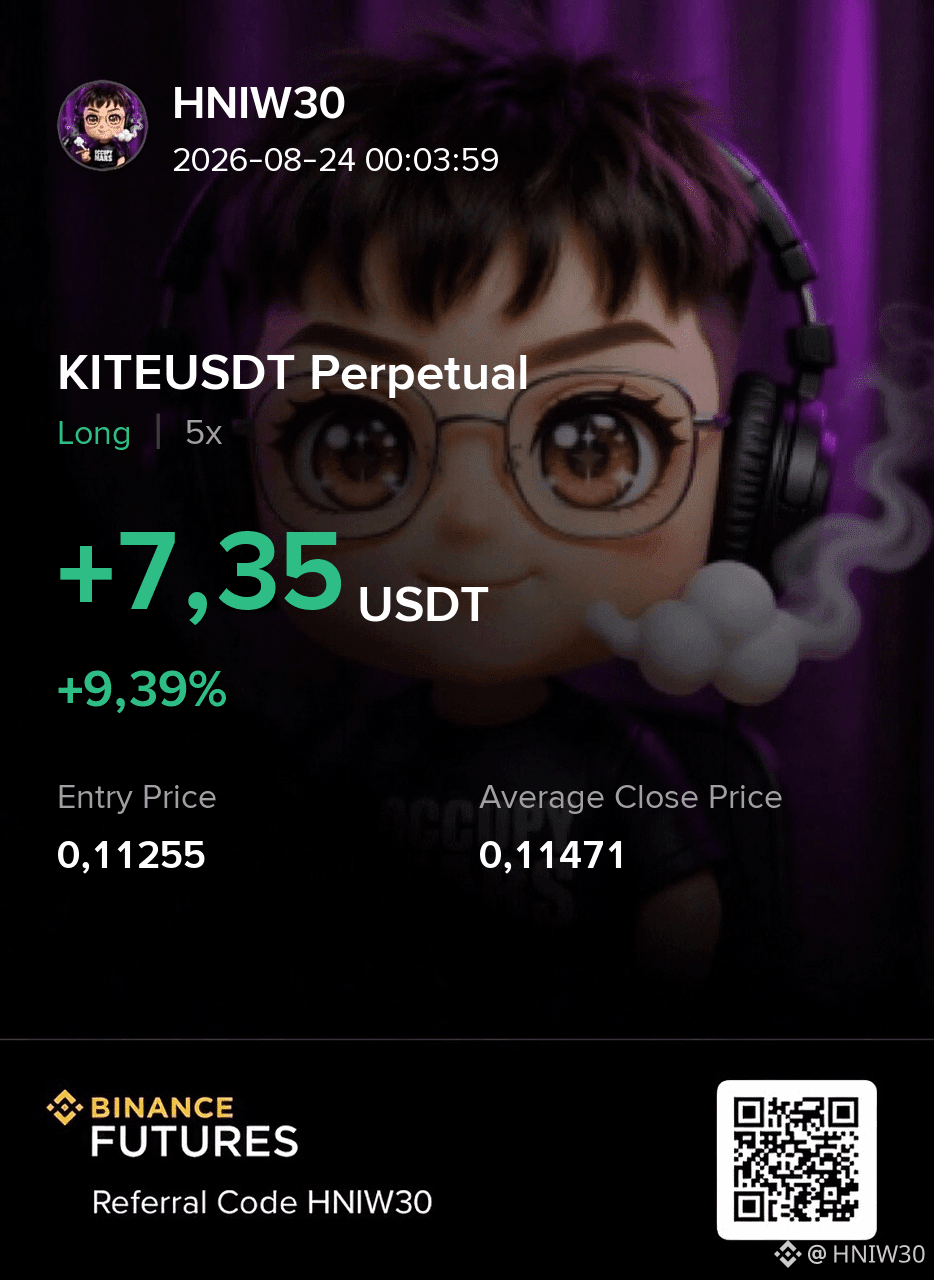
📌 Update on our current trades: $XMR , $ZEC and $KITE are progressing as planned.
🟢XMR LONG reached TP2 — trimmed 80% ✅
🟢ZEC LONG reached TP1 — trimmed 50% ✅
🟢KITE LONG reached TP1 — trimmed 50% ✅
📌 We stick to the plan: when a trade hits its final target we exit fully, removing any lingering exposure.
🎯 XMR hit TP3, so we closed 100% – a clean, disciplined finish.
🛡️ ZEC and KITE reached TP1; we took half profit and left the rest to run, trimming risk while still letting the move breathe.
This shows we manage positions after entry, not just post entry signals.
{future}(KITEUSDT)
{future}(ZECUSDT)
{future}(XMRUSDT)
📌 Update on our current trades: $XMR , $ZEC and $KITE are progressing as planned.
🟢XMR LONG reached TP2 — trimmed 80% ✅
🟢ZEC LONG reached TP1 — trimmed 50% ✅
🟢KITE LONG reached TP1 — trimmed 50% ✅
📌 We stick to the plan: when a trade hits its final target we exit fully, removing any lingering exposure.
🎯 XMR hit TP3, so we closed 100% – a clean, disciplined finish.
🛡️ ZEC and KITE reached TP1; we took half profit and left the rest to run, trimming risk while still letting the move breathe.
This shows we manage positions after entry, not just post entry signals.
🟢XMR LONG reached TP2 — trimmed 80% ✅
🟢ZEC LONG reached TP1 — trimmed 50% ✅
🟢KITE LONG reached TP1 — trimmed 50% ✅
📌 We stick to the plan: when a trade hits its final target we exit fully, removing any lingering exposure.
🎯 XMR hit TP3, so we closed 100% – a clean, disciplined finish.
🛡️ ZEC and KITE reached TP1; we took half profit and left the rest to run, trimming risk while still letting the move breathe.
This shows we manage positions after entry, not just post entry signals.
HNIW30
·
--
Bullish🚀 $XMR – Early uptrend gaining momentum
🟢 $XMR LONG
🎯 Entry: 485.03 – 486.41
🛑 Stop Loss: 473.88
🎯 TP: 490.26 - 503.48 - 511.77
🧠 Plan & Logic
The 15‑minute and 5‑minute charts both show a clear upward bias, confirming the early‑trend regime. Price action is reacting near an important level, so risk management matters here. The setup depends on confirmation around the entry zone and follow-through after the move.
Trade $XMR here 👇 🚀 📊
🟢 $XMR LONG
🎯 Entry: 485.03 – 486.41
🛑 Stop Loss: 473.88
🎯 TP: 490.26 - 503.48 - 511.77
🧠 Plan & Logic
The 15‑minute and 5‑minute charts both show a clear upward bias, confirming the early‑trend regime. Price action is reacting near an important level, so risk management matters here. The setup depends on confirmation around the entry zone and follow-through after the move.
Trade $XMR here 👇 🚀 📊
1
193
·
--
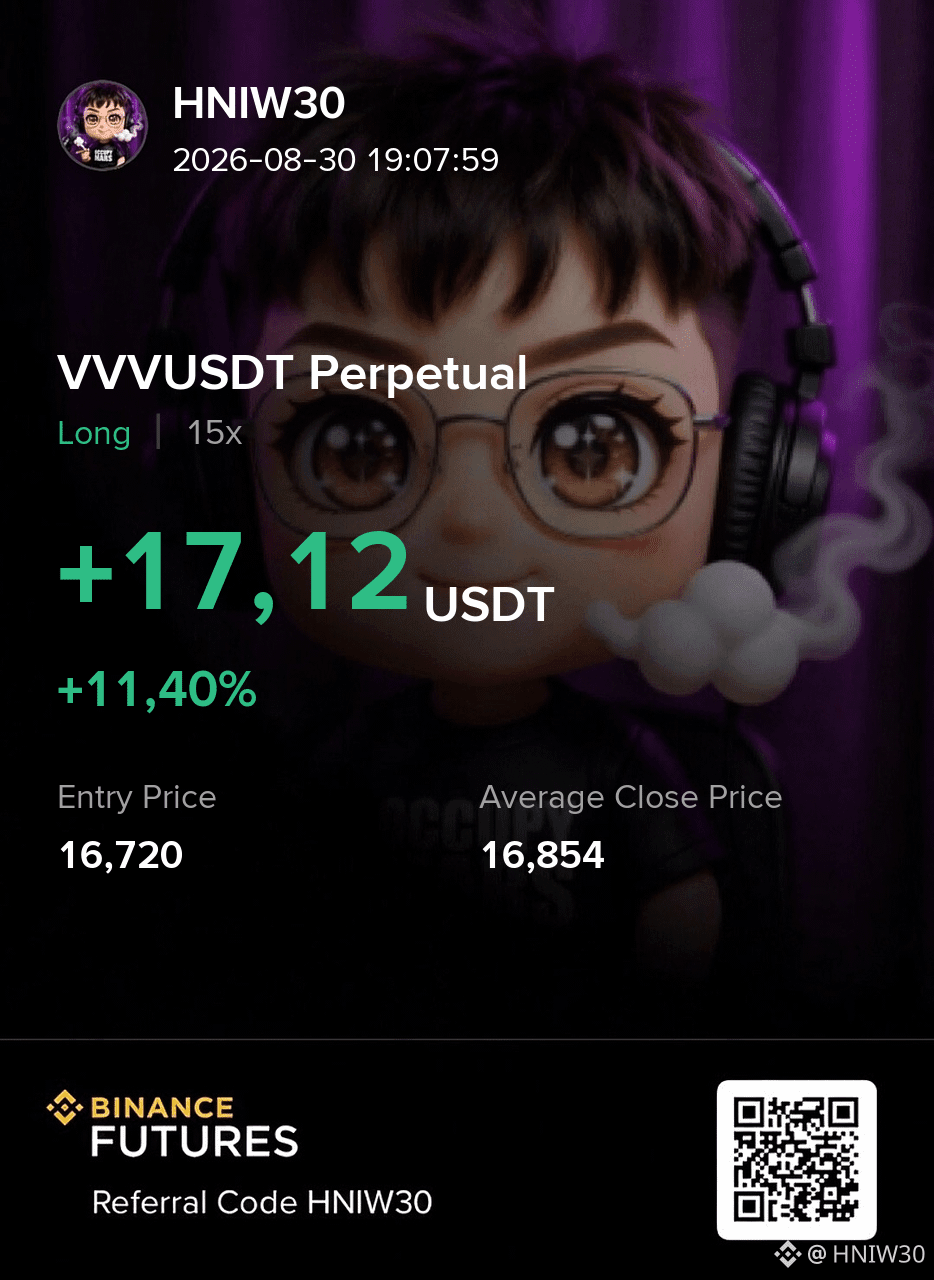
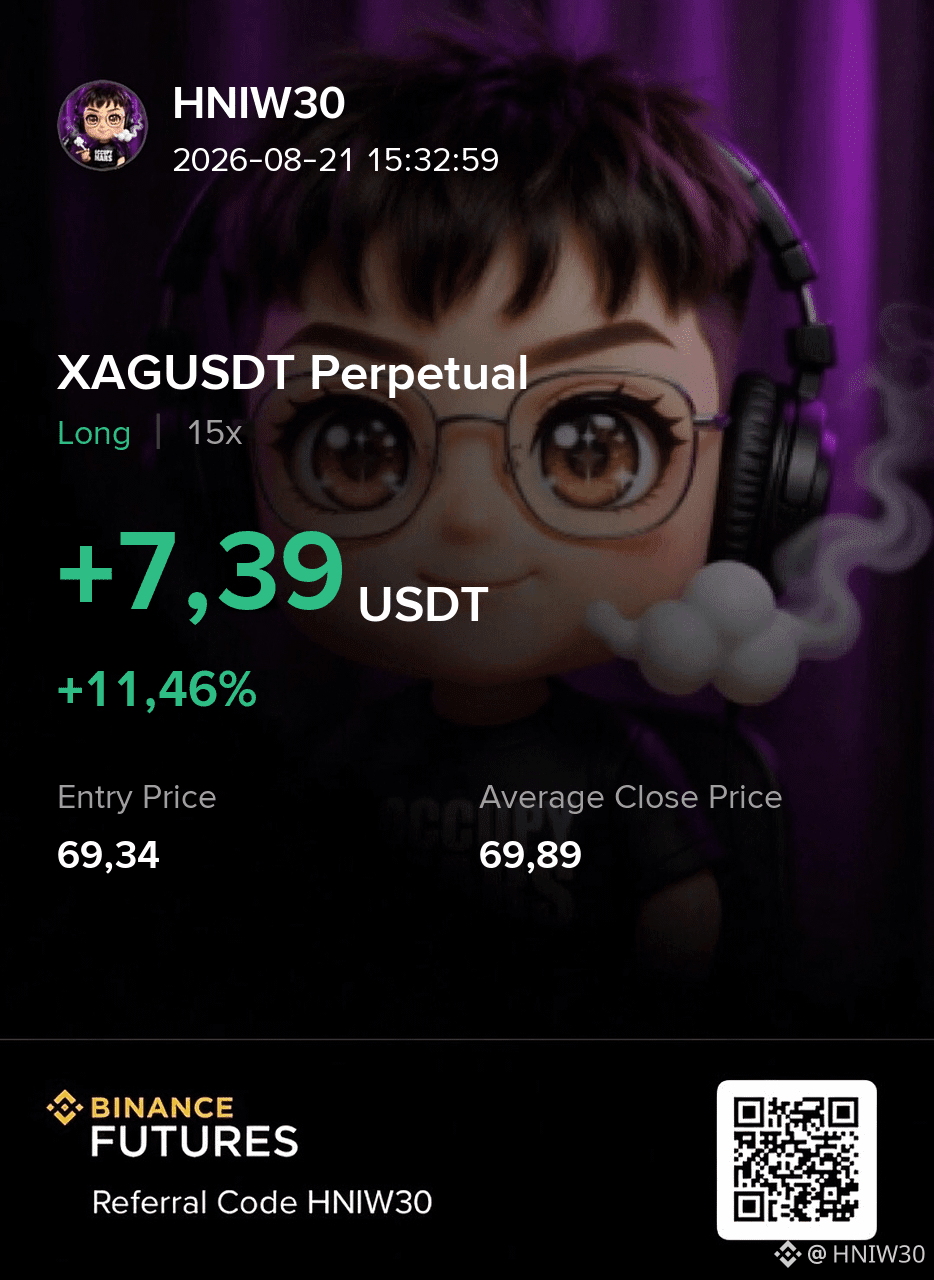
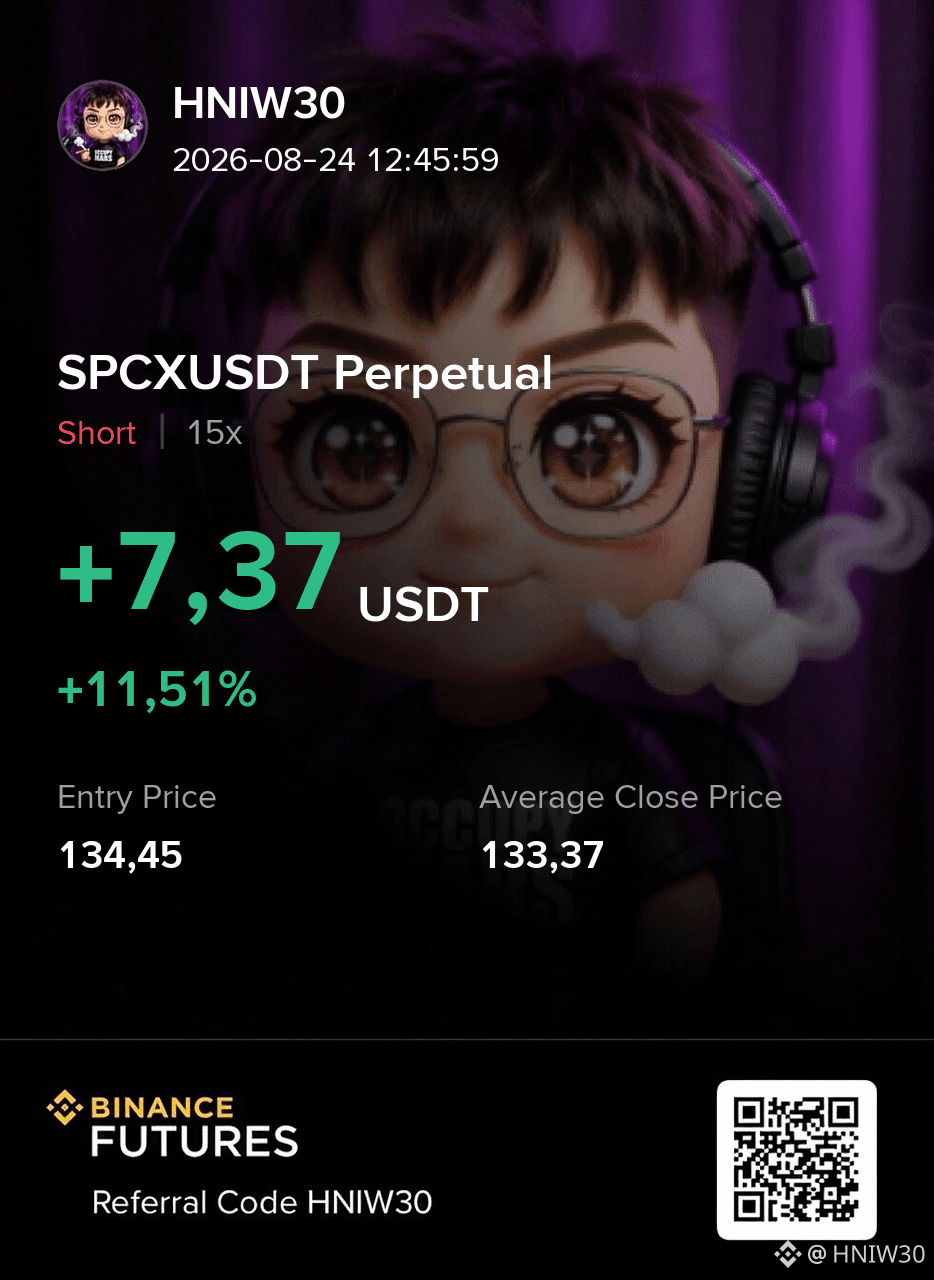
📌 Update on our current trades: $VVV , $XAG and $SPCX are progressing as planned.
🟢VVV LONG reached TP1 — trimmed 50% ✅
🟢XAG LONG reached TP1 — trimmed 50% ✅
🔴SPCX SHORT reached TP1 — trimmed 50% ✅
📌 Trade‑management update:
✅ Positions that hit TP3 were taken off the table entirely – a clean exit that locks in the full upside we planned.
🛡️ For the trades that only reached TP2 we trimmed half of the stake, securing profit while keeping a smaller exposure for any further move.
This disciplined approach shows we’re actively managing risk, not just posting entry signals, and ensures the portfolio stays protected as the market evolves.
{future}(SPCXUSDT)
{future}(XAGUSDT)
{future}(VVVUSDT)
📌 Update on our current trades: $VVV , $XAG and $SPCX are progressing as planned.
🟢VVV LONG reached TP1 — trimmed 50% ✅
🟢XAG LONG reached TP1 — trimmed 50% ✅
🔴SPCX SHORT reached TP1 — trimmed 50% ✅
📌 Trade‑management update:
✅ Positions that hit TP3 were taken off the table entirely – a clean exit that locks in the full upside we planned.
🛡️ For the trades that only reached TP2 we trimmed half of the stake, securing profit while keeping a smaller exposure for any further move.
This disciplined approach shows we’re actively managing risk, not just posting entry signals, and ensures the portfolio stays protected as the market evolves.
🟢VVV LONG reached TP1 — trimmed 50% ✅
🟢XAG LONG reached TP1 — trimmed 50% ✅
🔴SPCX SHORT reached TP1 — trimmed 50% ✅
📌 Trade‑management update:
✅ Positions that hit TP3 were taken off the table entirely – a clean exit that locks in the full upside we planned.
🛡️ For the trades that only reached TP2 we trimmed half of the stake, securing profit while keeping a smaller exposure for any further move.
This disciplined approach shows we’re actively managing risk, not just posting entry signals, and ensures the portfolio stays protected as the market evolves.
HNIW30
·
--
Bullish$VVV LONG
Entry: 16.706 – 16.734
Stop Loss: 16.386
TP: 16.854 - 17.221 - 17.455
Entry: 16.706 – 16.734
Stop Loss: 16.386
TP: 16.854 - 17.221 - 17.455
81
Log in to explore more content
Join global crypto users on Binance Square
⚡️ Get latest and useful information about crypto.
💬 Trusted by the world’s largest crypto exchange.
👍 Discover real insights from verified creators.
Email / Phone number
Trending Topics
BinanceLaunchesBinanceIntelligence
825,712 views
5,131 Discussing
🚀 BINANCE IS PUSHING AI DEEPER INTO FINANCE
Binance Intelligence brings together three products aimed at different users — everyday traders, advanced users and developers.
For traders, the interesting part is simple:
More data → better analysis → faster decisions.
Now the real question:
Can AI actually give retail traders an edge? 👀
$BNB $BTC $ETH
#binancelaunchesbinanceintelligence
CryptoMahibaloch
·0 Likes
·130 views
RobinhoodAdds$25MInBitcoinToBalanceSheet
0 views
0 Discussing
SP500AndNasdaqHitRecordHighs
0 views
19 Discussing